What is NoviSign Digital Signage?
Broadcast and Manage an Interactive Experience
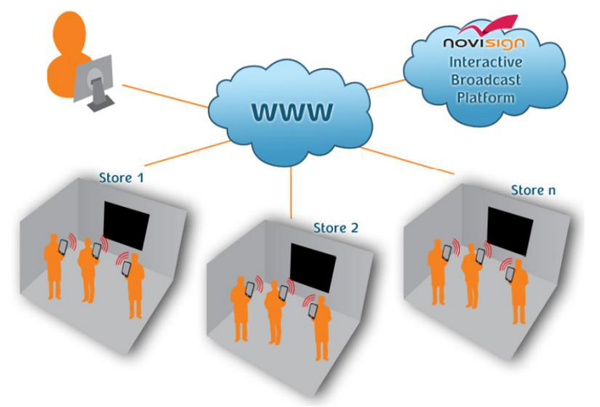
Easy to set up and simple to manage, the Android-based NoviSign digital signage enables you to broadcast to your local region or worldwide, while controlling content and timing. Use the multi-purpose Editor to quickly and easily create your own campaigns.
Entering the Site
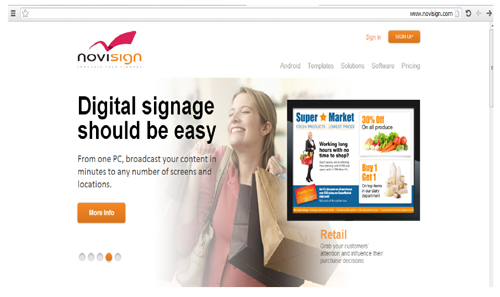 1. Click SIGNUP.
Signing into the Site (New Member)
 1. Enter your email in the User Name, for example,
MYNAME123@gmail.com.
Note: The password has eight (8) characters. These must be letters or numbers.2. Add first name, last name, and company name (optional).
Signing in (Members)
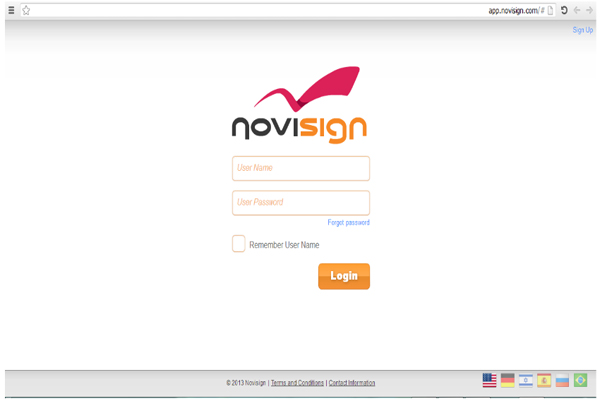 1. Enter your email in the User Name, for example,
MYNAME123@gmail.com.
Note: The password has eight (8) characters.
The Opening Screen
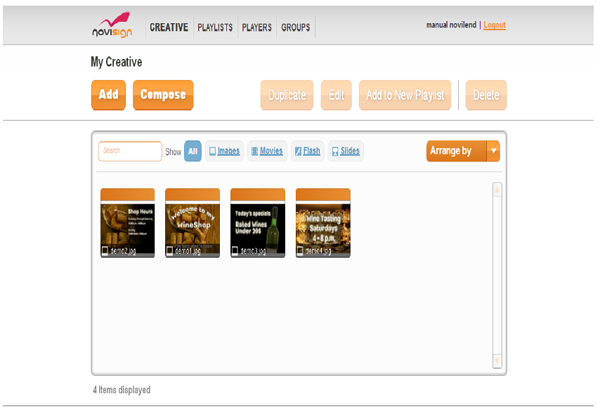 NoviSign Studio opens to the CREATIVE screen.
At the top of the screen is a gray bar with the four central fields of the application:
1. Creative
Creative = media
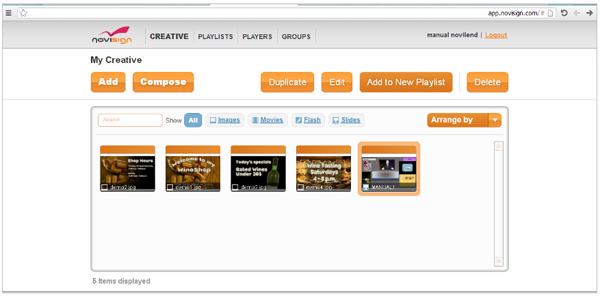
The Creative screen displays images, movies, flash media, and presentations ready to be displayed, slides that have been created or edited and saved.
You create and edit presentations for campaigns through the Creative screen, which opens to the Editor.
2. Playlists
The PLAYLISTS are groupings of media files that you have chosen to broadcast, arranged and ordered into lists.
3. Players
The Players window is your personal display screen after you have loaded the Playlist to it.
4. Groups
These are Groups of your players and screen displays that you have brought together under the same theme.
Immediately below the gray bar is the specific name of this screen: My Creative.
Underneath the name are six orange icons. Four, which relate to the content of the center screen (outlined in gray), are disabled when the screen opens. The two active buttons are Add and Compose.
- Add
- a. Click this button to add already prepared media. Select one of the options marked
 and underlined in blue: Images, Movies, Flash, Slides, or
- a. Click this button to add already prepared media. Select one of the options marked
</ul class=”guide-list” >
- Compose:
- a. Click this button to create new slides.
The center screen (outlined in gray) is the repository of your slides and media, not yet assigned to a list or a possible player.
Selecting any of the slides in the center area activates the disabled orange buttons and enables you to:
- Duplicate
Duplicate a slide or a group of slides - Edit
Edit a single slide (group of slides?) - Add to New Playlist
Create a new playlist of the selected slide(s). - Delete
Delete the slide or group of slides.
To the left, above the slide icons is a Search box that enables you to search for any file that has been uploaded for broadcasting.
Adding Media
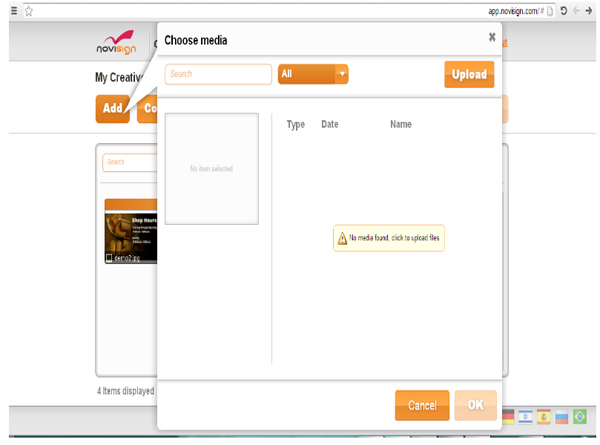 When you click ADD, the Choose media screen opens.
1. Click the Upload icon to upload different content files from your computer. The Upload opens to a search option on your computer drive(s).
2. After finding the correct file, select it by clicking Open.
Adding Media (cont’d)
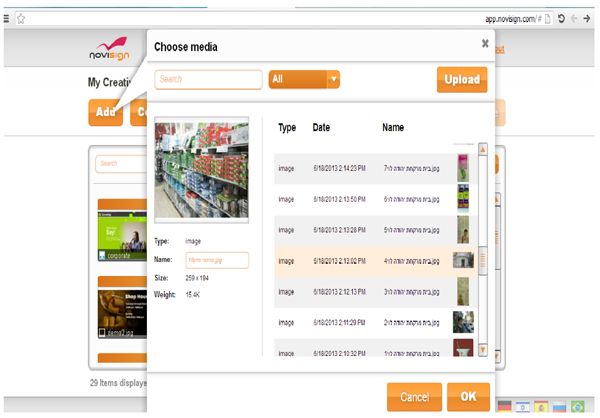 Once uploaded, the file appears in a chronological list of the uploaded media. In the upper left-hand corner appears a preview of the selected file with the following information:
- Type
- Name
- Size
- Weight
1. To add the file to the slide repository, click OK.
You can always view the chronological list of the slide repository by clicking the Add button or by performing a name search while in the My Creative screen.
Selecting Media
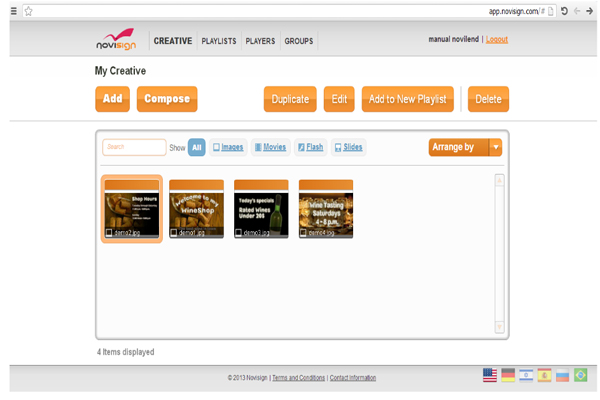 1. To select the media in the slide repository, click the media slide.
An orange bar immediately appears around the slide, and all the orange buttons that were previously disabled are activated.2. Double-clicking the slide to add it to the name registry and open a preview display.
Registering and Previewing Media
 The window for registering and previewing media opens.

1. Fill in the two boxes opposite Creative, the first with the Creative name, the second with the description of the slide.
In the center of the screen appears a window outlined by a gray frame that displays technical data. To the right of this window, the media slide appears in a preview window. You can play, stop, this window or enlarge it to full screen size by clicking on the four arrows ![]() in the bottom right-hand corner.
in the bottom right-hand corner.
2. If you decide not to edit (update) the slide media, click Cancel.
Arranging the Playlist
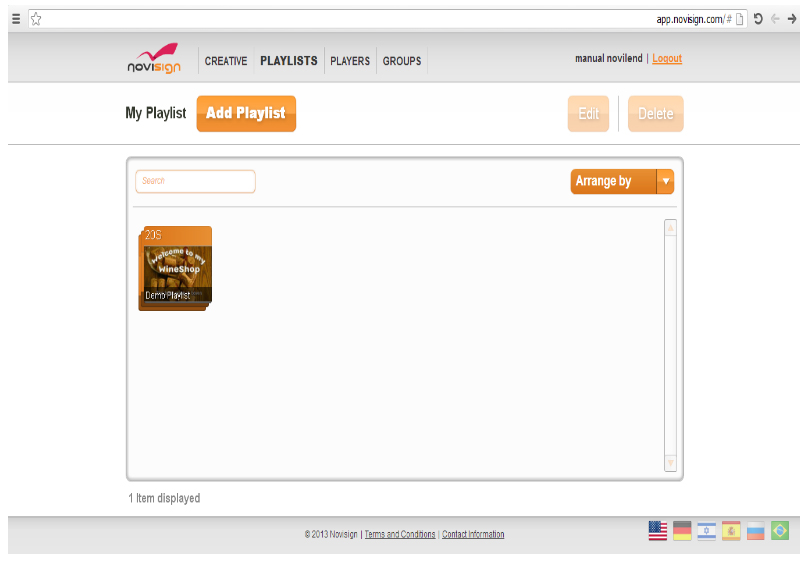 1. Click PLAYLISTS in the gray ruler at the top of the screen.
The word appears in boldface. The My Playlist window opens.
In the center of the screen appears your playlist within a gray rectangular frame.2. To add a playlist, click the Add Playlist button.
3. To arrange the playlist, click the Arrange by button. Two options appear:
- Name
- Date
4. The Playlist registry opens and you can arrange the various playlists as you wish in the gray rectangle.
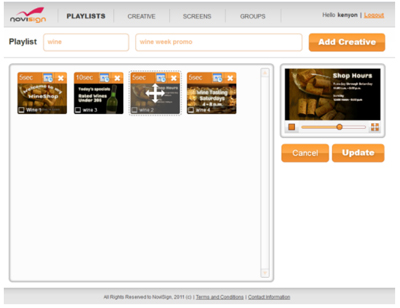
Editing the Playlist and the Preview
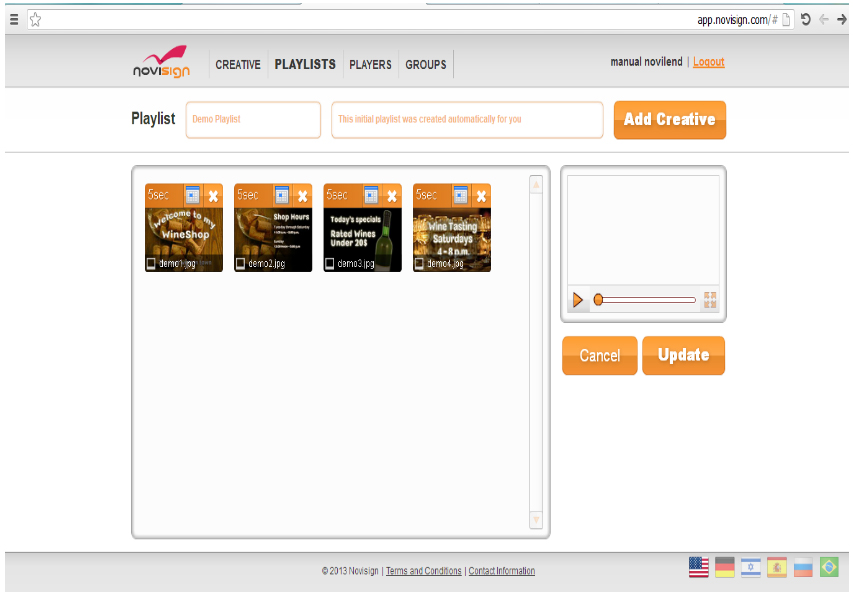 1. Double-click the playlist you have selected to open it for editing.
The individual media slides that comprise the playlist are displayed as consecutive icons.2. If you haven’t edited the name and description yet and they need to be corrected, edit them now in the boxes under the gray ruler.
3. Select one of the media files.
4. Click the number of seconds that appear to the left in the file title to edit the number of seconds for displaying the media.
5. To schedule the broadcast, click the small calendar. A window is displayed with two options:
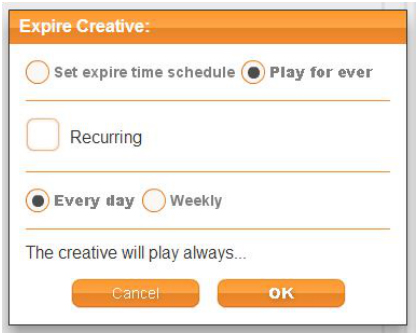
The Play forever option: This option can be set for Every day or Weekly.
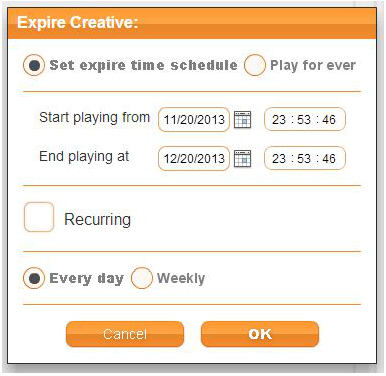
The Set expire time option. When you click on the calendar, a Calendar window opens, enabling you to select a day. Again, you can choose a daily or a weekly option.
6. To delete the media slide, click the X in the upper right corner in the title.
Adding Media to the Playlist and Viewing the Preview
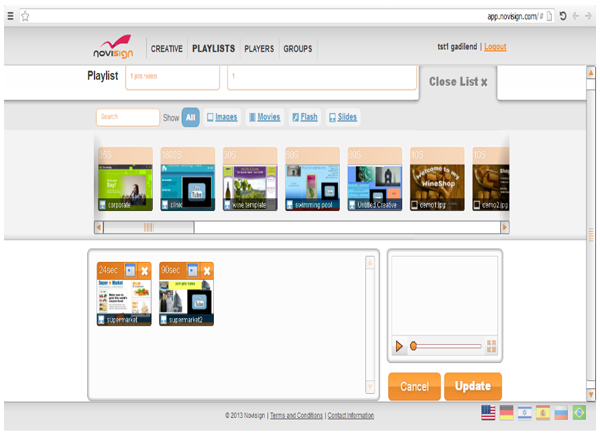 1. To add media to the playlist click the Add Creative button.
A wide horizontal ruler displaying all the media in your repository opens.2. Select a media presentation with the mouse and drag it to the appropriate location in the playlist.
A preview screen of the slides appears in the left upper corner of the Playlist window.
3. To save the changes, click Update.
Adding a Player
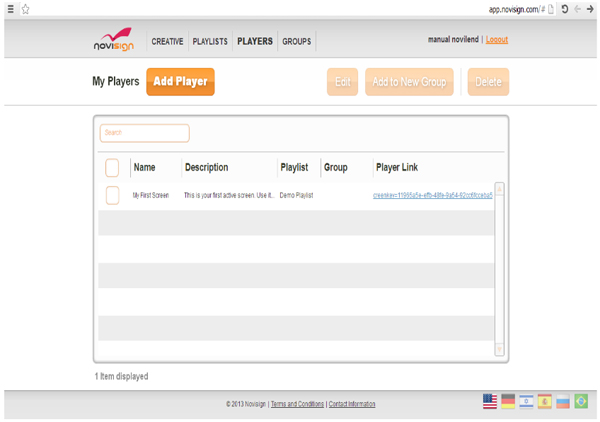 1. Select PLAYERS in the gray ruler.
Every player has a specific playlist built by you. The players with their details are displayed in the gray rectangle in the center of the screen.2. Click Add Player to add a player to the list.
3. Click Edit to edit a player in the list.
Note: To edit a player and its playlist, you must first check the box to the left of the player. The disabled orange buttons above are now activated.
4. To add a player (or group of players) to a new group of players, click Add to New Group.
5. Click Delete to erase the player from the list and delete the data from the server.
Editing a Player
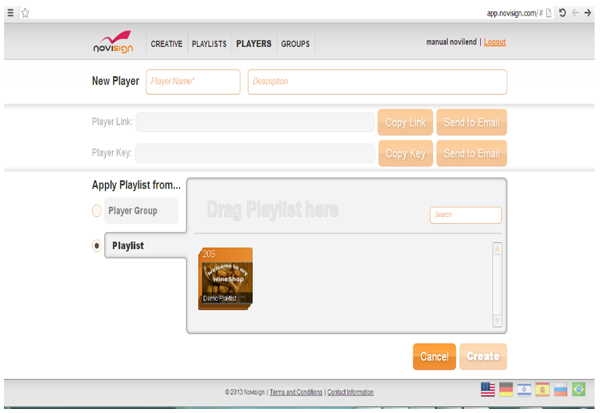 Editing the player and selecting playlist (s) is the first stage in creating a new player and uploading it to the NoviSign cloud server.
1. Check the box next to the player you wish to edit.
2. Click the Edit button.
The specific player opens for editing.
The player editing screen is divided into three sections:
- The New Player: name and description
Next to New Player, edit the player name and description in the appropriate boxes - The link and key addresses: These link to the NoviSign server
- The Playlist
The gray Playlist rectangle is divided into two sections.
The previously created playlists appear in the lower section. The new playlists appear in the initially empty upper section.
3. To add a playlist or playlists to the player select the playlist(s).
4. Drag and drop it into the upper row.
After playlists have been dragged into the upper row, the Create button is activated.
5. Click Create to save the new player with its playlist(s).
6. Click Cancel to cancel the activity.
Uploading the Player for Operation
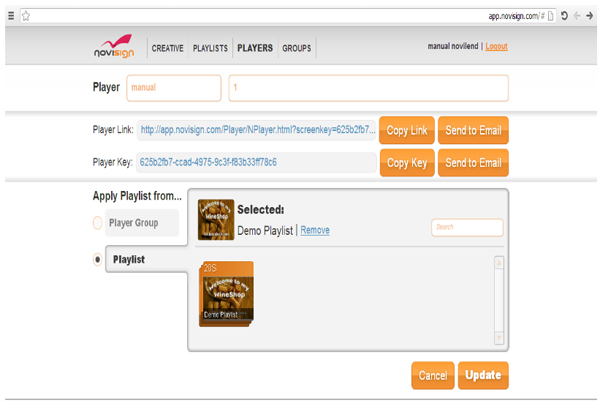 The previous page opens again but this time with the player link and key in blue lettering.
1. Enter the name and description of the new player.
Entering the name and description of the player activates the buttons.
2. Select a playlist.
After you have selected a playlist, the word Selected appears in bold in the upper row of the Playlist rectangle.
3. Click Update after making your changes.
The player is now connected to the NoviSign cloud server.
Starting up the Player
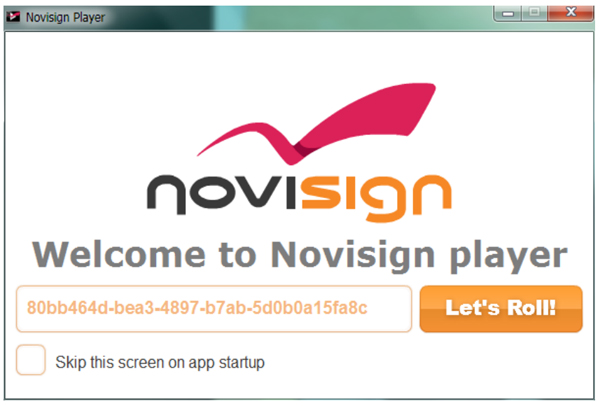 This screen appears once you are connected to the NoviSign cloud server.
The first time this screen appears, the uploading might take a number minutes and the screen might appear blank for a while. This delay no longer occurs when the player is broadcast again.
Adding New Media or Template and Entering the Creative Composer
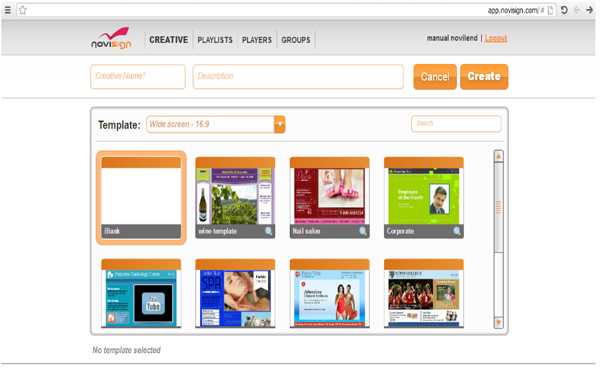 1. In the gray ruler, select CREATIVE, the first field. The field is marked in bold.
The original screen with the existing playlist opens.2. Fill in the boxes under the gray ruler with the name and description of the new media presentation.
The playlist displays on the upper left an empty media presentation icon marked in orange, which represents the new media to be created.
3. Select the empty icon for the new media.
4. Click Create.
Editing Content
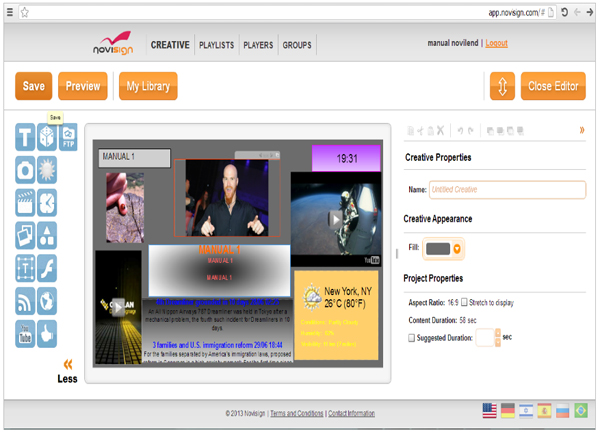
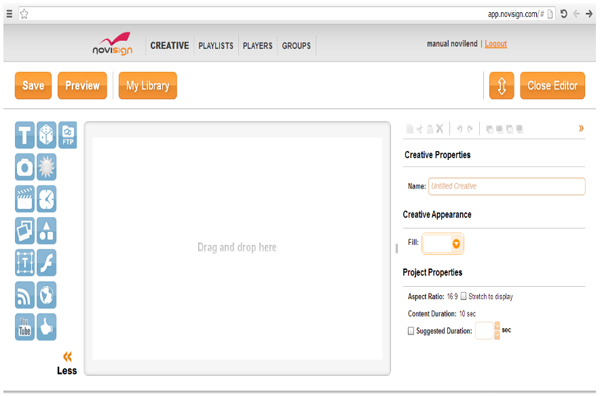 The NoviSign Creative Composer opens.
Under the gray ruler are five buttons:
 Click to save the presentation when finished.
 Click this button any time while creating the media presentation slide to view it.
 Click this button to view all the creative files loaded by the user.
 Click to toggle the display area size.
 Click when you complete the slide and after clicking Save.
The main body of the screen is divided into three panes:
- On the left are activity icons in gray representing the functions for designing and formatting your presentation. To activate the icons, drag them into the center display area of the screen.
- In the center is the display area where you create the presentation.
- On the right are detailed information and options that change according to the activity icon you choose.
The Activity Icons
 Text
Text Photo
Photo Video
Video Slideshow
 Ticker
 RSS
RSS YouTube
There are fifteen activity icons. Resting the mouse on each icon displays the icon’s name tag.
Adding and Formatting Text
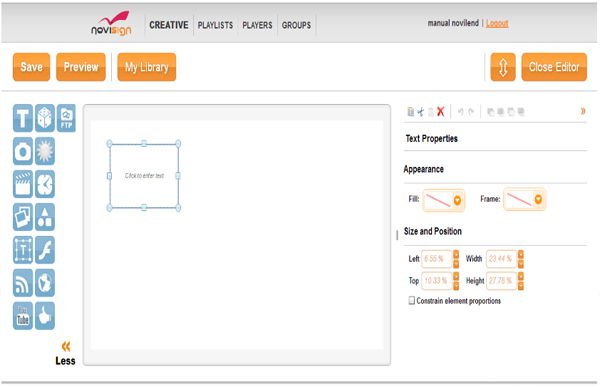 1. Select the Text
![]() icon in the left-hand pane.
icon in the left-hand pane.
2. Drag it to the desired location in the central display area.
3. To move the text, click the edges of the blue outlined box defining the text.
4. To change the text size, drag the corner of the text box either up (to reduce the size) or down (to enlarge it).
5. Click within the box to write.
When you begin adding text, above the text box, a formatting box opens that enables you to change the font, size, color, etc., and to format the text.
6. To modify the sizes and characteristics of the text, select the different options in the box.
Uploading an Image to the Repository and Formatting It
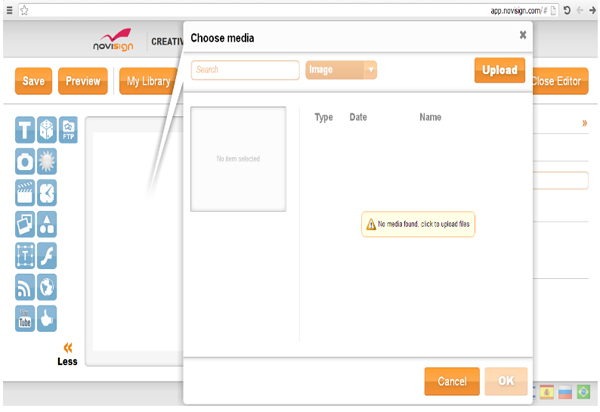 1. Select the Photo
 ![]() icon in the left-hand pane.
icon in the left-hand pane.
2. Drag it to the desired location in the display area.
A new rectangle opens. This is the file repository uploaded into the library. The rectangle is nearly the size of the display window.
3. Select an image file.
4. A small preview of the image opens in the upper left of the rectangle.
5. Click OK.
NoviSign recommends using a 100-1000K sized image.
6. If you prefer an image not in the repository, click Upload at the upper right of the rectangle. The screen opens to the computer drive files.
7. Click Open to upload the image to the repository. The uploading process is noted in red lettering. When done, COMPLETED appears in green.
8. Click Close Window.
The image now appears in the repository.
9. Repeat steps 1-4. You can edit the size and the image characteristics by clicking and dragging the mouse on the blue frame or scrolling down to modify other display options: adding frames, coloring them, modifying thickness, etc.
Uploading and Formatting Videos
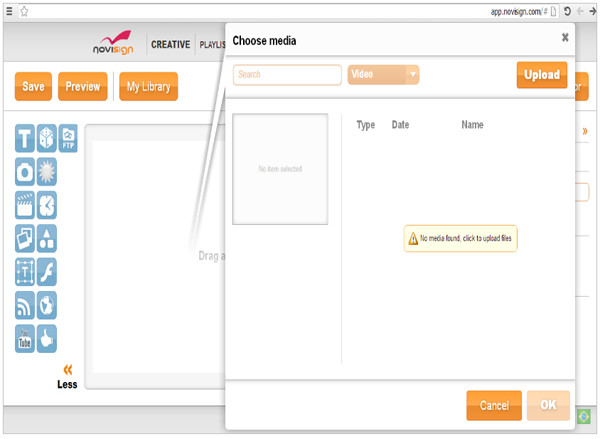 1. Select the Video
 ![]() icon in the left-hand pane.
icon in the left-hand pane.
2. Drag it to the desired location in the display area.
A new rectangle opens. This is the file repository uploaded into the library. The rectangle is nearly the size of the display window.
3. Select a video file.
4. A small preview of the video opens in the upper left of the rectangle.
5. Click OK.
6. If the desired video is not in the repository, click Upload in the upper right-hand corner of the rectangle, and the screen opens to the computer drive files. Repeat as when uploading image files.
7. Click Open to upload the image to the repository. The uploading process is noted in red lettering. When done, COMPLETED appears in green.
8. Click Close Window.
9. The video now appears in the repository. Repeat steps for uploading the video from the repository. You can edit the size and the image characteristics by clicking and dragging the mouse on the blue frame or scrolling down to modify other display options: adding frames, coloring them, modifying thickness, etc.
NoviSign recommends videos of M 16 size. The default duration is 30 seconds, which you can change in the Upload process.
Building a Presentation with Video Clips
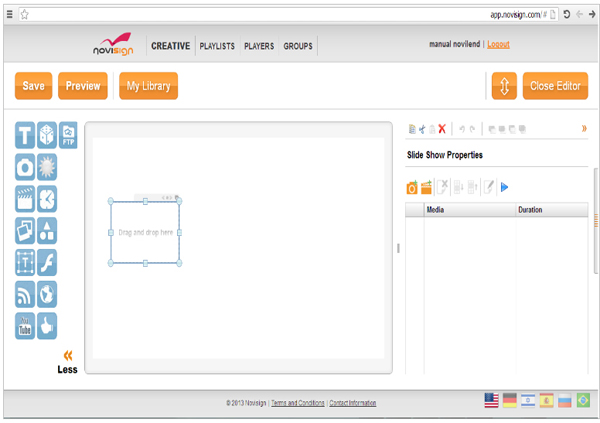 1. Select the Slideshow
 ![]() icon in the left-hand pane.
icon in the left-hand pane.
2. Drag it to the desired location in the display area.
A small rectangle appears on the display area where you have dragged the icon.
In the right panel, under Slide Show Properties appears a table with two columns:
- Media
- Duration
The table displays the file repository nested in the library of images and videos. Two small orange icons appear in the top row of the table:
 A photo icon
 A video icon
Each icon has a green + sign.
3. Click each icon to open the appropriate library of images or videos previously loaded into the repository. You can upload images or videos from the computer drive in a similar process.
4. After being selected, the file appears in the table in chronological order according to date. The default duration for the picture or video slideshows is 10 seconds. The duration appears in the duration column of the table in the appropriate row.
5. To modify the duration, click the number.
6. To change the size of the slideshow, drag the edges of the blue rectangle framing the slideshow, as previously explained.
7. To modify the formatting and other aspects of the slideshow such as color, thickness of the frame, etc., scroll down with the mouse. (yes??)
It is important to follow NoviSign’s recommendations regarding the size of the images and videos as described earlier.
Adding Ticker Announcements
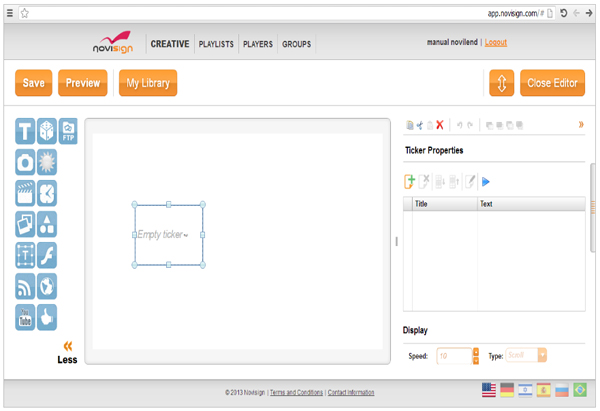 1. Select the Ticker
 ![]() icon in the left-hand pane.
icon in the left-hand pane.
2. Drag it to the desired location in the display area.
A small rectangle appears on the display area where you have dragged the icon.
In the right panel, under Ticker Properties appears a table with two columns:
- Title
- Content
The table displays the file repository nested in the library of announcements for broadcast. The icon ![]() appears in the top row of the table.
appears in the top row of the table.
Click the plus sign to open the text box, to add new text.
Above this, opens the formatting ruler for formatting the text, font, color, and adding formatting such as bold, underline, etc.
Adding and Formatting the News
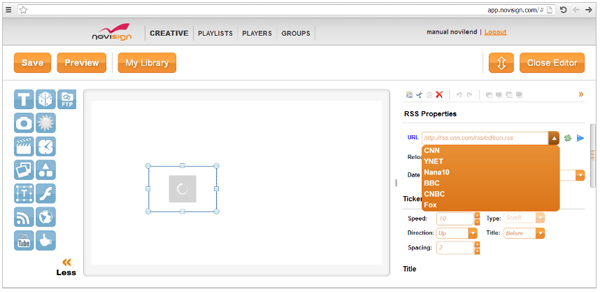 1. Select the RSS
 ![]() icon in the left-hand pane.,
icon in the left-hand pane.,
2. Drag it to the desired location.
Adding and Editing YouTube
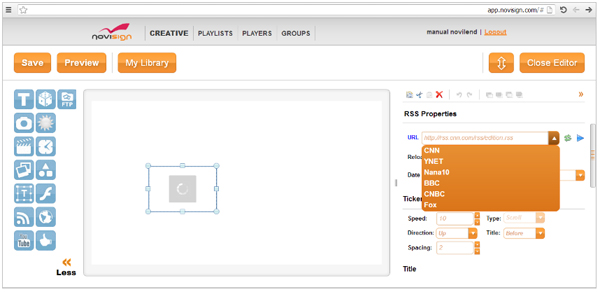 1. Select the YouTube
 ![]() video icon
video icon
2. Drag it to the desired location.
Adding a Weather Channel
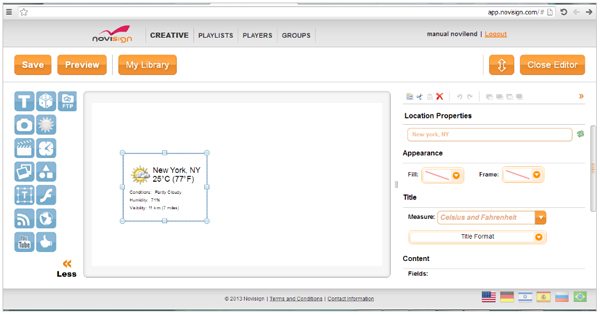 1. Select the Climate
 ![]() icon from the left-hand pane.
icon from the left-hand pane.
2. Drag it to the desired location.
Adding and Formatting a Clock
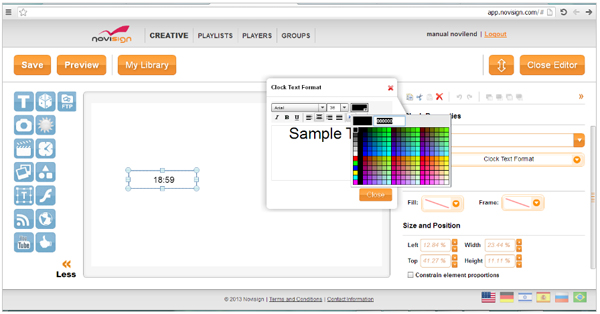 1. Select the Clock
 ![]() icon
icon
2. Drag it to the desired location.
Saving the Edited Media
 1. When the media presentation is complete, click
 ![]()
Note: A double-click on the display area window opens the Creative Composer again and requires saving the presentation again.
Viewing a Preview
 1. Click Preview to view your creation.
Note the clock in the upper right hand corner.2. Close the presentation and close the Creative Composer.
You will return to the opening screen of the Creative process.
