Videowall is one of the coolest WOW effects of the digital signage industry. I this tech post, I will show you how to create several unique video walls. The focus will be on the content side and less on the hardware side (for the hardware side, you can read our article about 3 ways of how to build a video wall). We did all of them using 10″ professional displays of Primeview, but this can be done with any professional displays that allow daisy chaining. It can also be done using a videowall switcher/splitter.
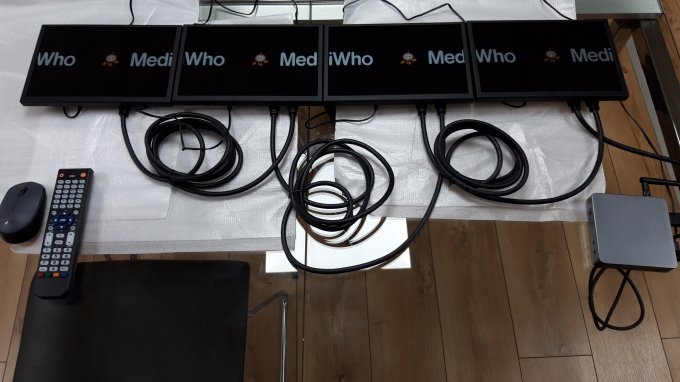
Connecting to displays to one another is the easy part like you see in the following image where we daisy chained four 10″ professional displays. You can see that the silver Android media player (Minix X10 mini) is connected by an HDMI cable to the HDMI-IN port of the right-most display; the right-most display has an HDMI cable going out from its HDMI-OUT port to the HDMI-IN port of the second display from the right; an HDMI cable goes from the HDMI-OUT port of the second display from the right to the HDMI-IN port of the third display from the right and so on:
Now, the challenge is how to create your video in the Creative Composer of our online Studio to make it fit your video wall?
Let’s follow few examples:
2 x 2 video wall
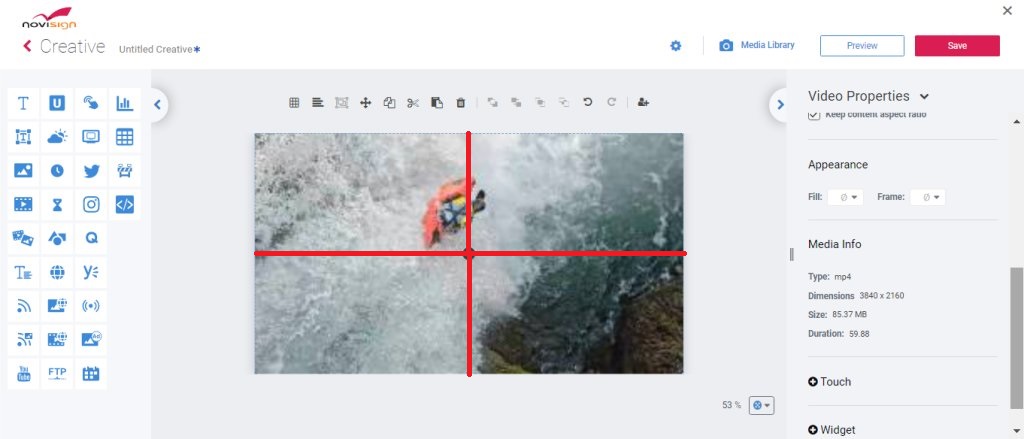
This means you have 4 displays, aligned in 2 rows and 2 columns. In this case, if your Android media player is 4K (3840 x 2160p) and the content video that you put in the composed creative is also 4K resolution, then, since the content will be divided into 4 equal squares, each square (or actually, display) will get 1/4 of this resolution, which means, each of your 4 displays will get 1920 x 1080p (full HD), which looks nice. This way (like in mathematics, the X axis is horizontal and goes from left to right, while the Y axis is vertical and goes from top to bottom), the top left “virtual” square has x1y1 coordinates, the top right “virtual” square has x2y1 coordinates, the bottom left “virtual” square has x1y2 coordinates and the bottom right “virtual” square has x2y2 coordinates. See the example below:
4 x 1 video wall
This means you have 4 displays (each is 16:9 ratio, of course), aligned in 1 row (and 4 columns). In this case, if your Android media player is 4K (3840 x 2160p), the video content should be in 2 possible ways:
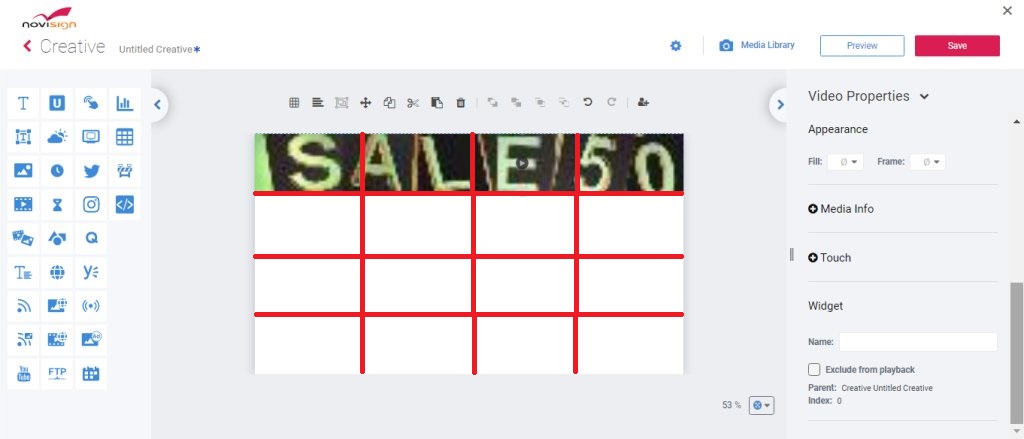
a) A video of 3840 x 540p (to keep ratio of 64:9), which should be placed in the top 1/4 strip of the canvas in your creative composer, and the content video that you put in the composed creative, like this:
This way the top left “virtual” square has x1y1 coordinates, the next “virtual” square is x2y1 coordinates, the third one has x3y1 coordinates and the fourth one has x4y1 coordinates, as they’re all on the first line (X axis).
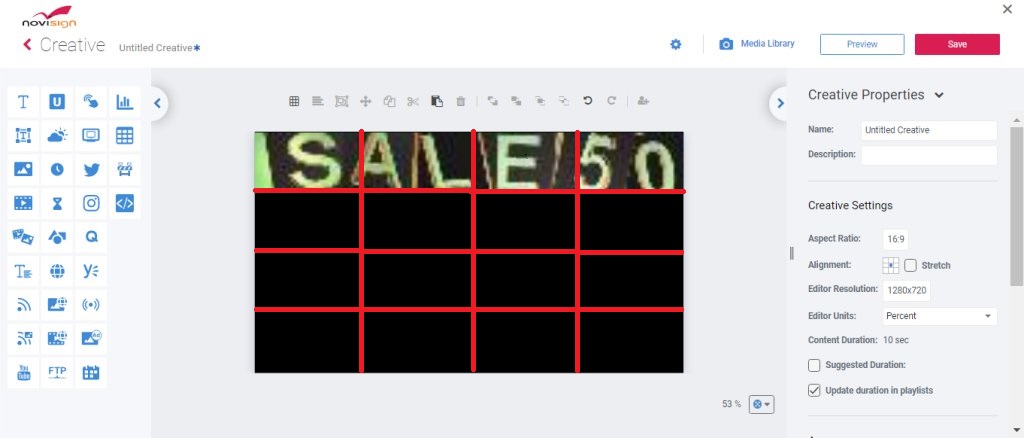
Since the top trip will be divided into 4 display, each display will get 960 x 540p screen resolution which is fine (but can be better). This can also be done with a 3840 x 2160 video, which 3/4 of its bottom is just black, while the video itself is in the top 1/4, like this:
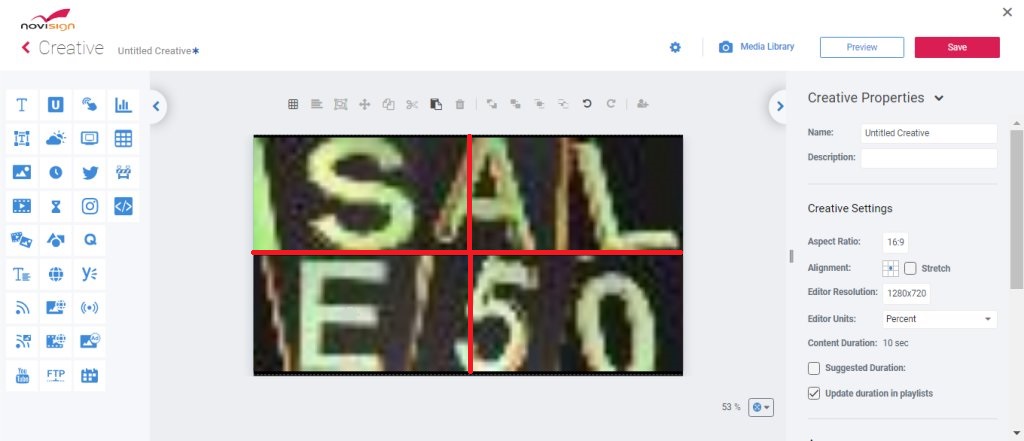
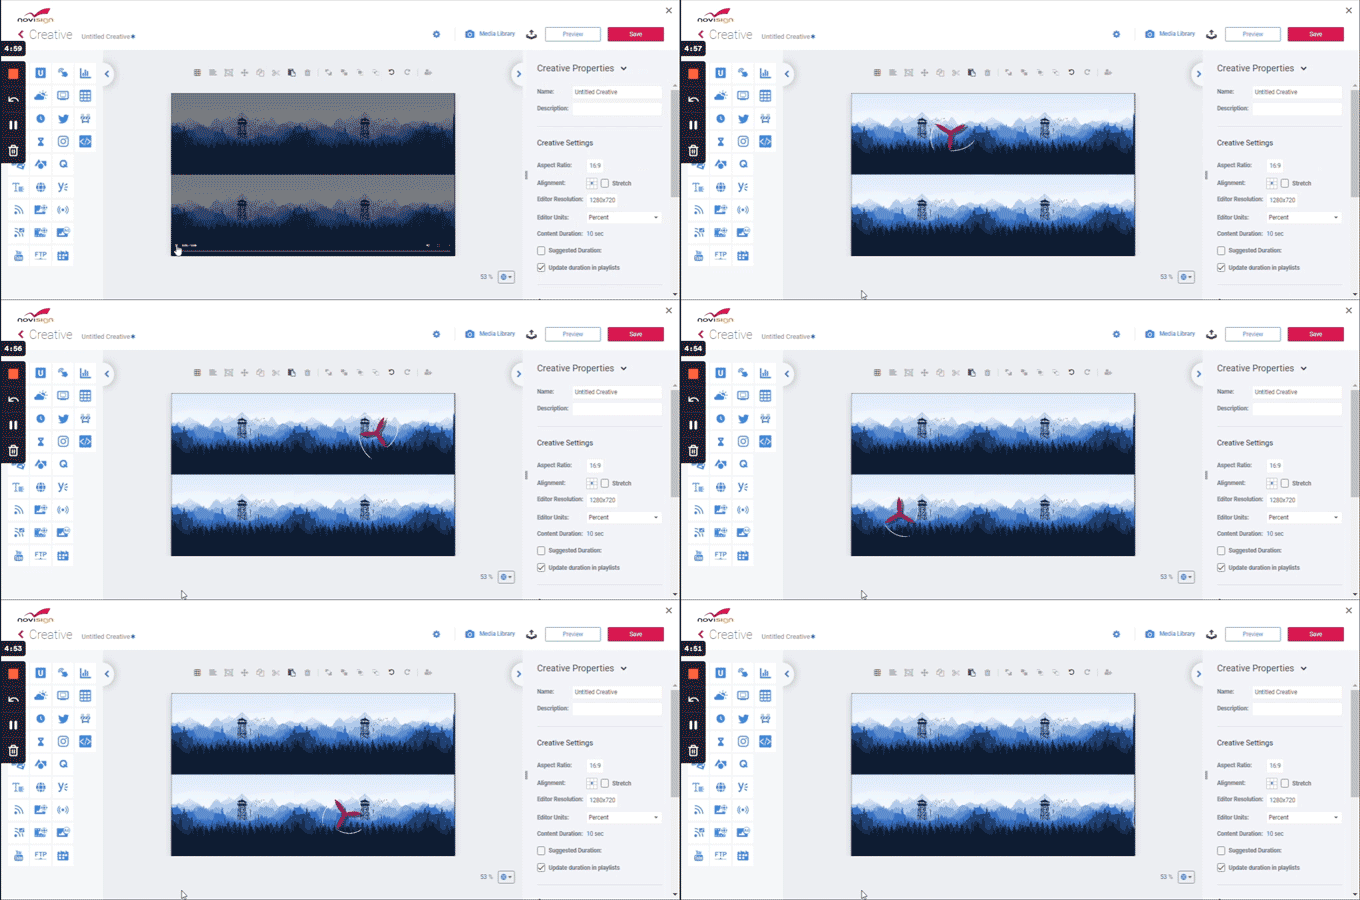
b) A video of 3840 x 2160p, which its top half is consisted of the content to be displayed on the 2 left displays, while its bottom half consists the content of the 2 right displays:
Using this method for your 4 displays, you’ll get the sharpest view. You’ll have to ask your graphics designer to create this video in 3840 x 2160p, where its top half is the left half of the original video, while its bottom half is the right half of the original video. In this case, the resolution for each display will be 1920 x 1080p (which is 1/4 of the whole resolution), which is better than the previous example. But that require a graphical change in the original video that was used in the creative.
Here is how it looks if you put a moving object. On the special video it will look as it’s moving from left to right on the top row (which will be displayed on the 2 left displays on your 4 x 1 video wall) and then starts from the left toward the right on the bottom row (which will be displayed on the 2 right displays on your 4 x 1 video wall). Once you set the 4 displays in one row, it will look as it is moving from the left-most display all the way to the right-most display:
3 x 3 or 9 x 1 video wall
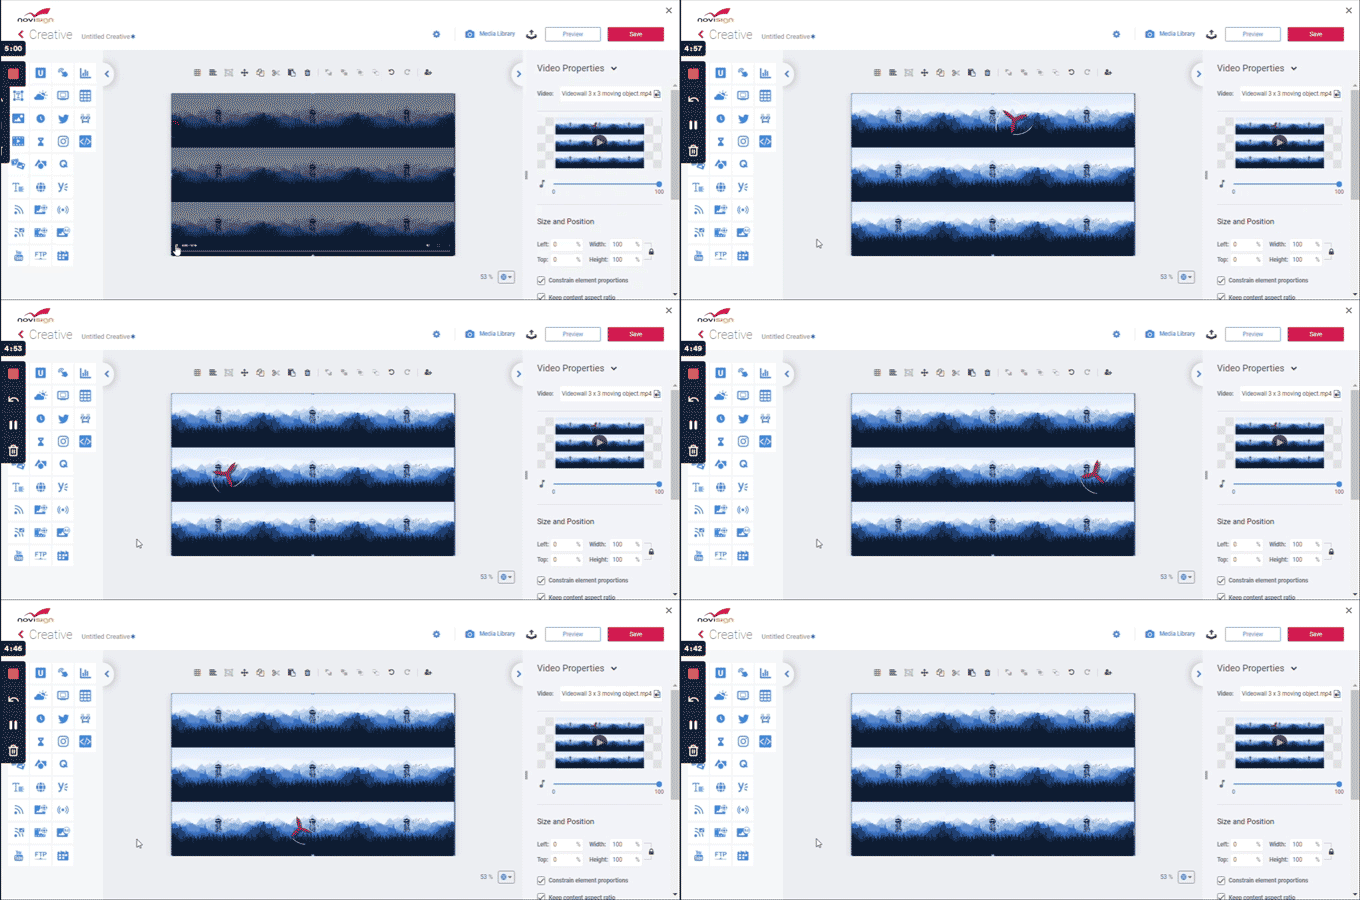
This means you have 9 displays (each is 16:9 ratio, of course), aligned in 3 rows and 3 columns (like a tic-tac-toe board game). In this case, if your Android media player is 4K (3840 x 2160p), the resolution of the video content each of the 9 displays will be 1280 x 720 (HD) which is 1/9 of the whole resolution.
You can also align those 9 displays in a 9 x 1 video wall (that means one horizontal row of 9 displays). In the following example, you can see how we made one video that will look good both on 3 x 3 and on 9 x 1, where the object keeps moving between the displays. Just imagine that if you had to make one video of long strip (which would have been 3840 x 251p, to keep aspect ratio of 16×9 : 9), in that case each display could have got only 426.6 x 251p screen resolution which would be very blur. Hence, putting up a video in a 3 x 3 grid-like position would end with a much better result of 1280 x 720 (HD) for each of the 9 displays:
6 x 1 video wall
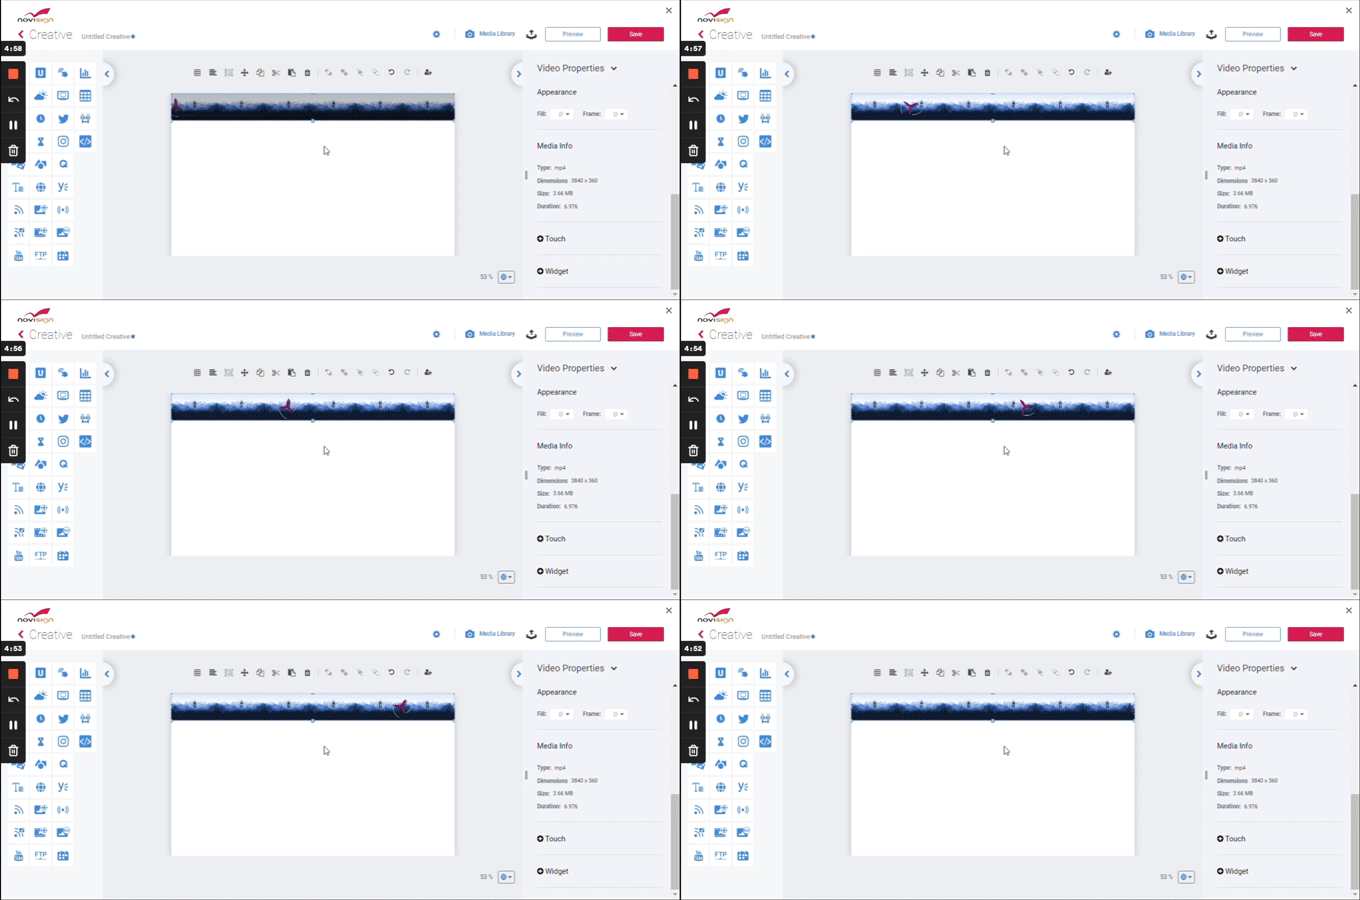
This means you have 6 displays (each is 16:9 ratio, of course), aligned in 1 row (and 6 columns). In this case, if your Android media player is 4K (3840 x 2160p), the best way will be to have a 3840 x 2160p video content (which will look as a grid-like of 3 x 2 (this way, each display will get a higher resolution).
The wrong way to have it will be a 16×6 : 9 (which is 96 : 6 aspect ratio, which will end in a 3840 x 360p), because in this way, each display will show 1/6 of this long horizontal strip and will finally get a low 640 x 360p very low screen resolution:
Non conventional displays
Some displays, such as custom LED displays, may have a non-standard screen resolution, sometimes even very low resolution.
This is relevant not only for video walls, but also when displaying content only in a single TV display.
Imagine you have a LED display of 640 x 200p. Something like this:

This is definitely not 16:9 and none of the Android media player supports this resolution.
So, if you build a creative to be displayed in this 640 x 200p LED display, then a composed creative which is set to custom dimensions of 640 x 200 pixels or to custom dimensions of 16:5 aspect ratio – this will not work good on the Android box, because the Android box doesn’t know how to process it well (since it doesn’t support this unorthodox screen resolution).
The right approach here will be to build a 16:9 standard creative and then place the content somewhere within the creative. Where is that somewhere? It is a matter of trial and error. It may look like this:
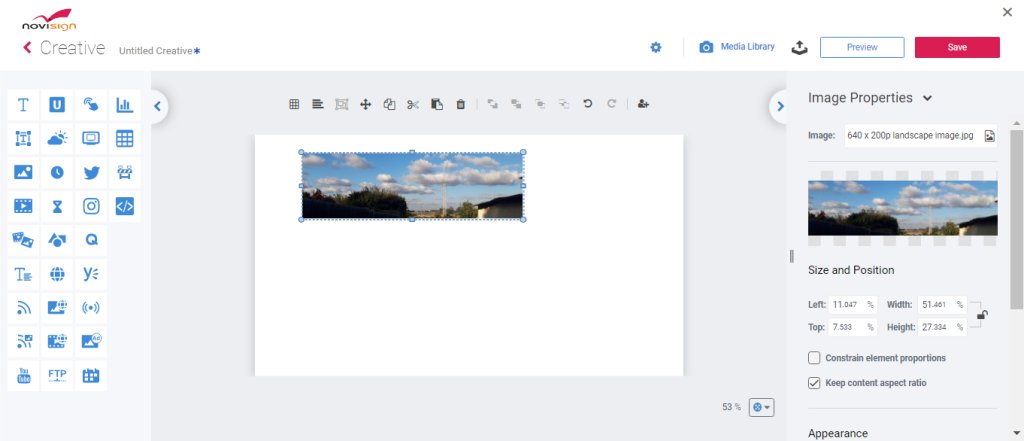
That means, you will need to do some trial-and-error in order to find out where is correct rubric, on the canvas, that will appear on the physical screen (and that is very individual to the custom screen resolution of your special TV display, combined with the supported screen resolutions of your Android box).
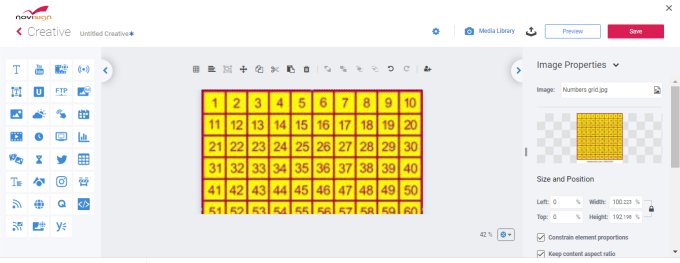
To shorten this process, you can put an image on the whole canvas and see which part of it is chopped off and which part will be taken into this 640 x 200p display borders. An image with a grid and numbers, like in the following example, will do the trick and will allow you, in a better way, to figure out which part of the canvas is actually displayed on the physical LED screen:
We like to keep it simple.
Nir
