In this tech article we will list 3 ways of API integrating with NoviSign digital signage solution.
The 3 ways are:
- Devices and players software
- NoviSign catalog service
- Third-party catalog service integrations
Part 1. Devices and Players Software
NoviSign Digital Signage platform now supports the capability for any device with installed software to fetch data directly from any third-party API endpoint allowing its customers to present any dynamic content on the screens. Such API integration is supported by any type of the device for any platform available for players.
The integration is performed by making some configuration steps that can be divided into two principal parts:
- Player Configuration
- Studio Management
Player Configuration:
Navigate to: Settings > Advanced > External interfaces > Custom API integration
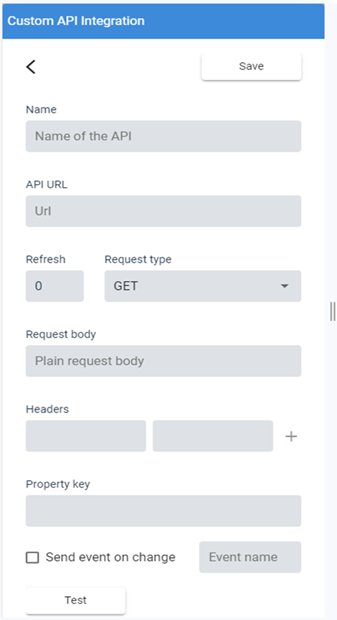
Here we will need to add a new “Custom API Integration” and fill the following fields:
“Name” – The name of the integration (any name for your convenience).
“API URL” – the URL where the JSON data will be fetched from.
“Refresh” – this is the refresh rate in seconds (think of possible maximum for not to experience performance issues).
“Request Type” – GET/POST (GET by default).
“Request Body” and “Headers” – additional parameters like static token if required by an API to fetch data. If not required may be left empty.
“Property key” – this is a key for your choice that we will use in our Studio creatives in order to “inject” the dynamic data into the screens. We will remember it for further configuration steps.
Now we may check the configuration by clicking the “Test” button. If everything is configured correctly the JSON payload should be seen on the screen.
Finally, we need to save the created configuration by pressing the “Save” button and follow the next steps.
Studio:
In order to define dynamic content on the Studio, we will use variable expressions inside of the creative’s widgets. The dynamic variables will be replaced by the data received from the API at run time.
What do dynamic expressions look like?
As mentioned above we support JSON format responses. The JSON will be “parsed” by the player and the expression will refer to the JSON inner path. There is a special syntax format reserved for this purpose:
${@customapi.PROPERTY_KEY.JSON_KEY1.JSON_KEY1_1….}
${@customapi – reserved syntax to refer to JSON. Any expression should start with it.
PROPERTY_KEY – this is a property key we configured in our previous steps to use for this integration. There may be several integration configurations identified by its key. This key will be used to know where to fetch the data from.
JSON_KEY1,JSON_KEY1_1 – The inner JSON path.
E.g. ${@customapi.myrestaurant.InProcess.0.orderIDShort} => “1031”
Supported widgets
Currently we may use the above syntax in setting Text, Label, Webpage, Web video, Web image.
Part 2. NoviSign Catalog Service
This is an optional web-service “layer” between the third-party APIs and Devices that NoviSign provides for its clients in order to allow additional flexibility and convenience for storing and consuming data. Some standard scenarios may be considered in this scope:
- When we need to pull some data into some storage in order to consume it afterwards by players. Let’s say the client has a service that is triggered by some event and needs to save the result somewhere and show it on the screens (webcam statistics, etc.)
- When we want to perform some operations on a scheduled basis and save the result in the database in order to fetch it afterwards by players.
After the data is saved in the catalog repository it’s available through standard public “GET” methods and can be “injected” to screens like any third-party API endpoint described above.
The full API for Catalog Service can be found here:
https://app.novisign.com/catalog/webjars/swagger-ui/index.html?configUrl=%2Fnotifications%2Fv3%2Fapi-docs%2Fswagger-config&urls.primaryName=api
Any item is stored with account ID (actually this is a corresponding account in Studio) and item ID, set by the client and sent with POST requests.
Any catalog record can be stored and consumed with two different approaches:
* Using catalog-controller API calls. The catalog item is stored in JSON format and it is the client’s responsibility to follow JSON format convention before storing it in the database (otherwise the exception will be thrown and the item will not be saved).
* Using feed-controller API calls. This way allows to store any free text payload sending in body with some additional predefined fields similar to RSS feed item including:
“Account Id” – required, account ID predefined and taken from Studio as mentioned above.
“Channel” – required and set by the client.
“title”, “author”, “link” – additional optional fields that can be applied.
The items are fetched and grouped afterwards according to the “channel” parameter in the form of XML RSS feed (this allows presenting items in Studio RSS widget) or standard JSON format depending on additional “xml=true” parameter. If no “xml” parameter is passed the channel will be presented in JSON format.
Note. Consider the required “limit” parameter when fetching data with feed-controller GET requests.
Please note. In order to use the catalog service API client should authenticate and fetch the Bearer token used for all API calls. Please turn to our support team in order to get the credentials and use it.
Scheduling
This option is provided to customers that need to run some repetitive scheduled tasks implementing some additional “pre-processed” business logic by catalog service before the items are saved in the database and available to screens. There are many integrations already implemented by the NoviSign team and if you need us to assist, please refer to our support team in order to consult and evaluate possible integration.
Part 3. Third-Party Catalog Integrations. Use Case: Zapier
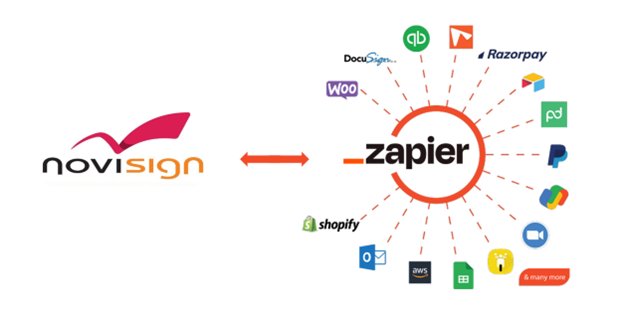
What is Zapier?
Zapier is an online automation tool that connects your favorite apps, such as CRM, Google Forms, Google Sheets, Facebook Leads and more.
You can connect two or more apps to automate repetitive tasks without coding or relying on developers to build the integration. It’s easy enough that anyone can build their own app workflows with just a few clicks.
How does it work?
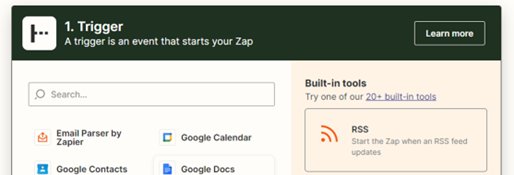
Zapier Triggers
Get new data from connected API, parse individual data fields, and let users include that data in subsequent Zap action steps. Triggers can run every time something new is added to an API endpoint or pushed to Zapier via a Webhook, or they can use filters to watch for specific items.
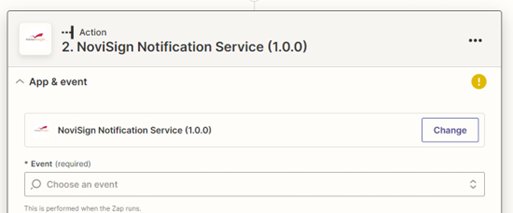
NoviSign Actions
Push new data into integrated API by NoviSign: Save data into feed collections and use it through RSS XML widget or Custom API objects.
Before you start, you need to register a Zapier account (there is a free plan available) and turn to our team to perform some initial configuration steps for this configuration and get from NoviSign your integration Zapier client credentials. After that you may follow this steps:
- Create a Zapier Account and click “Create Zap” button.

- Search and Choose a Trigger: any of more than 5,000 applications (free and payable) available for your choice.
- Add NoviSign App as an Action and Check the Authorization credentials. Test the integration.
Save and Start Use
Yevgeni.
 info@novisign.com
 +972 (9) 794-7643
 (646) 893-7770

