Step 6: Send Playlist to Display
Description:
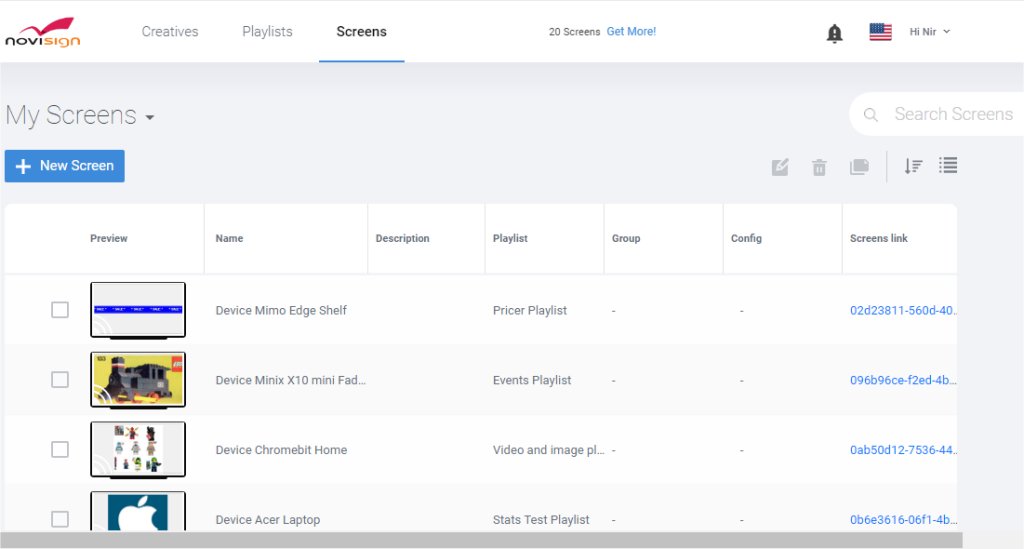
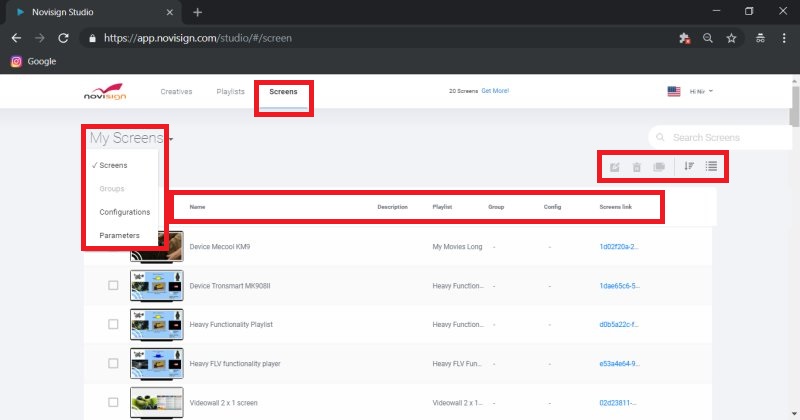
This is where you send your content (playlist/s) to a media player. Screens in the “SCREENS” tab are supposed to represent screens in the real world. The page consists of four primary features (buttons located under the search textbox):
- New Screen: add new screen that you want to send content to.
- Edit: edit an existing screen.
- Delete: the screen from the system (this does not affect its chosen content).
- Duplicate: duplicate a screen.
Under the set of buttons is a table. In the upper right side of the table are one textbox (for searching), while in the upper left corner there is a down arrow right to the “My Screens” which allows you to navigate to the Configurations, Groups and Parameters:
- “Search”: search for a screen name.
- “Screens”: manage the content of the screens.
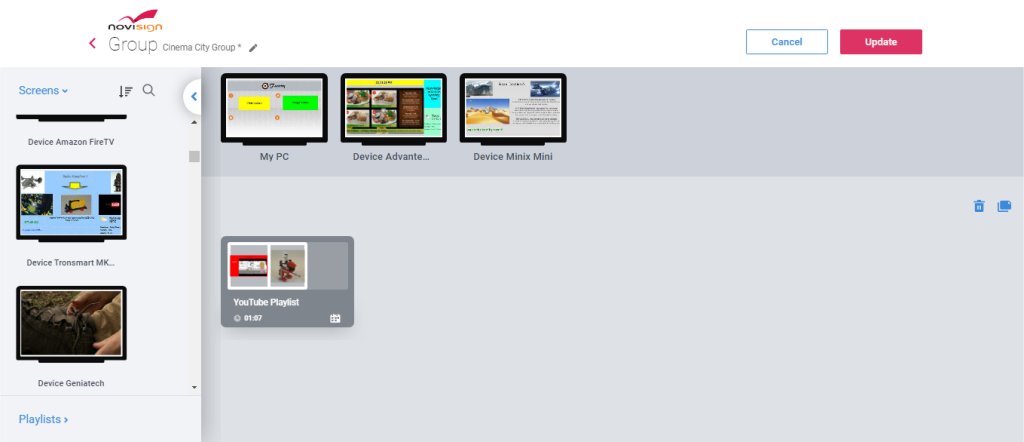
- “Groups”: send the same content to multiple screens all at once.
- “Configurations”: send a set of configured app settings to any screen.
- “Parameters”: build a list of hierarchical keys/values to be used like data in your creatives (suing the label widget)
The table is broken down into categories:
- “Name”: name of the screen.
- “Description”: description of the screen – this could be location (better name your screens according to their location, so you’ll be able to know who is what and where, i.e. if you have a couple of screens in the University of Texas and one of them is in the cafeteria of the faculty of humanities, you can name it “Texas uni. – humanities cafe front”).
- “Group”: indicates if the screen belongs to a group of screens.
- “Config”: shows if there is a selected configuration which was applied on that screen.
- “Screen Link”: ability to live preview (in your browser) the content playing on the screen.
How to Send Content to One Screen:
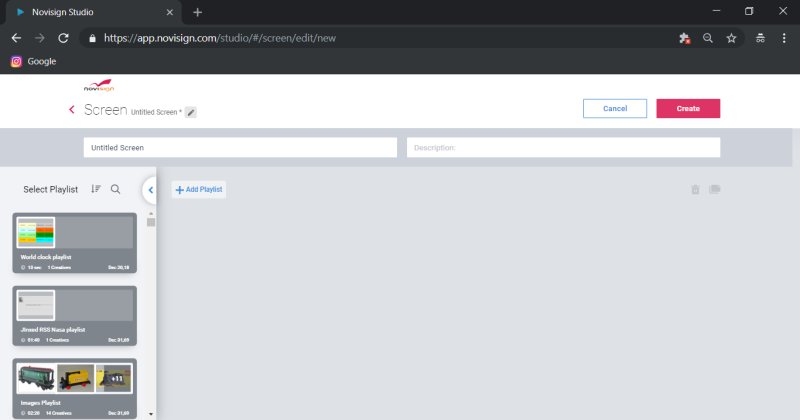
Image 3.4
Required Action
- Select the “New Screen” blue button. Once selected, your screen should look like “Image 3.4”.
- Add a name for the new screen and fill the description of the display use.
- In the left pane, click the plus icon of any playlist which you wish to assign to this screen:
- To change the order of the playlists (a screen can have multiple playlists if you like), click and drag it to rearrange.
- To schedule a specific playlist to play, click the calendar icon.
- Press the “Create” button.
- Your screen will then take you back to the primary “SCREENS” tab.
- The Studio will update to look like “Image 3.6”.
- You can live to preview the content by clicking the screen link.
- You can copy the screen key (it’s a kind of ID) of the screen to your clipboard (in order to be sent by email) this way: Click the 3 dots left to any screen, then choose the “Copy Key” in the popup menu.
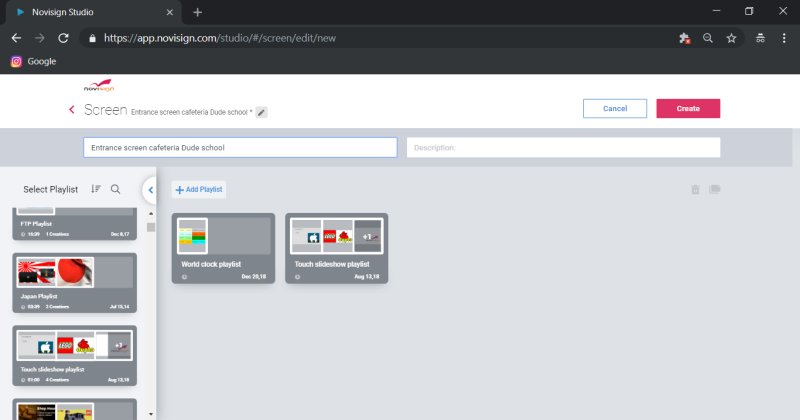
Image 3.5
How to Send the Content to Multiple Screens:
Required Action
- On the Screens tab, select the Groups from the dropdown menu (where you see the “My Screens”).
- Click the “New Group” button.
- Click the “Screens >” option in the left pane. It will open a list of all available screens of yours.
- For each screen you wish to add to the group, hover with the mouse cursor and then click the “+” icon, which will be revealed while hovering. This will add the screen to the main frame (and will remove it from the list of available screens, as each screen can be added to only one group).
- When you’re done, close the list of screens and then click the “Playlists >” list, which will be opened and list all available playlists of yours.
- For each playlist you wish to assign to the group (you can assign more than one playlist), hover with the mouse cursor and then click the “+” icon, which will be revealed while hovering. This will add the playlist to the main frame.
- Type group name and a description in the 2 upper textboxes.
- Press the “Create” button.
- You are done! The content will update and begin playing on the screens in your group.
Note:
The way the system knows which screen in the actual world is which screen in your Studio account (under the “Screens” tab) is a unique identifier we call “screen key”. You can find what screen key each screen has using the popup menu under the “Screens”. While on the other end, on the signage device itself, you either type that screen key or choose the screen name from a dropdown list in the installed app (the same way you give a name to a new born baby). This is a one time pairing.
