
A guide to turning your Adobe Photoshop files into digital signage!
The primary focus of NoviSign is to make digital signage easy and manageable for users. Because many designers use Photoshop to design in we’ve written this guide to help you turn your Photoshop into digital signage using NoviSign’s Online Studio.
In this article we’ll be using a design that we’ve already made in Photoshop and show you step by step instructions for turning your Photoshop files into digital signage!
Benefits of designing first in Adobe Photoshop
NoviSign’s online Studio is as easy-to-use as it comes, but given that you have a design of your own in a PSD file or you’re used to doing your designs in Photoshop first, it can provide you several benefits. Few of those are listed below:
1. Quality
Photoshop no doubt, is a masterpiece. It has advanced design tools and procedures. While NoviSign almost provides you with all the necessary design tools, Photoshop can always give you more options and variety to add to your design.
2. Double Check
If you’re used to designing things in Photoshop, it will not only give you satisfaction, but you can also make things much quicker in NoviSign’s online Studio later on since you’ll know what you’re building.
3. Font Variety
With Photoshop, you can always use your favorite fonts and then export and upload them to NoviSign’s online Studio (as non-editable layers). Click to learn more about adding custom fonts to NoviSign
How to get started?

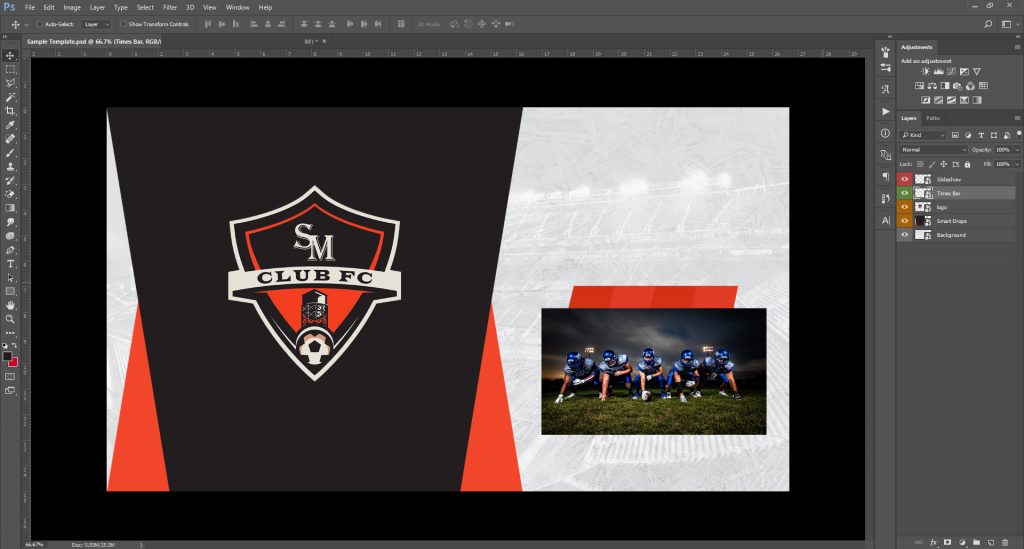
1. Open the file in Photoshop
2. Delete all the unnecessary layers and merge the ones that go together. Also delete all the files that you would be able to recreate in NoviSign’s online Studio so that they’re easily editable anytime (g.: simple shapes and texts).
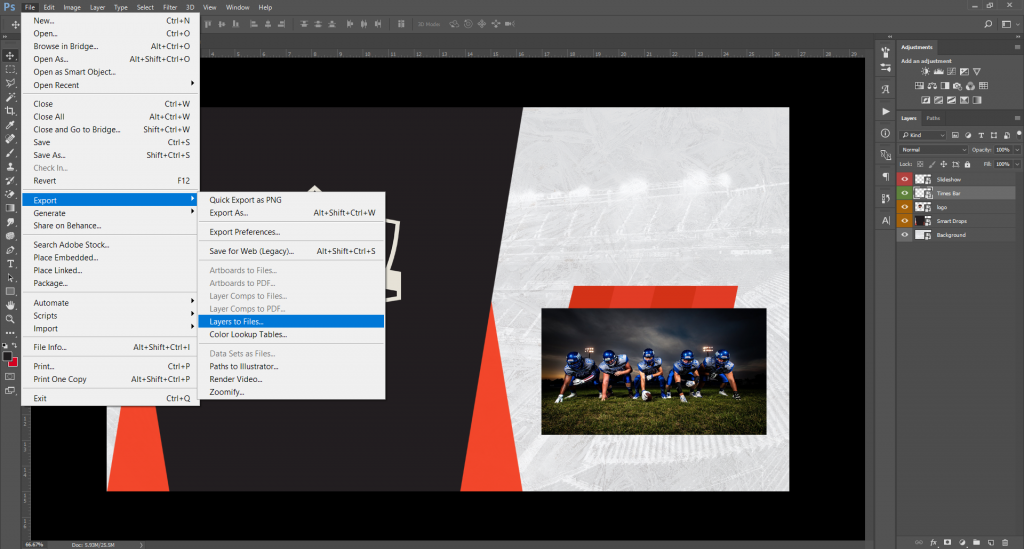
3. Now export all these layers into a folder of your choice by following the steps shown below:

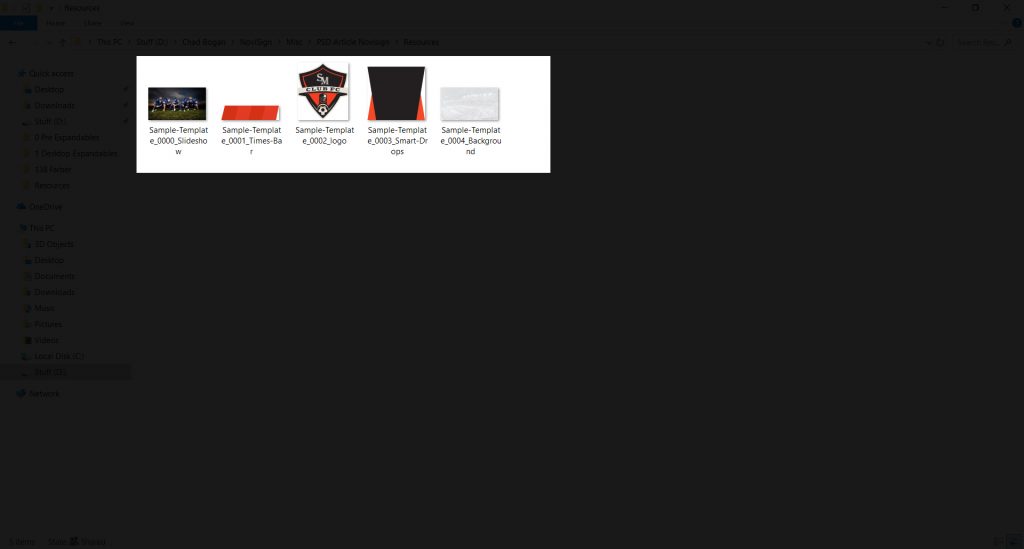
4. You shall be able to see the files exported layer by layer in the folder now.
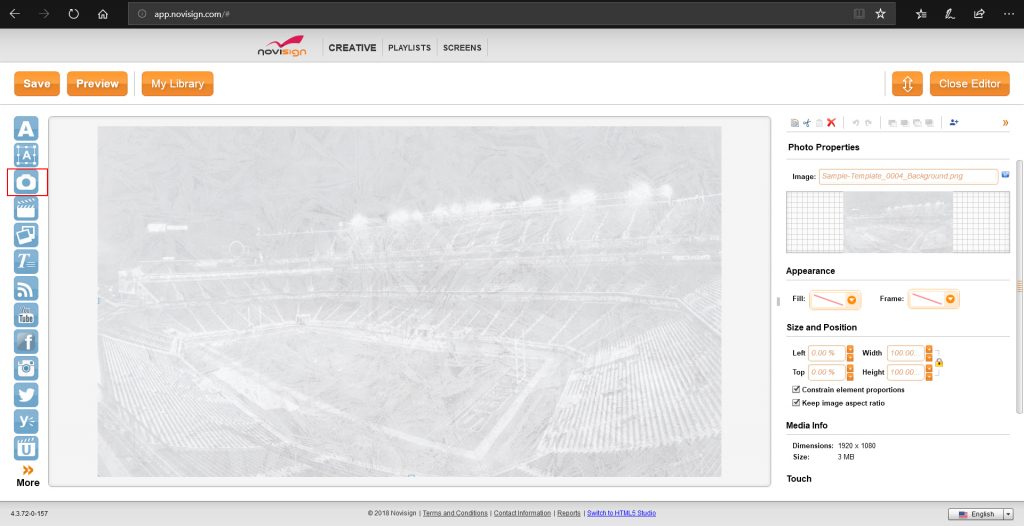
5. Login to your NoviSign’s online Studio and create a new creative there. Then upload all the files/layers that you exported into your NoviSign’s online Studio’s Library.

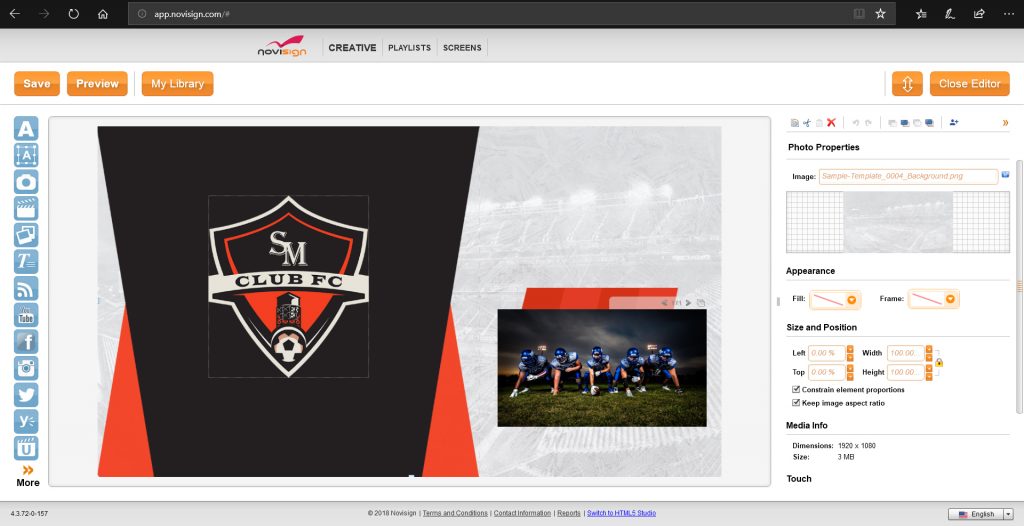
6. Once the files are uploaded, you’ll start building your design by putting the layers one by one. We started with the background image just to get started, which was put using the image widget on the left.
7. Now similarly put all the layers that were imported one by one. Different layers will be placed by different widgets. For example, a video will be placed using a video widget if it was ever uploaded.
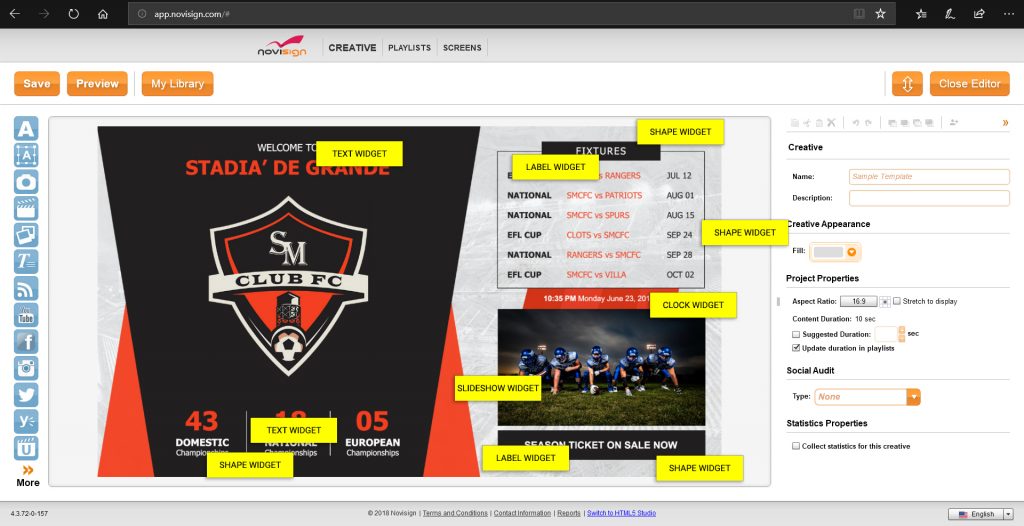
8. Now that you’ve placed all the complex/imported layers, it’s time to complete your design by using NoviSign’s online Studio’s widgets. For instance, time would be placed by using the clock widget. In the following image, we’ve labeled the widgets we’ve used.
9. Your design is ready-to-go! Just click on Save and then proceed with the usual steps to show the design on your final screen.
If you have any queries or want assistance with anything, we are always here for you.
And not to forget, NoviSign provides CUSTOM DESIGN SERVICES as well as DESIGN MAINTENANCE SERVICES at affordable rates to make sure that your design always stands out and you don’t have to worry about anything.
About The Author: Chad
More posts by Chad