This feature is for sharing content with others: the Invites feature. This is an ability for a user to invite another existing user(s) or anyone to access any of the accounts he has access to. Currently it supports only users which are in email format (the login name is a real email address).
The number of users which is allowed to be invited to a certain account is limited and will be according to the customer’s plan (pricing).
Also, partners are able to enable/disable it from Admin “Plans” section.
The feature is under testing in our test server. You are welcome to try it and provide your feedback.
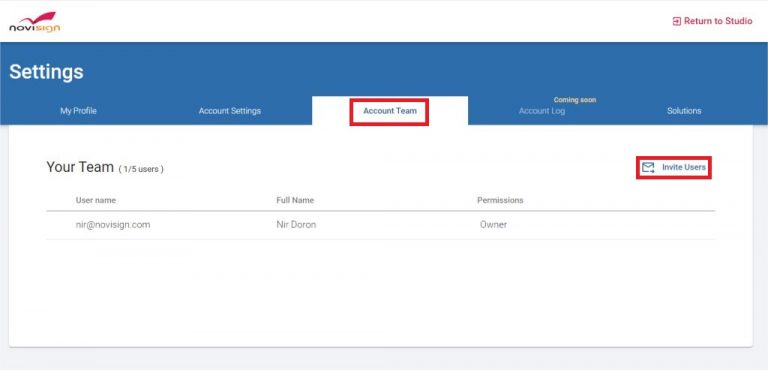
- While you’re logged in to the online Studio, open the popup menu in the top right corner of the screen (by clicking the little arrow near the “Hi” message) and then choose “Settings”.
- In the settings screen, go to the “Account Team” tab and click the “Invite Users” button.
3. A popup form will appear. Type the email addresses of all the users and/or email addresses of people you’d like to share with them the account. Please notice that it will share the account which you’re currently logged into. In order to share one of the other accounts which you have access to, you will need to switch the account (through the menu in the top right corner of the Studio) and repeat this process.
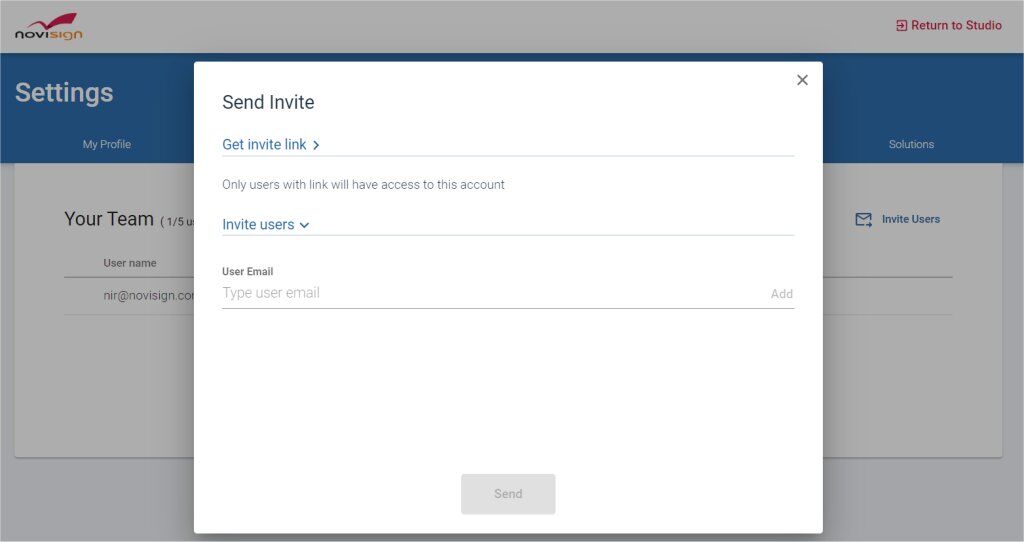
4. Press “Send” after you have added all the email addresses and an invitation will be sent.
5. For existing users – they will get a message to appear in the online Studio after they log in (see below). Please notice that this works only for users which their login name (username) is in a valid email format. For emails which are related to people without a user in NoviSign – they will get an invitation email inviting them to sign up to NoviSign. However, once they sign up for a new user, they will not have their own private account, but only access to the account which was shared with them.
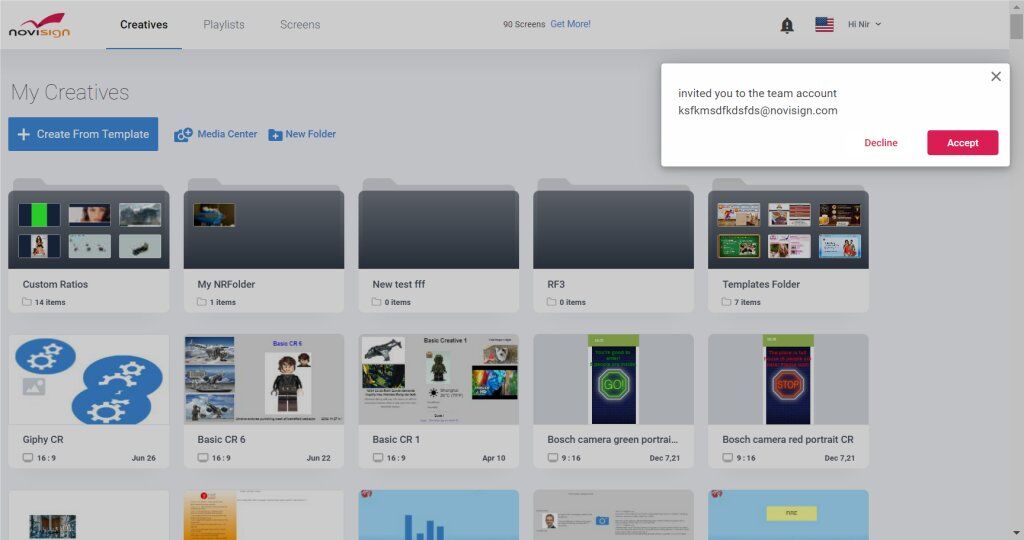
And this is how it looks like: