The Smart Switch widget (originally developed during the COVID-19 pandemic as the “Smart Entrance widget”) helps businesses control the number of people entering a compound. It works by using a mobile or touch-enabled device as a controller to increase or decrease the count of attendees. When the number reaches a predefined threshold, a stop sign appears. When entry is allowed, a green light sign is displayed.
Over time, the widget has evolved, offering an enhanced user experience, expanded functionality, and a new name: Smart Switch widget.
How Do I Set It Up?
Setting up the Smart Switch widget is quick and easy:
Open the Studio Composer and add the Smart Switch widget to your creative (you’ll find the Smart Switch widget in the left-side widget panel).
Customize the statuses, images, and behavior (such as idle timeout and transitions).
Save your creative and assign it to a screen that will show the dashboard panel.
Copy the controller link and open it on a touch device (smartphone or tablet) to control the widget in real time.
Alternatively, you can embed the controller into another creative for kiosk-style use.
Smart Switch Panel Structure
The widget is divided into two sides:
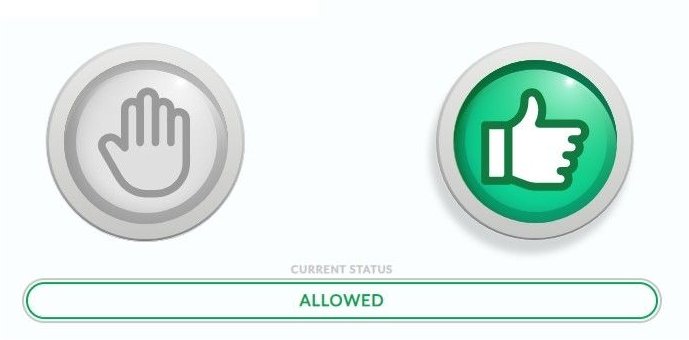
1. Controller Panel
Displays statuses like “Go” and “Stop”.
Functions as interactive buttons.
Designed to be used on a touch-enabled device (smartphone, tablet, or PC browser).
Pressing a button here updates the Dashboard panel.
2. Dashboard side
Displays the active status based on input from the controller panel.
Appears on the main creative shown on the large screen.
The controller panel looks like this now:
Additional Features
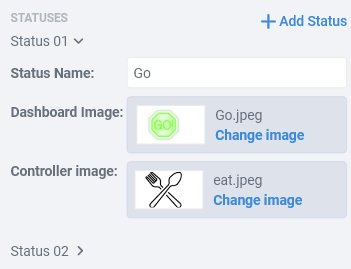
Add More Statuses
Now the widget supports up to six statuses (not just “Go” and “Stop”).
For each status, you can edit:
Status name
Image for the controller panel
Image for the dashboard panel
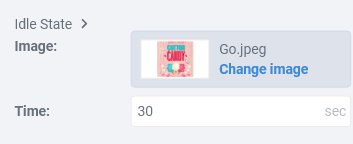
Idle State
A default status that is triggered after a defined period of inactivity.
Can include:
A custom image
The duration (in seconds) before it activates
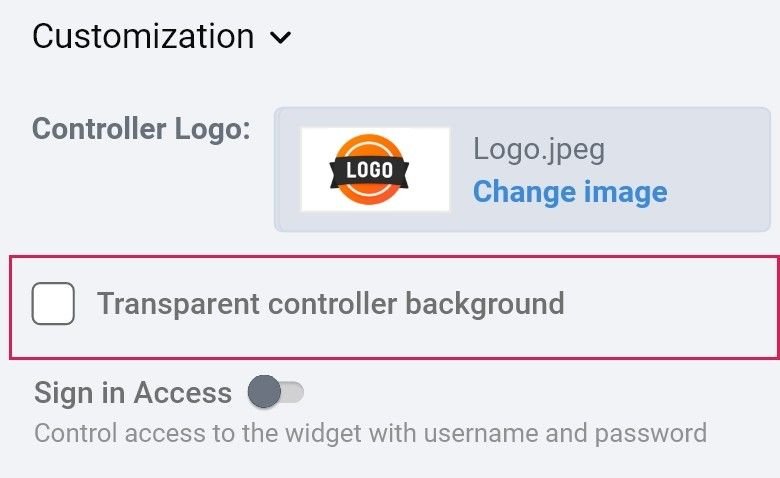
Transparent Background (Controller)
You can now add images, shapes, or other widgets behind the Smart Switch widget.
Enable this in the Customization section.
Additional customization options include:
Adding a logo to the controller or dashboard
Setting an offline state image
Sign-in credentials for secure access to the controller panel
Add Titles
Add a title to:
The controller panel
The dashboard display
Step-by-Step: Creating Your First Smart Switch Widget
Step 1: Add the Widget
Drag the Smart Switch widget into your creative from the widget panel.
Step 2: Customize
Set a Title and select whether it will be visible or not.
Create at least two statuses with:
A name
An image for the dashboard
An image for the controller panel
A display duration in seconds
Step 3: Configure Idle State (Optional)
Toggle Idle State ON
Set inactivity time before it triggers ( (that is the time it will wait during inactivity, and will automatically appear).
Step 4: Save the Creative
Click Save
Setting Up the Controller Panel
Option 1: Use on a Touch Device
Click “Copy controller link”
Open this URL on a smartphone, tablet, or PC browser which will be used as the controller of this particular entrance.
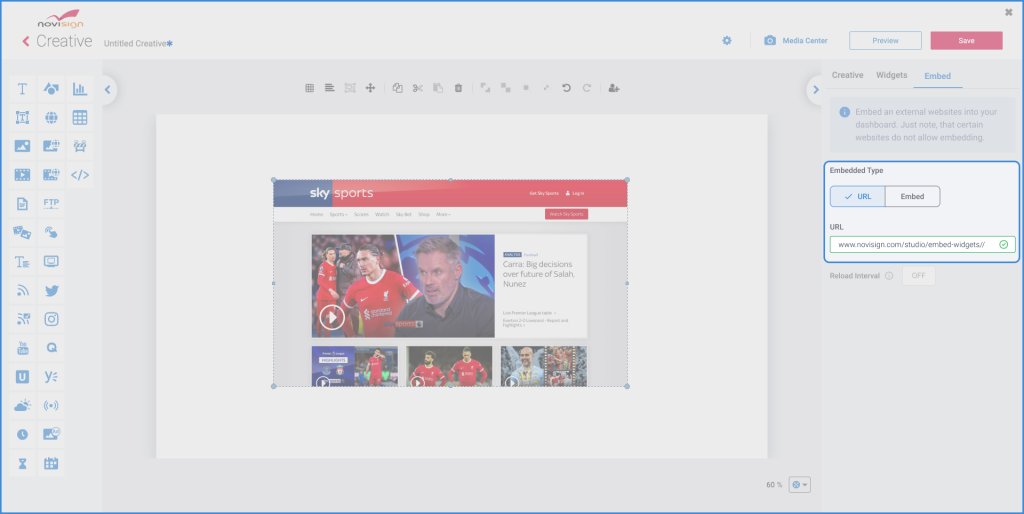
Option 2: Embed Controller in a Creative (NoviSign App)
Create a new creative
Add the Embed widget
Paste the copied controller URL into the URL field
Click Save
Add this creative to a playlist assigned to a touch device (e.g., smartphone used as the controller)
Watch a Tutorial Video
Need a visual guide?
You’ll find the tutorial video on how to set up and use the Smart Switch widget step-by-step here: