Below you can find the recommended configuration for Android devices you will use as digital signage players. Android devices may include media players (also known as “TV box”, “set-top box”, “MiniPC” or just “player”; if the size is as a cigarette lighter it may be called “dongle”), tablets, smart TVs (also called “SoC” or “smart display” or “digital signage display”) and touch kiosks. As you can get many types of Android devices to serve the Android digital signage, we have gathered for you an optimal recommended Android device configuration that would work optimally for most of your sites. The main parameters to set on the Android device are date and time, notifications and updates. This is a live document which is based on our partners’ experience in the field, so it will be updated as we go on. Please send us any feedback and recommendations on the below so we can keep improving it.
Configuring the Android settings
- On your Android unit, connect a mouse (just for the installation procedure).
- Set the Wi-Fi network or LAN network connectivity.
- Under “Date & Time” set the timezone to your time zone.
- Turn on the the automatic date & time and the automatic time zone.
- If you have under the “Display” a sleep option, better set it to “Never”, as your device should be playing 24/7.
- Under “Security” check the “Unknown sources” checkbox in case you’d like to download our APK from our downloads website (this way you’ll be able to automatically upgrade the app) rather than from Google Play store.
- In case you would like to display your digital signage in portrait mode, you need that your signage player will support screen rotation. These days most of the Android based media players support this functionality, but some do not. The rotation option (assuming that your Android player has it)should appear under the “Display” menu, probably under a submenu called “Screen Rotation”, “Screen Direction” or “Screen Orientation”. There might be one or two ways for the roation (90 degrees or 270 degrees, which is upsidedown rotation).
- Under the “Accounts”, set a Gmail account (new or existing) to be used in the Google Play store later, in case you’d like to download the app from the Google Play market.
Installing the APK from Google Play store
This is one of few ways to install NoviSign’s APK on your Android device. Please notice that by using this way, you won’t be able to upgrade your app automatically, only manually (by starting the Google Play app, searching “NoviSign”, finding the app and clicking the “Upgrade” button) when there is a new available version.
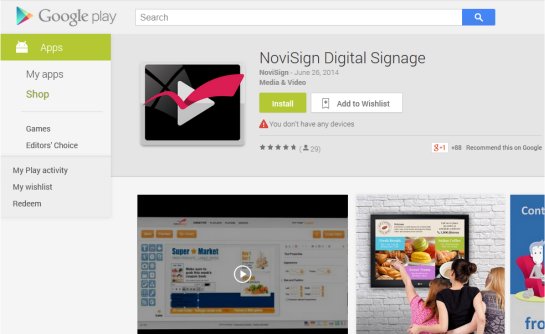
- Start the Google Play store app in your Android device (assuming you have it there, otherwise this installation way is irrelevant and you should move to the next suggested installation way).
- Search for “NoviSign Digital Signage” player application and install it.
- The app will be downloaded and installed within a few minutes.

Installing the APK from our downloads website
This is another way of a few ways to install NoviSign’s APK on your Android device. The advantage in this way, in case you have a rooted firmware on your Android device, is that you’ll be able to use the auto-upgrade feature of the app.
- Open a browser on the Android device (you can open the default Android browser or Chrome browser if you have it installed or if it came pre-installed).
- Surf to https://app.novisign.com/downloads – this is our downloads website.
- Click (means left-click) the APK file which appears in the top of the file list (it will look like this: novisign-rel-<the app’s version>.apk).
- The file will start to be downloaded to that device. It might ask you a question of how to download it (i.e. using ES3 file management app or else).
- You might have a link there (in the installation feedback popup window) for installing the app. Click it for start installing. If you already have an older version of the app which was installed as an APK (and not from Google Play), then it will be overridden by the new version (upgraded).
- If the APK did not start the installation process, go to the “Downloads” app you may have among the pre-installed apps in the Android unit. There you’ll find the APK file. Just click it and press “Install” and “Next” in order to complete the installation.
- In case the “Downloads” app cannot open the APK (rare, but may happen in some firmwares, that you get some kind of error), you need to open it in another way: open the “Explorer” app or another file management app. Search for the “Download” root folder on the Android device’ storage. Then enter that Download folder (which holds all the files which you downloaded to the unit before), find the APK and click it. From here it should be able to install.
- After finishing the installation, you’ll be notified and might have an “Open” link to open the app (if not, you can open the NoviSign app from the “Apps” section in your Android unit).
Configuring the app
- Start the NoviSign app by clicking the app’s icon (should be in the Android device’s home screen or under the “Apps” menu).
- The app will start and you will find yourself in the entrance page of the app (some call it the “orange screen”).
- Check the “Start player automatically on device startup” checkbox. This is impirtant if you’d like your app to run 24/7.
- In the screen textbox, you can type the screen key of the playlist which you already created, but the better way will be to login to your Studio CMS account, using the “Name” and “Password” controls on the top right corner and then, once you’re logged in, click the magnifying glass icon which is right to the screen key textbox, in order to choose your screen from your Studio account, rather than typing its screen key or pasting it.
- Press the “Go” button.
- The content will start downloading and once it has fully been downloaded, the playlist will start running.
- Let it run one full cycle to see that everything runs well.
- Stop the playback by right-clicking the mouse. You’ll be back in the app’s entrance screen.
- Access the app’s settings page by clicking the gear icon in the top right corner.
- Turn off the “Display Notifications” setting (under the “Display” block of settings), as you do not want to see any error or notification once this device goes live.
- If your Android device is in our recommended Android hardware list, please check out that page, to know if you need to change any of the other settings, according the device brand and model.
- Please notice that you might need to change some settings, either now or in the future, in order to have better performance or to overcome possible obstacles. One good example is the “Video To Video Transition”, which on some devices the “Auto/Performance” default chosen option will not function well, so you’ll have to change it to one of the other options or to “Disable” (in case of Minix Neo X10 mini you’ll have to change this setting to “High Compatibility”). Here is a link to the quick reference for the native Android app settings.
- Go back to the entrance screen of the app (by right-clicking the mouse).
- Press the “Go” button.
Optimization
- If you have installed any other application on the Android device and it is not necessary – please uninstall it. Sometimes other installed apps might affect the UI and prevent from the NoviSign app to start running the playlist after the device has just booted up.
- Before running the NoviSign player application, close any other running application.
Useful links
* If you like to see the installation manual of the native Windows player app, click here.
* If you like to see the installation manual of the Chromebox player app, click here.
* If you like to see the installation manual of Philips SoC smart TV, click here.
* If you like to see the installation manual of Sony smart Android TV, click here.
* If you like to see the installation manual of the WebOS 3.x player (LG smart TV) app, click here.
* If you like to see the installation manual of the Tizen +4 player (Samsung smart TV) app, click here.
* If you like to see the installation manual of the Amazon FireTV stick app, click here.

