This guide provides simple, step-by-step instructions to help you set up your Sony Bravia BZ series professional display. The goal is to quickly get your TV connected, registered, and ready to use with NoviSign for digital signage.
The provisioning process will prepare your TV so it can be managed remotely when needed, reducing the need for on-site assistance. By following this guide, you’ll be able to:
-
Register your TV using the link provided by support.
-
Connect your TV to the internet.
-
Complete the setup so the NoviSign signage app is ready to use.
NOTE: This document is intended for customers who are setting up Sony Bravia BZ displays for the first time.
Before starting the provisioning process, ensure the following tools, software, and access are available:
-
A Sony Bravia BZ series professional display (e.g., BZ30J, BZ35J, BZ40H, or later models).
-
Remote control for the TV.
-
Power supply connected and stable.
-
Ethernet cable (for wired setup) or reliable Wi-Fi access.
-
Access to the Wi-Fi or LAN network with the necessary credentials.
-
Contact NoviSign support and ask for a registration URL.
-
Open the URL.
-
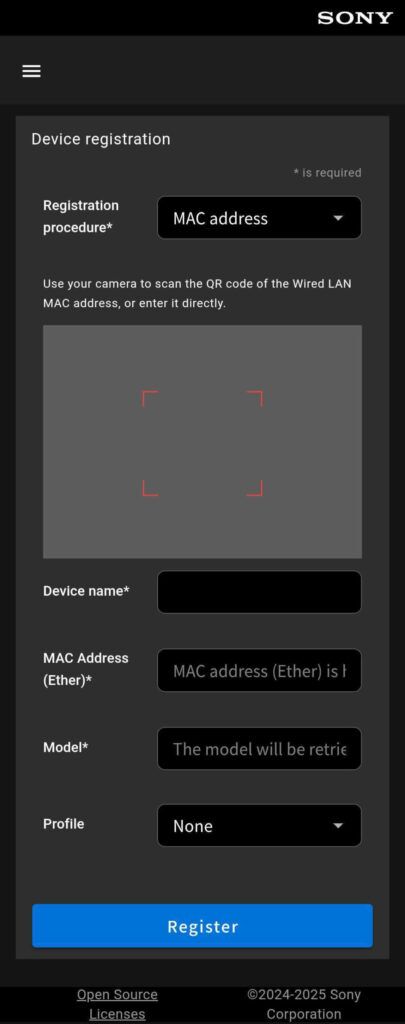
Either use the camera, or fill in yourself the following details:
-
Registration procedure: MAC address
-
Device name: Choose a name for the device
-
MAC Address (Ether): Get Ethernet MAC address from the TV box
-
Model: The model will be retrieved automatically based on the MAC address entered.
-
Profile: Choose NoviSign
-
Click Register
Now the device is registered.
- Contact NoviSign support and ask for provisioning URL
- Open the URL (NOTE: The URL will be available for 10 days)
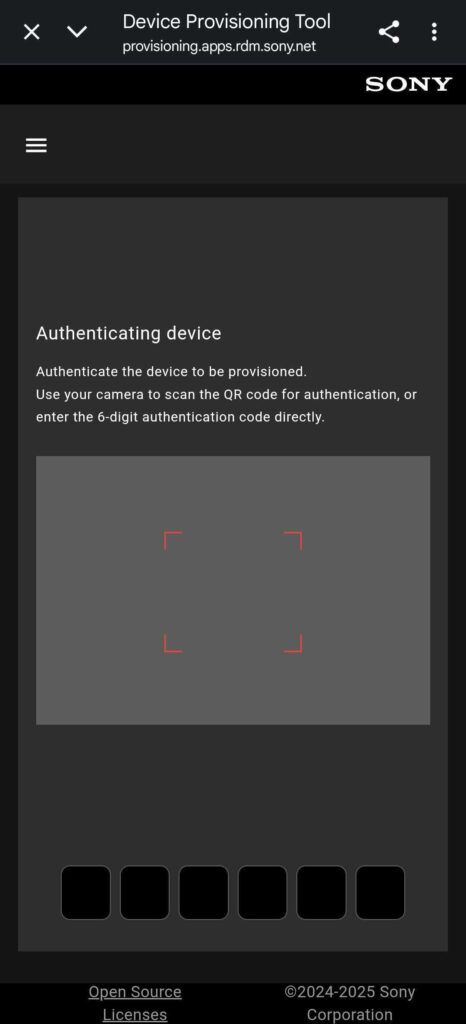
- Turn ON the TV
- You will see a QR code and a number below it (on wi-fi it might take a few seconds):

Point the camera to the QR code or enter it manually in the boxes at the bottom.
Once the provisioning process is complete – Android TV will be shown and then the NoviSign / Onsignage app will be loaded.
-
Error:
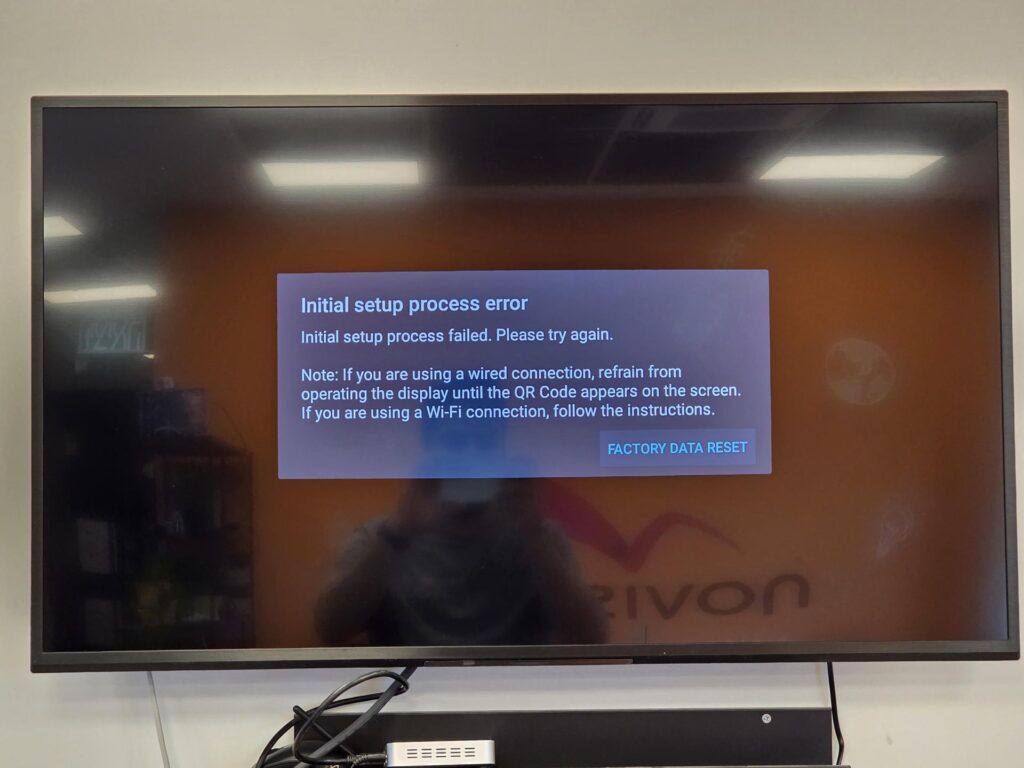
2. If this screen is shown white the Provisioning progress is running:
-
Try to click FACTORY DATA RESET.
-
If it fails again, try to connect to a different network (either via ethernet or wi-fi)
