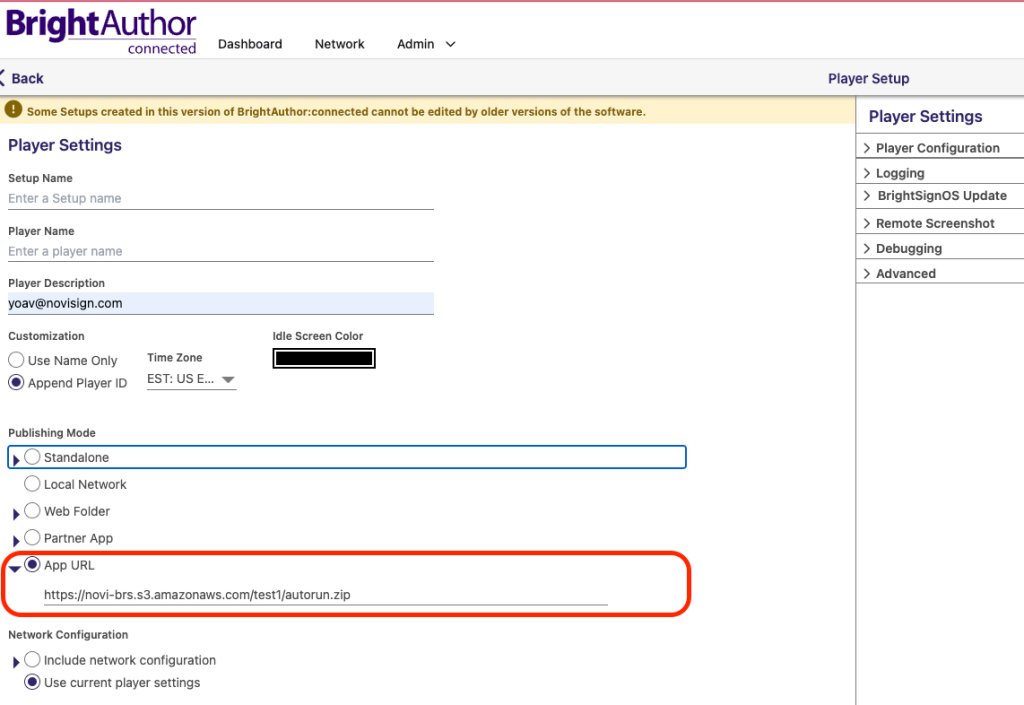
This guide walks you through the recommended method for setting up your BrightSign player using an App URL. By using this approach, you’ll enable remote updates and simplify ongoing content management through the BrightAuthor software.
App URL Setup Guide for BrightSign Players
To request a BrightSign App URL for your screen, please email support@novisign.com.
Important: Make sure to include the NoviSign screen key and the username associated with the screen in your request to help us process it faster.
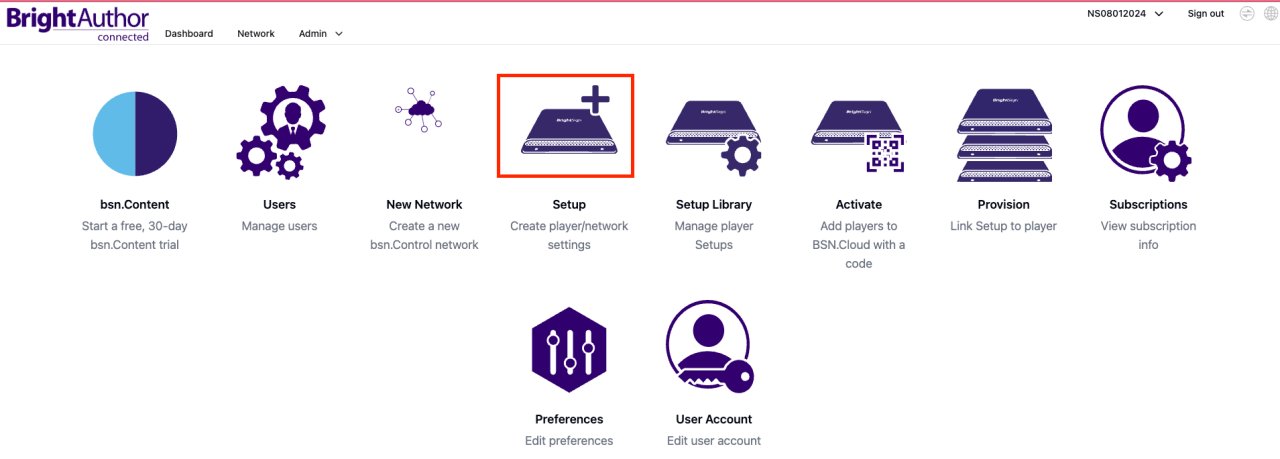
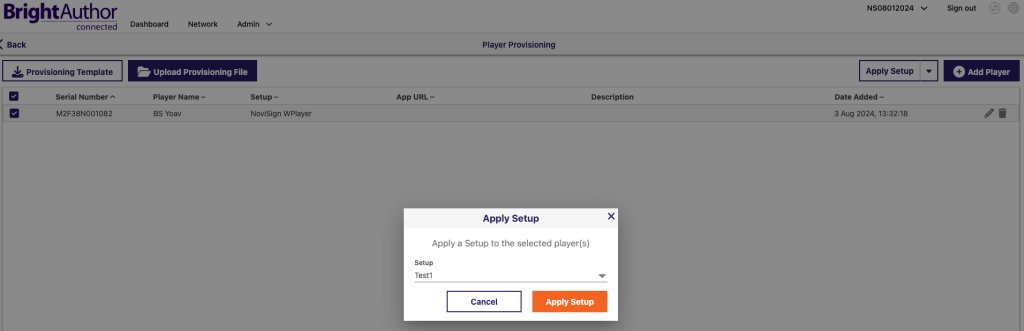
Go to BrightSign cloud: https://bsn.cloud/ and login to your user account (create one if you do not have).
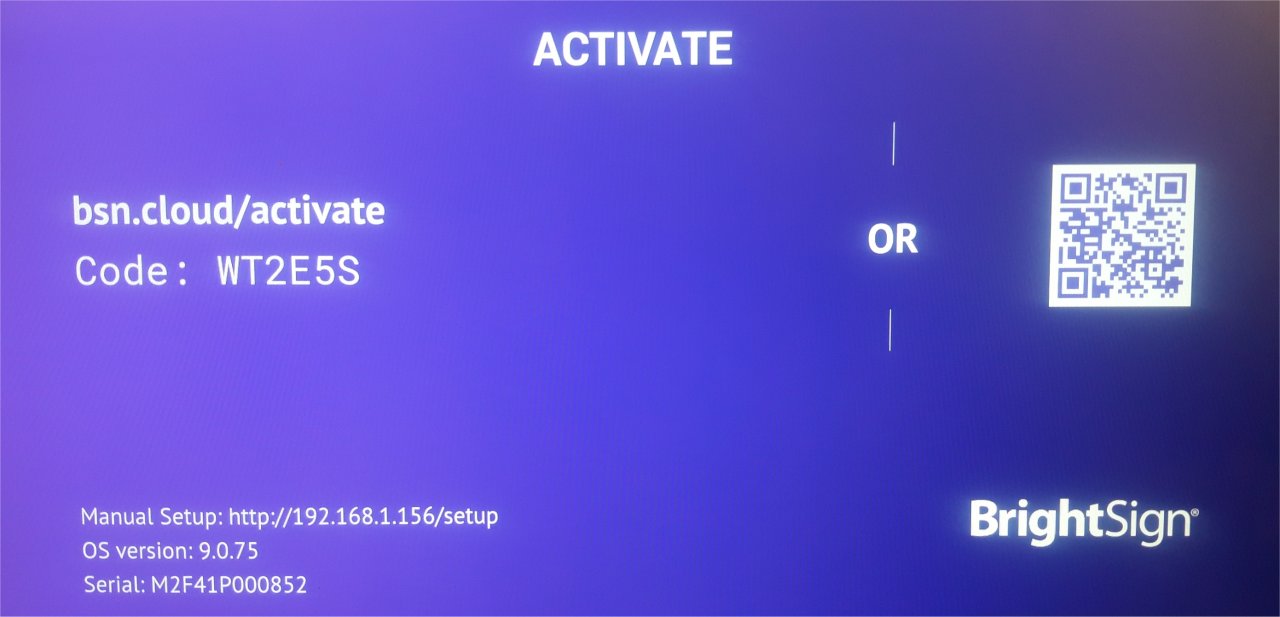
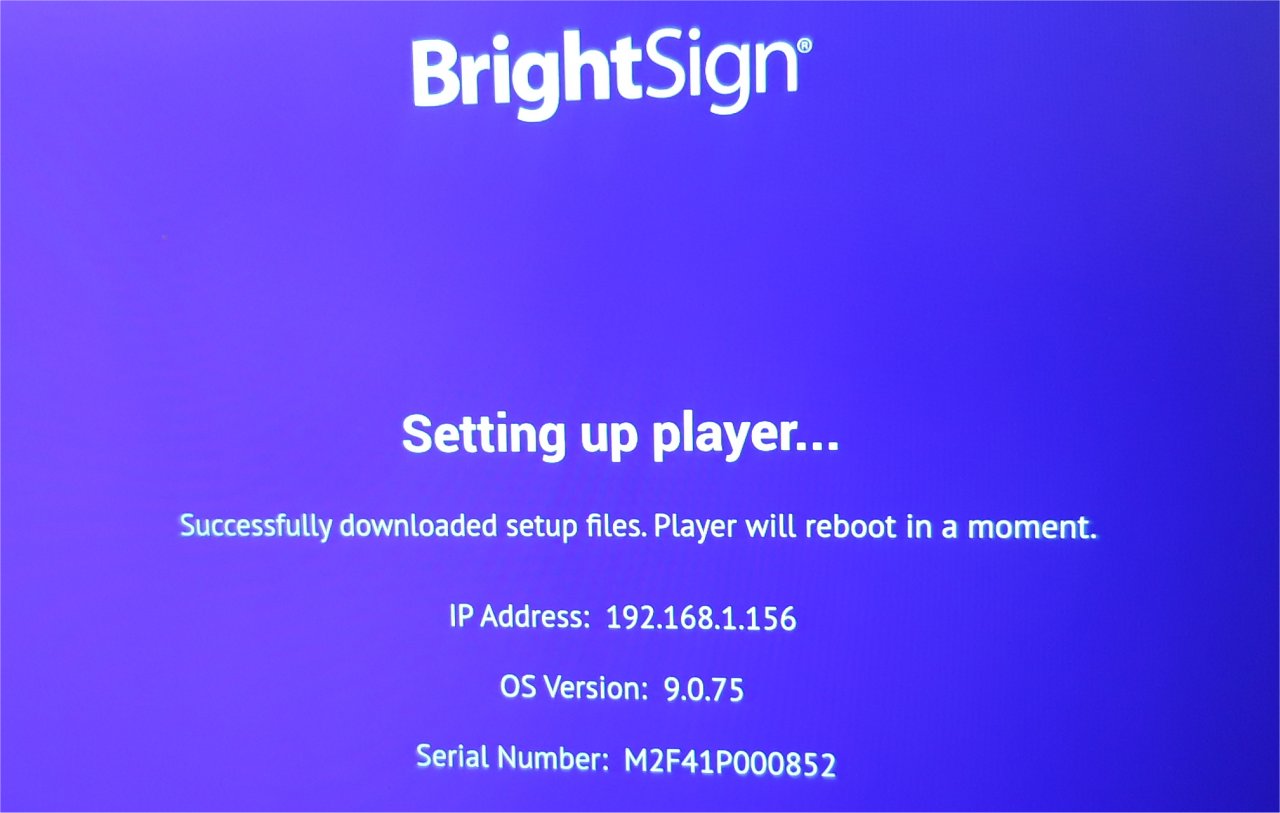
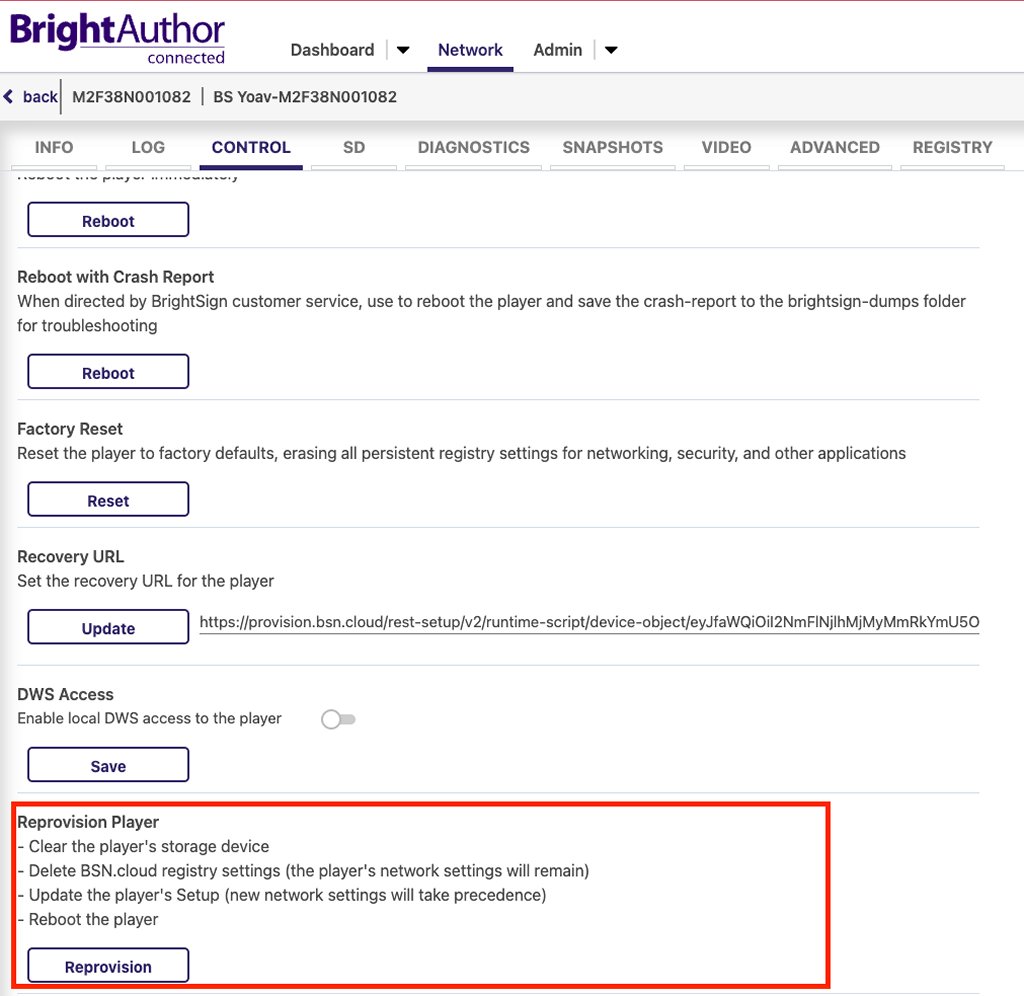
Take the unit you’d like to install the app (make sure the BrightSign player has micro SD card inserted) and turn it on. Once you started it you’ll get activation code which you’ll later need to use in your BrightSign account in order to start provisioning your unit with BrightSign (or actually “pair” it to your account). Once you did it, the unit will reboot itself (maybe even a few times) and will upgrade its firmware.
- Open BrightAuthor.
- In the admin dashboard, go to Setup to begin configuring the player.
- Give a name to your new setup (in the “Setup Name”).
- Name the player under “player Name”
- Add a description to the “Player Description”.
- For the Customization option, choose the “Use Name Only” and choose the timezone of yours.
- In the Network Setup section, choose your network type (Wired or Wireless) and configure the player’s IP settings.
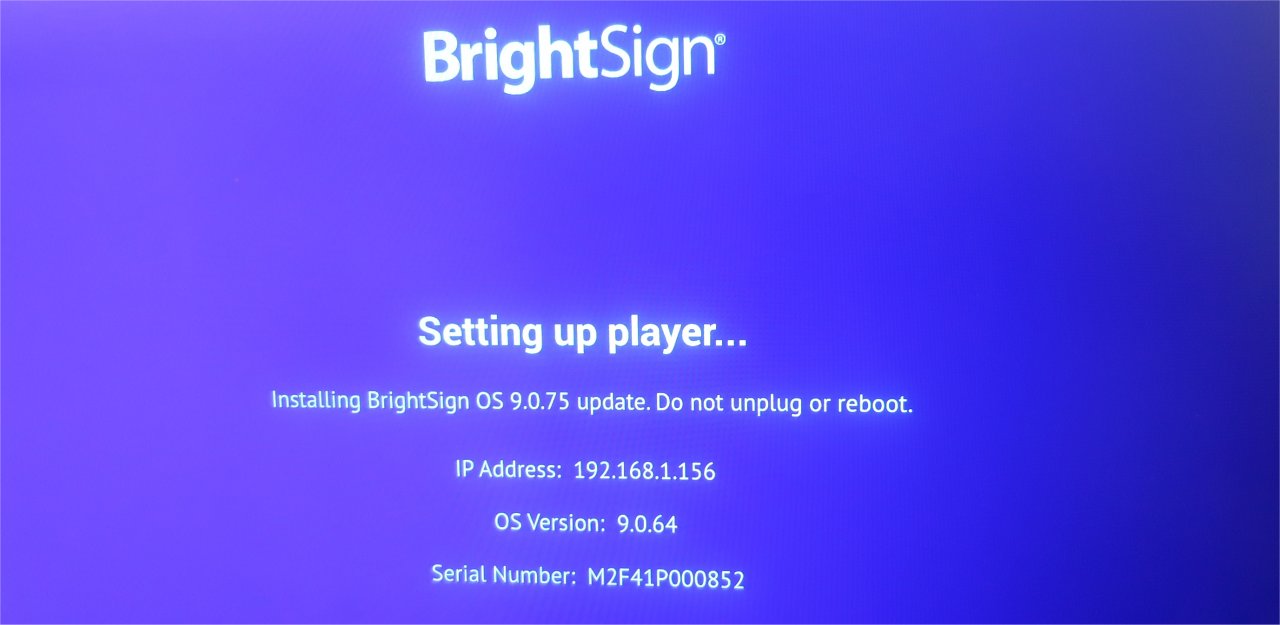
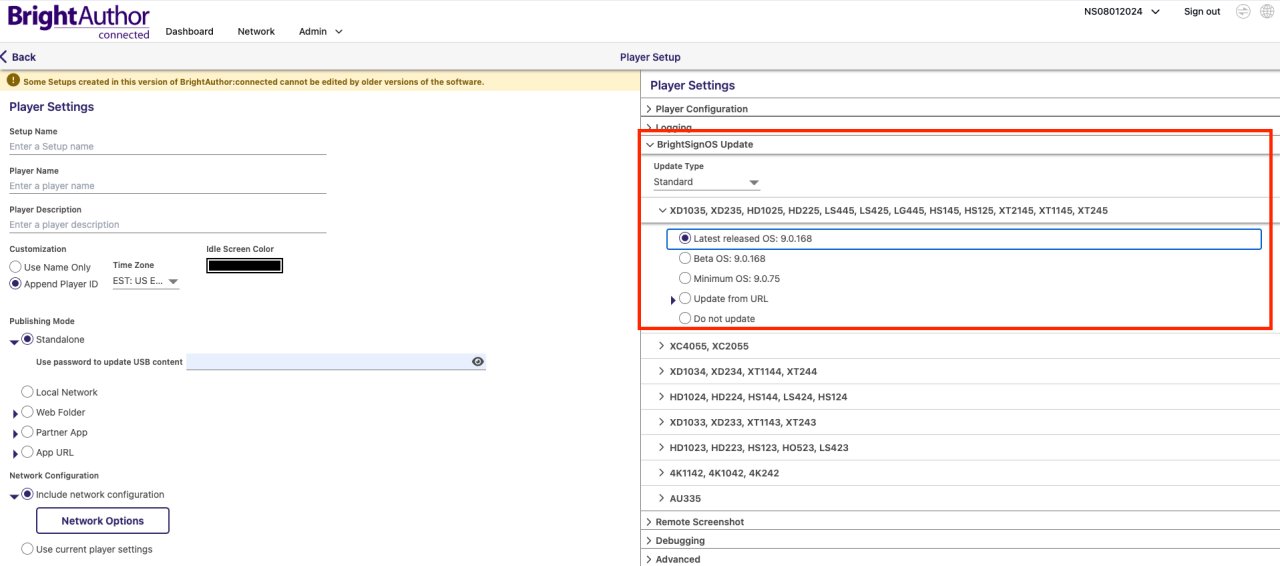
Keeping your BrightSign player’s OS updated is crucial for stability and new features. Follow these steps:
- In the Setup screen, navigate to the Firmware Update section.
- Select Check for BrightSign OS Updates and enable Automatic Updates to ensure the player always runs the latest firmware version. Make sure to select the correct player model (in this example the screenshot references the following player models: XD1035, XD235, HD1025, HD225, LS445, LS425, LG445, HS145, HS125, XT2145, XT1145, XT245).
- In the Setup screen, locate the App URL field.
- Paste the BrightSign App URL you received from NoviSign (with ZIP extension). This URL allows the player to download and run content directly from the CMS.
Here is a sample URL: https://novi-brs.s3.amazonaws.com/test1/autorun.zip - Save the setup (by clicking the button “Add Setup to Library” in the bottom).
- Now if you click the “Setup Library” you’ll be able to see the new setup which have just created.
- Provision the Player on the Network.
- Apply the setup to the player.
- Go to the Admin tab in BrightAuthor.
- Select the Provision option to provision the player on the network with the new App URL. Here you should see all your units.
- Check with check box the one which you’d like to provision.
- On the right side click the “Apply Setup” and choose the new setup which you created.
- Go to Network menu, choose the unit, click “Control” and then scroll down to “Reprovision”. Click it.
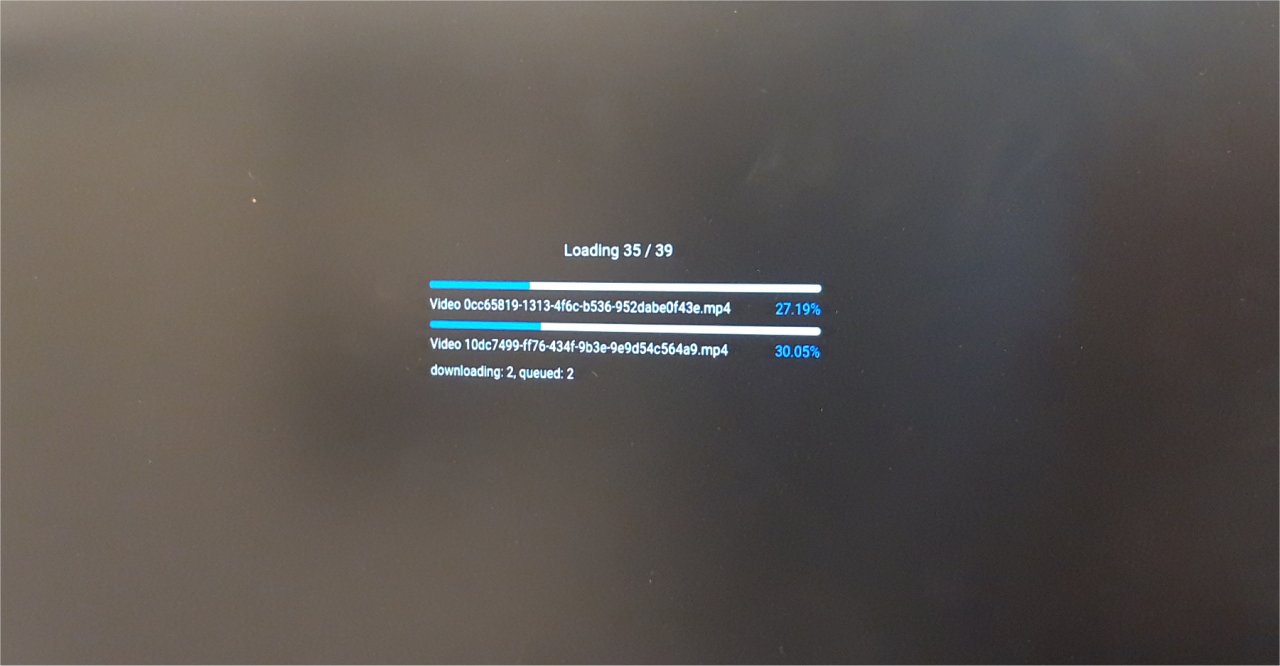
Once done, the player will reboot and apply itself all settings with the app and then begin running the content.
If the player doesn’t boot correctly, content doesn’t display, or OS updates fail, double-check the following:
- Ensure the App URL is correctly entered.
- Verify network connectivity (especially if using wireless).
- Check the Firmware Update settings to ensure the player is running the latest BrightSign OS version.
- Contact NoviSign support if issues persist.