
The NoviSign Android player app now supports dynamic RFID events, giving you a more flexible and powerful way to interact with your digital signage content.
Dynamic RFID Events
What Are Dynamic RFID Events?
Previously, if you wanted to use RFID (or barcode) to trigger creatives in a playlist, you had to manually assign a specific event to each creative.
With dynamic RFID events, the process becomes smarter and more automated.

How It Works
-
An RFID reader is connected to your Android device via USB.
-
When a product (with an RFID tag) is placed on the reader, it sends the product’s RFID code + Enter as a keyboard input to the Android box.
-
The NoviSign app captures this input and sends the product ID to your web server, which is pre-configured in the app.
-
Your server then responds with:
-
An event name (which the app will use to trigger a specific creative).
-
Optional: Additional event data (like a URL, title, or image path).
-
If a creative in your playlist is linked to that event name, it will be displayed immediately.
Typical Use Case
To make it more dynamic, the response from your web server can bring some more data in the event_data response. You can add, for example a URL, and then in the triggered creative you can put a webpage widget with a data expression in its URL property, like this: ${ID.url}, so the the displayed website will actually be chosen on the spot, by the response from the server! This way you just use one creative and one or more events, but with many options for displaying different websites.
In the above example you should have a website that can get the request and send a response. In that example, there was a data event key called “url“.
Last note: if the RFID code is not in the list which you have in the web server, then the RFID code will be counted as the event value itself for the app (and in that case, if you have set a creative to be triggered by that event, it will be triggered).
What you need
-
An RFID reader and RFID passive tags (to attach to your products).
-
A web server with an API that can:
-
Receive the product code from the app.
-
Match it with an event name ( It should have a table there (which you can edit) that binds product RFID codes (as they are in the RFID tags) to event names (as they are in NoviSign’s system).
-
-
A NoviSign playlist with creatives set to trigger by events.
Setup – Admin Tool Configuration
Before configuring Studio:
-
Contact NoviSign Support
-
Request to have the required events added to your account
NOTE: Events must exist in your account before they can be selected in Studio.
Setup – Studio Configuration
Create the Creatives
In Studio → Creatives:
-
Create an Event Creative
-
This creative will play only when an event is triggered
-
-
Create a Default Creative
-
This creative will play when no event is active
-
Create the Playlist
-
Create a new playlist
-
Add both creatives to the playlist
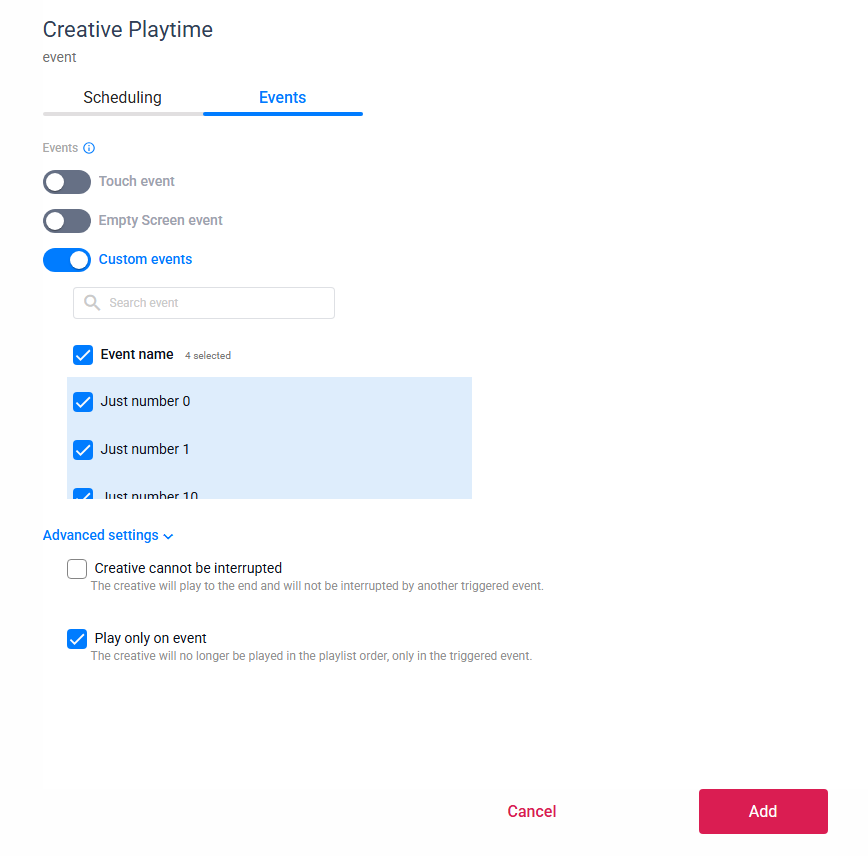
Assign the Event Trigger
-
Click the schedule icon on the event creative
-
Open the Event section
-
Select the relevant event name
-
Enable Play only on event
Create the Screen
-
Create a screen
-
Assign the playlist to the screen
Step 3 – Android Player Setup
Basic RFID Setup
Use this setup if you want to trigger creatives directly by event value.
Steps
-
Open the NoviSign app on your Android device.
-
Tap the gear icon to open Settings.
-
Scroll to Advanced.
-
Set RFID Reader to ON.
-
Exit Settings by right-clicking three times.
-
Log in to your NoviSign account.
-
Select the appropriate screen.
-
Tap Play to start playback.
How it works
-
The RFID value (or typed number) is treated as the event name
-
The creative configured for that event will play immediately
Advanced RFID Setup (Server-Based / Dynamic Events)
Use this setup if you want your server to control which content appears and pass dynamic data.
Steps
-
Open the NoviSign app on your Android device.
-
Tap the gear icon to open Settings.
-
Scroll to Advanced.
-
Set RFID Reader to ON.
-
Scroll down to IoT Remote Events and configure:
-
Enable Remote Events → ON
-
Event Name Prefix → Leave as
ALL -
Custom Remote Events API URL
→ Enter your server endpoint -
Integration API Key (optional)
→ Enter if required by your server
(sent asapi-keyheader)
-
-
Exit Settings by right-clicking three times.
-
Log in to your NoviSign account.
-
Select the appropriate screen.
-
Tap Play to start playback.
How it works
-
The scanned RFID value is sent to your server
-
The server returns:
-
An event name
-
Optional event data
-
-
The player triggers the matching creative dynamically
When Are IoT Remote Events Required?
IoT Remote Events are optional and are only required if you want dynamic, server-based behavior.
You do NOT need IoT Remote Events if:
-
You want to trigger creatives using:
-
Fixed event numbers
-
RFID values used directly as event names
-
-
You are not using a web server
-
Each event maps directly to a predefined creative
➡️ In this case, the RFID (or typed value) is treated as the event name itself.
You DO need IoT Remote Events if:
-
You want your server to decide which event should run
-
You want to return additional event data (URL, title, image path, etc.)
-
You want one creative to display dynamic content using data expressions (e.g.
${ID.url}) -
You are mapping many RFID tags to fewer creatives
In this case, the Android player sends the scanned value to your server and waits for an event response.
Triggering an Event
To trigger an event manually for both setups:
-
Connect a keyboard to the Android player
-
Use the numeric keypad
(the small keypad on the right side of the keyboard) -
Type the event number
-
Press Enter
The creative associated with that event will appear immediately.
This method is useful for:
-
Testing event behavior
-
Demo environments
-
Setups without an RFID reader
Setup Complete
Once configured, Dynamic RFID Events allow your Android player to:
-
React instantly to RFID scans or keyboard input
-
Display event-driven or fully dynamic content
-
Scale easily without creating multiple creatives
Your setup is now complete.