The Data Source feature allows you to connect external data services directly to widgets in NoviSign Studio. This enables screens to display live and dynamic content without requiring complex integrations or developer assistance.
With this feature, content creators can configure integrations directly from Studio Settings and then use the connected data sources inside widgets through dynamic properties in the Composer.
This makes it easier for non-technical users to connect external systems and automatically display updated data on their screens.
Supported Integration (Phase 1): Google Sheets (CSV).
Plan Availability: The Data Source integration feature is available only for accounts on the Business Plus plan and Premium.
Upcoming Integrations: Support for Amadeus and Toast integrations will be introduced in upcoming releases.
How Data Sources Work
The feature works in two stages:
Configure the Integration in Studio Settings
Use the Data Source inside a widget in Composer
Once an integration is configured, NoviSign automatically creates a Data Source entry at the account level. This data source can then be selected inside widgets when configuring dynamic properties.
This allows widgets to pull live data from the connected service.
Creating a Data Source Integration
To use Google Sheets as a data source, you must generate a public CSV URL from your sheet.
Steps to Get a Public CSV URL:
Go to Google Drive
Sign in to your Google account
Use a non-organization (personal) Google account
Open an existing Google Sheets file or create a new one
In the top menu, click: File → Share → Publish to the web
In the popup:
Select Link
Choose Entire document or a specific sheet
Select format: Comma-separated values (.csv)
Click Publish
Copy the generated public URL
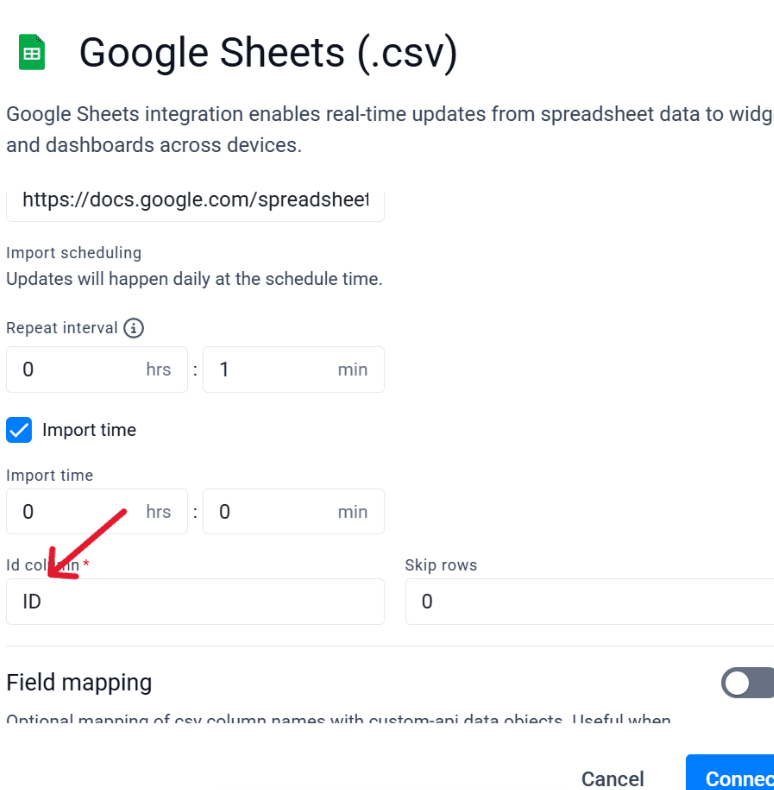
Paste this URL into the Document URL input field in NoviSign Studio
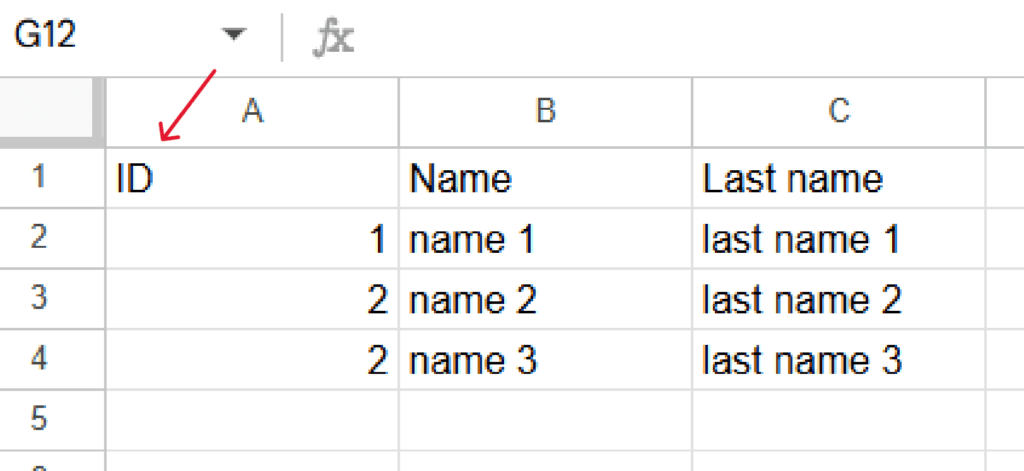
The “ID column” field in the API Integration pop-up must exactly match the name of the first column in your Google Sheet (case-sensitive)
For example:
If your first column in Google Sheets is named ID, then the ID column field in the integration should also be ID
If your column is named test, then you must enter test in the integration field
This column is used as a unique identifier for each row
Each value in this column should be unique
If the names do not match exactly, the integration may not work as expected
To connect an external data source to NoviSign, you first need to create an integration from the Settings page.
In the Studio, click Settings in the top navigation.
Select the API Integration tab.
Click Add new integration.
From the dropdown menu, select Google Sheets.
Once your data source integration is configured in Studio Settings, you can load and test the data directly inside your Creative.
How to Load Data
Go to the Creatives tab and open your Creative
In the right-side panel, scroll down to Load Parameters
Under API Integration, click Add
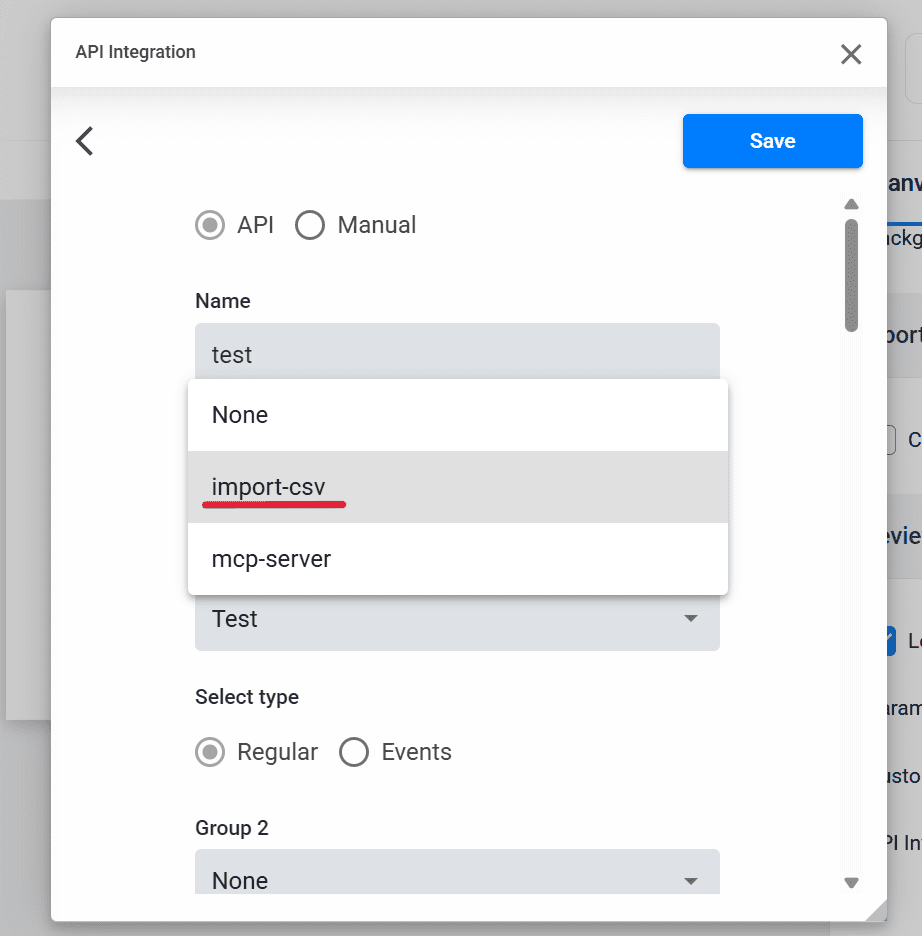
Configure the Integration
In the Integration types dropdown, select: import-csv
In the Select item dropdown, choose the name of the integration you created in the Settings tab
In the Name field, enter a name for this integration (This name will be used later when binding dynamic data in the widget)
Scroll down and click Test
Result:
The data from your CSV (Google Sheets) will appear in the preview section
This confirms that the integration is working correctly and the data is being pulled successfully
After loading and testing your data, you can bind it to widgets and display it on screen.
How to Display Data
Add a Text or Label widget to your canvas
Click inside the text field
Type: ${
This will open the Compose JSON dialog
Click Insert a dynamic value
Select @customapi
Click Insert a dynamic value again
Choose the API Integration you created in the previous step
Select the desired dynamic property (e.g., Name, Last name, etc.)
Result:
The widget will now display data dynamically from your connected data source
The content will update automatically based on the integration
Managing Integrations
Data sources and integrations are synchronized with the configuration defined in Studio Settings → API Integrations.
Important notes:
Disabling an integration in Studio Settings will not affect content that has already been saved and sent to players for playback.
The integration settings can be managed directly from Studio without requiring access to the Admin panel.
Data Types Supported
The Data Source feature can retrieve and display different types of content depending on the response returned by the integration.
Supported data types include:
Text
Images
Video
These values can be mapped to supported widget properties inside the Composer.