We have added a new queue (line management system) widget to the online Studio which allows you to manage a line, like you have in a reception of a hospital, clinic, post office, stores, etc. In this kind of virtual queue, there is no use for papers anymore (if you need to use paper, we have a simple queue feature, as well). The visitor needs to use his/hers smartphone to scan a QR code or type a tiny URL, then the smartphone browser will give the visitor a number in the line and will also tell him/her when the line arrives.
We also upgraded the Chrome OS, Windows and Android player apps to support the new widget.
Studio v4.2.25-0-9
Queue widget
So, how do you create a line management system? Here are the steps:
1. First thing is to create a blended creative in your account in the online Studio (app.novisign.com), by pressing the “Compose” button from the Creative tab.
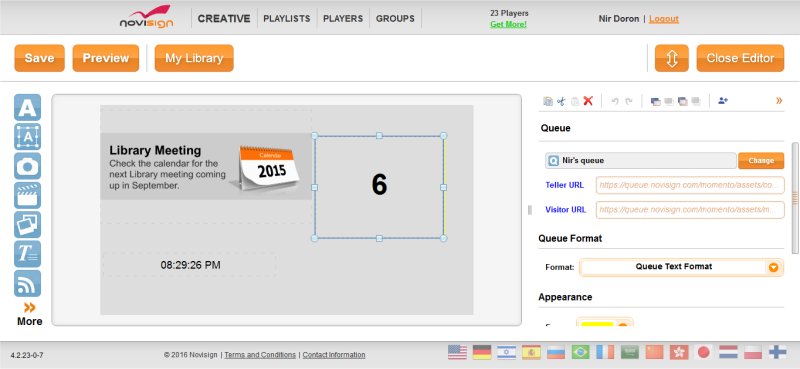
2. When you’re in the creative composer, drag the queue widget (has an icon of a “Q” letter) from the widget list in the left to the canvas in the center. This will open the queue list popup window. You can choose an existing queue or create a new one. You can later access this popup window by pressing the “Change” button which is in the properties pane of the widget, in the right side.
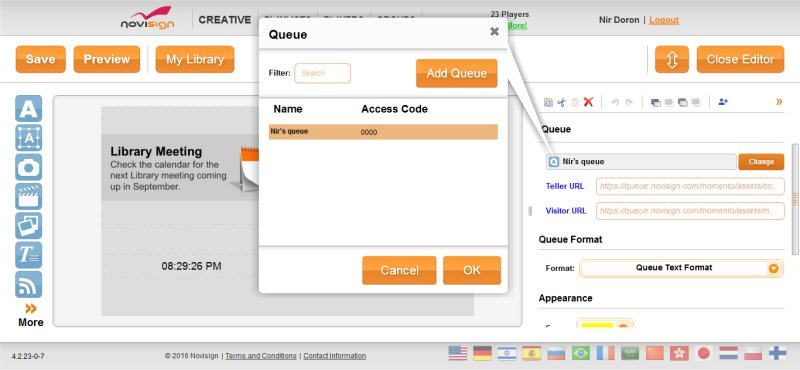
3. If you decide to create a new queue, just press the “Add Queue” button. Give your queue a name (will be used later to log into) and an access code (password). The queue is ready to go!
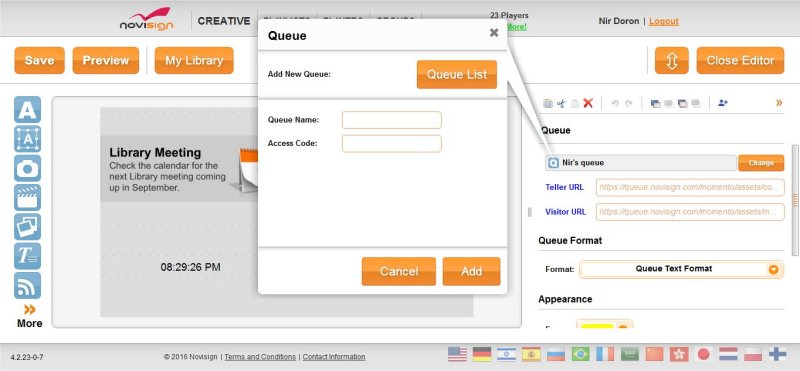
4. Now, just reshape, replace and set the style of the widget: this is the incrementing number which will appear on the digital signage screen in the venue.
5. The teller in the venue has his/her own user interface. The URL is specified in the queue widget’s properties (called “Teller URL”) and will be something like this: https://queue.novisign.com/momento/assets/console.html?n=<the queue name>
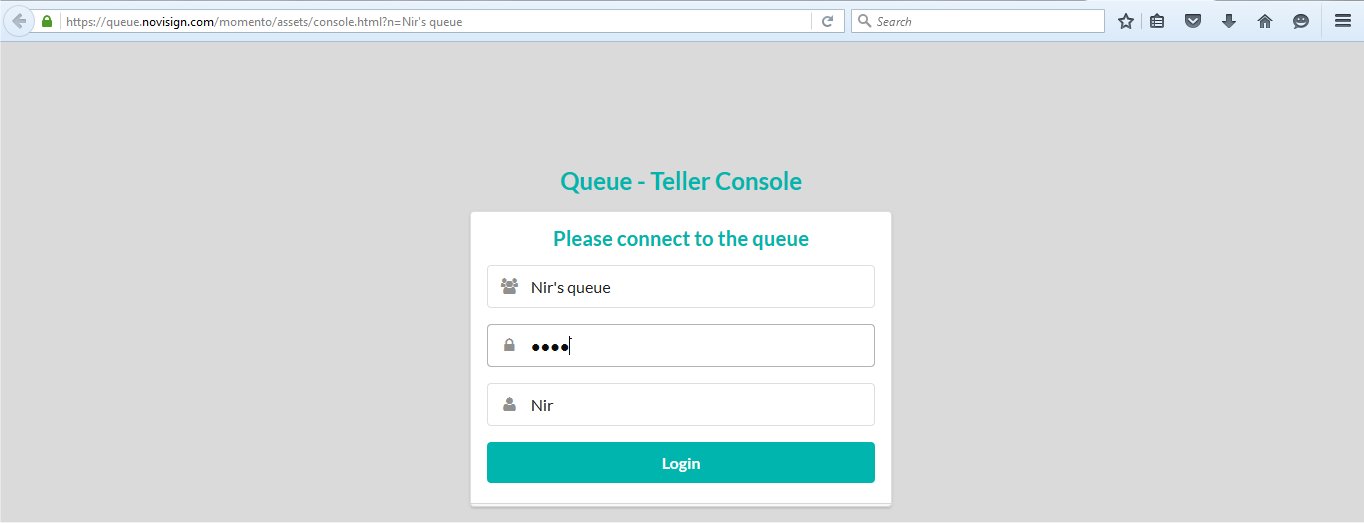
6. The teller needs to log in to the queue teller console, using the queue name, access code and also provide his/her name.
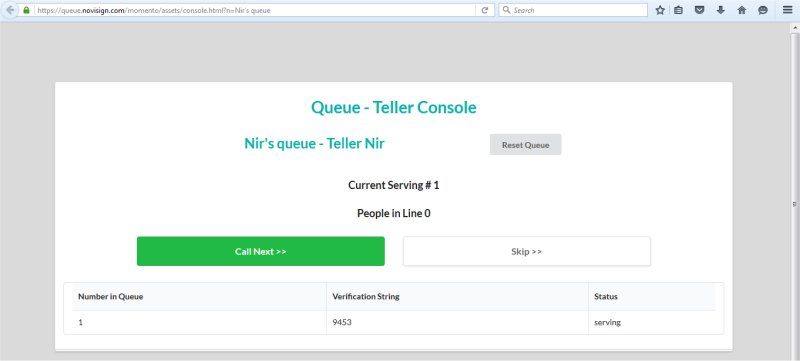
7. Inside the queue teller console, the teller can do 3 things: a) press the “Call Next >>” button, in order to call the next number to come to the desk; b) press the “Skip >>” button, in order to skip a number (a number which was skipped will appear in the bottom table as a skipped number, so the teller will be able to accept that number in a later stage, if s/he likes to); c) press the “Reset Queue” in order to reset the queue and make it start from zero. In the top part of the console, the teller can see which number is being served now and how many people are currently still waiting for their turn in the line. In the table which appears in the bottom of the console, the teller can see the details of the person who is being served at the moment, including his/her verification code (a combination of digits to verify that the person really has that number in the line) and details of people which were skipped.
8. The visitors in the venue should get their line numbers using their smartphone. How is it being done? They need to type a URL or a tiny URL or even better: scan a QR code. The visitor page has a URL which appears in the properties pane of the queue widget (called “Visitor URL”) and will be something like this: https://queue.novisign.com/momento/assets/mobile.html?q=<number>. To make it easier for your visitors, better create a QR code of this queue URL (you can use a web QR generator like this one: http://goqr.me/) and place that image as part of the blended creative, so the visitors will be able to scan it with their smartphones.
9. A virtual queue page will appear on the visitor’s smartphone browser and s/he will need to press the “Take a Number” button, in order to take a number in the line.

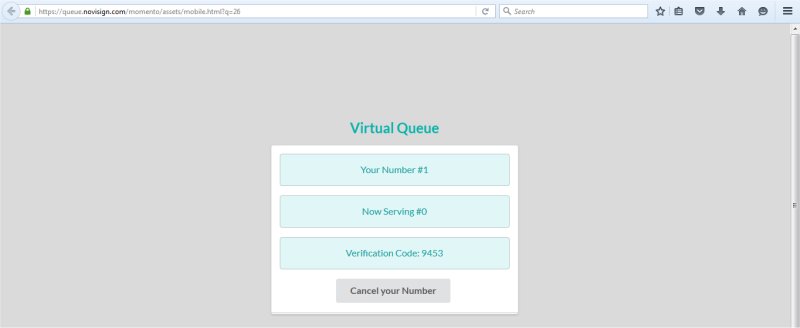
10. After taking a number, the visitor will see, on his/her smartphone his/her number, who is being served now and a verification code, which s/he might be asked to tell the teller.
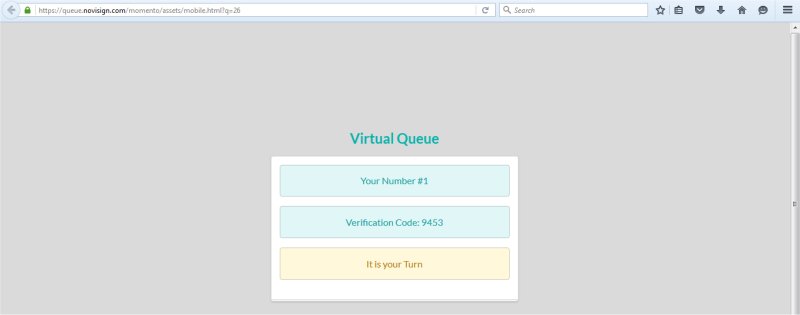
11. Once his/her turn arrives, s/he will see a proper message in his/her smartphone browser (if s/he hasn’t turned it off), telling him/her that “It is your Turn”.
Native Android player v4.3.7-0-12
Will be released very soon. Supports the new feature of the queue widget. Can be downloaded or upgraded from the Google Play market (just search “novisign” and click the app with the black background).
Air (Windows) player v4.1.0-0
Supports the new feature of the queue widget. The Air file can be downloaded from our download website: http://app.novisign.com/downloads/
Native Windows player v4.3.7-0-11 (beta version)
Will be released very soon. Supports the new feature of the queue widget. Can be downloaded and installed using this Windows signage app installation manual.
Chrome OS player v4.3.7-0-12
Will be released very soon. Supports the new feature of the queue widget. Can be downloaded and installed using this Chrome OS signage app installation manual.
 info@novisign.com
 +972 (9) 794-7643
 (646) 893-7770

