NoviSign Studio allows you to upload and use your own custom fonts inside creatives. This is useful when you want to match your brand identity or use fonts that are not included by default.
How to Upload Custom Fonts in NoviSign Studio
Overview
Important: Custom font upload is available only for accounts that are eligible for this feature under their subscription plan. It is supported on Business Plus, Premium, and higher-tier plans.
If you do not currently have access, please contact your account manager.
Before You Start
Please make sure you have your font files ready. In many cases, fonts are provided as a ZIP file that includes multiple styles, such as:
- Regular
- Bold
- Italic
- Light
- Black
Uploading multiple styles allows you to use different font weights in your designs.
How to Upload a Custom Font
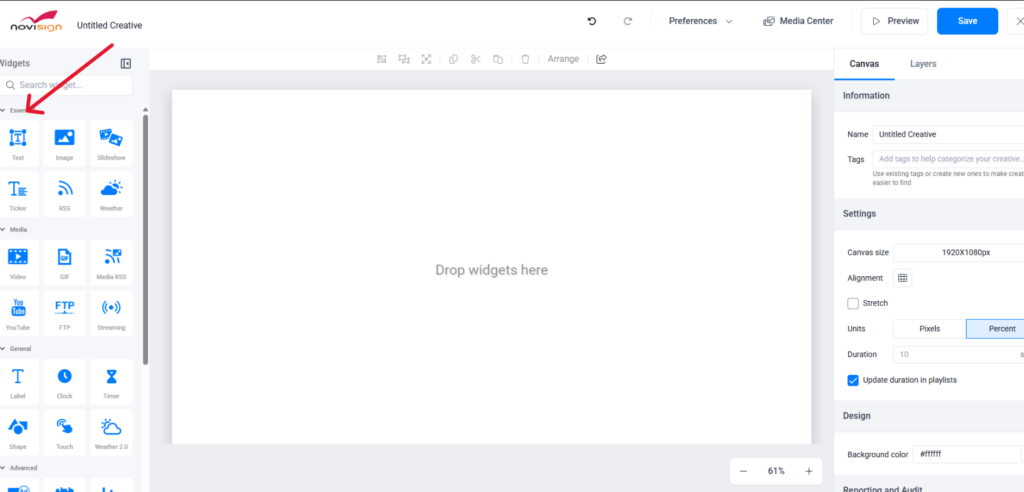
Open your creative in NoviSign Studio and add a Text Widget to the canvas.
Click inside the Text Widget.
In the font name section, locate the small arrow on the right side of the font field.
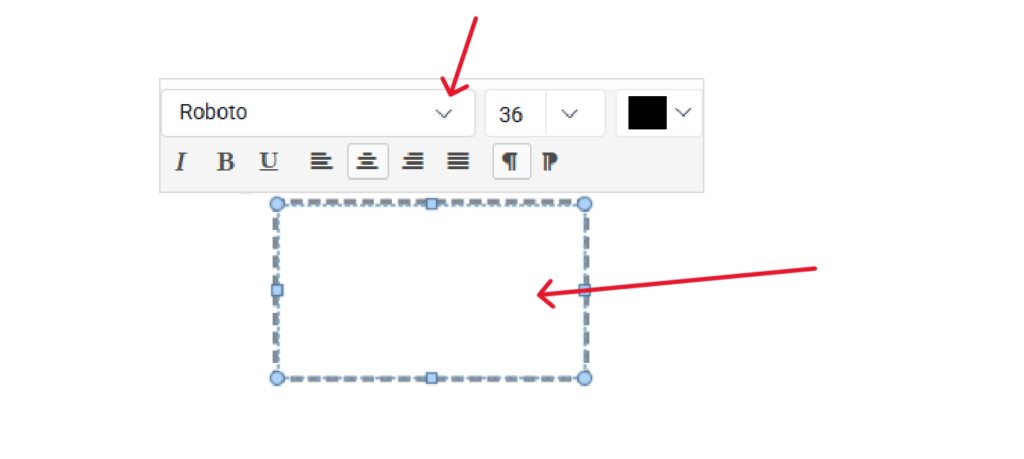
Click the blue cloud icon.
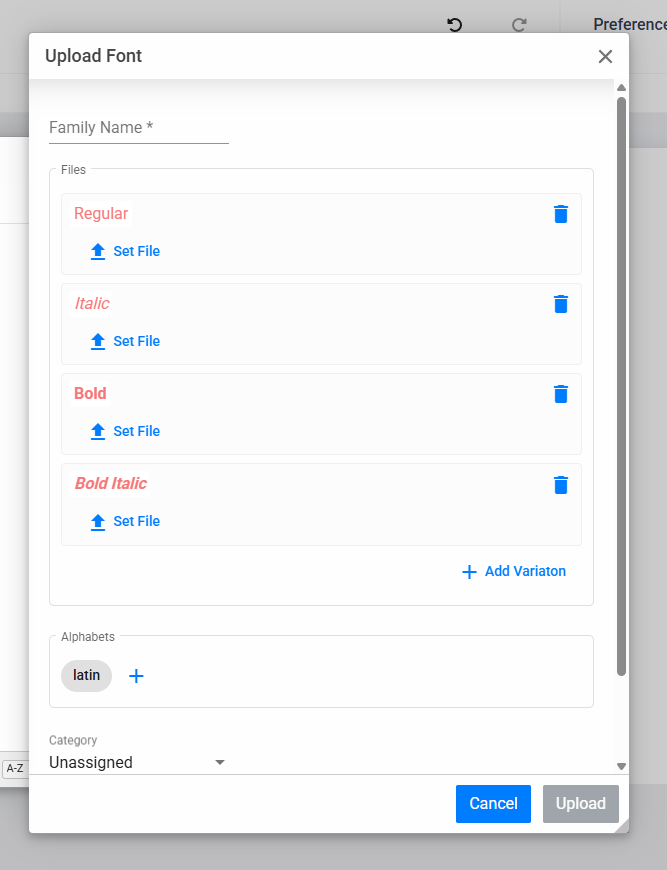
You will then see the available font file types that can be uploaded.
Select the relevant font files from your computer (for example: Regular, Bold, Italic, Light, Black).

Once the upload is complete, the custom font will appear in your fonts list and can be selected for your Text Widget.
Once the upload is complete, the custom font will appear in your fonts list and can be selected for your Text Widget.
Best Practices
- Upload all font styles together for the best editing experience
- Use clear font names to easily identify them later
- Keep a backup copy of your original font files
- If you need assistance with custom fonts or upgrading your subscription plan, please contact our support team or your account manager.