Required Action
- Log-in to your NoviSign account:
https://app.novisign.com/
Description:
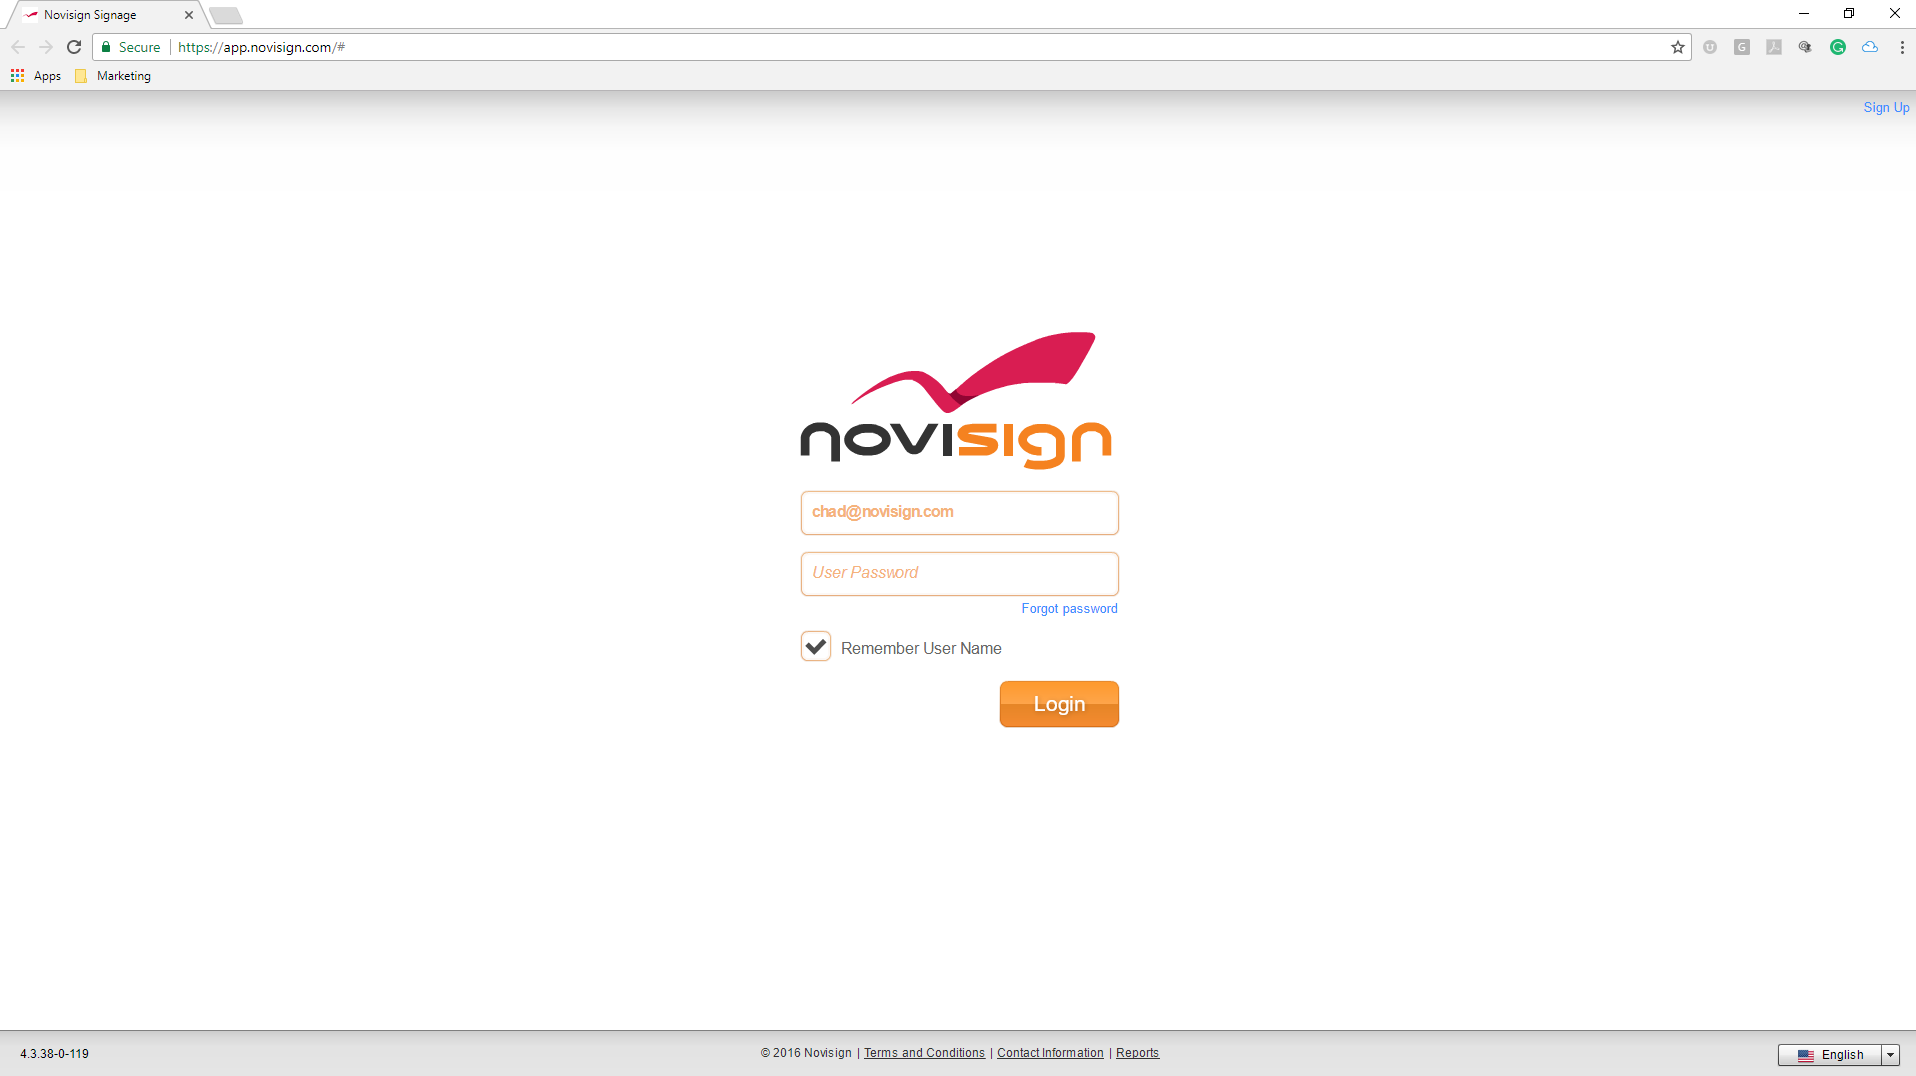
This is the website that you will go-to to log-in to your NoviSign Digital Signage account. Once logged in, you
will have full access to edit, update, and manage content. See “Image 1.0” for visual representation. After
logging in, the page will appear featuring a gray top bar that contains the NoviSign logo in the upper left
side with the following tabs “Creative,” “Playlists,” and “Screens.”
Related Information
Required Action
- Select the button titled “Compose.”
Description:
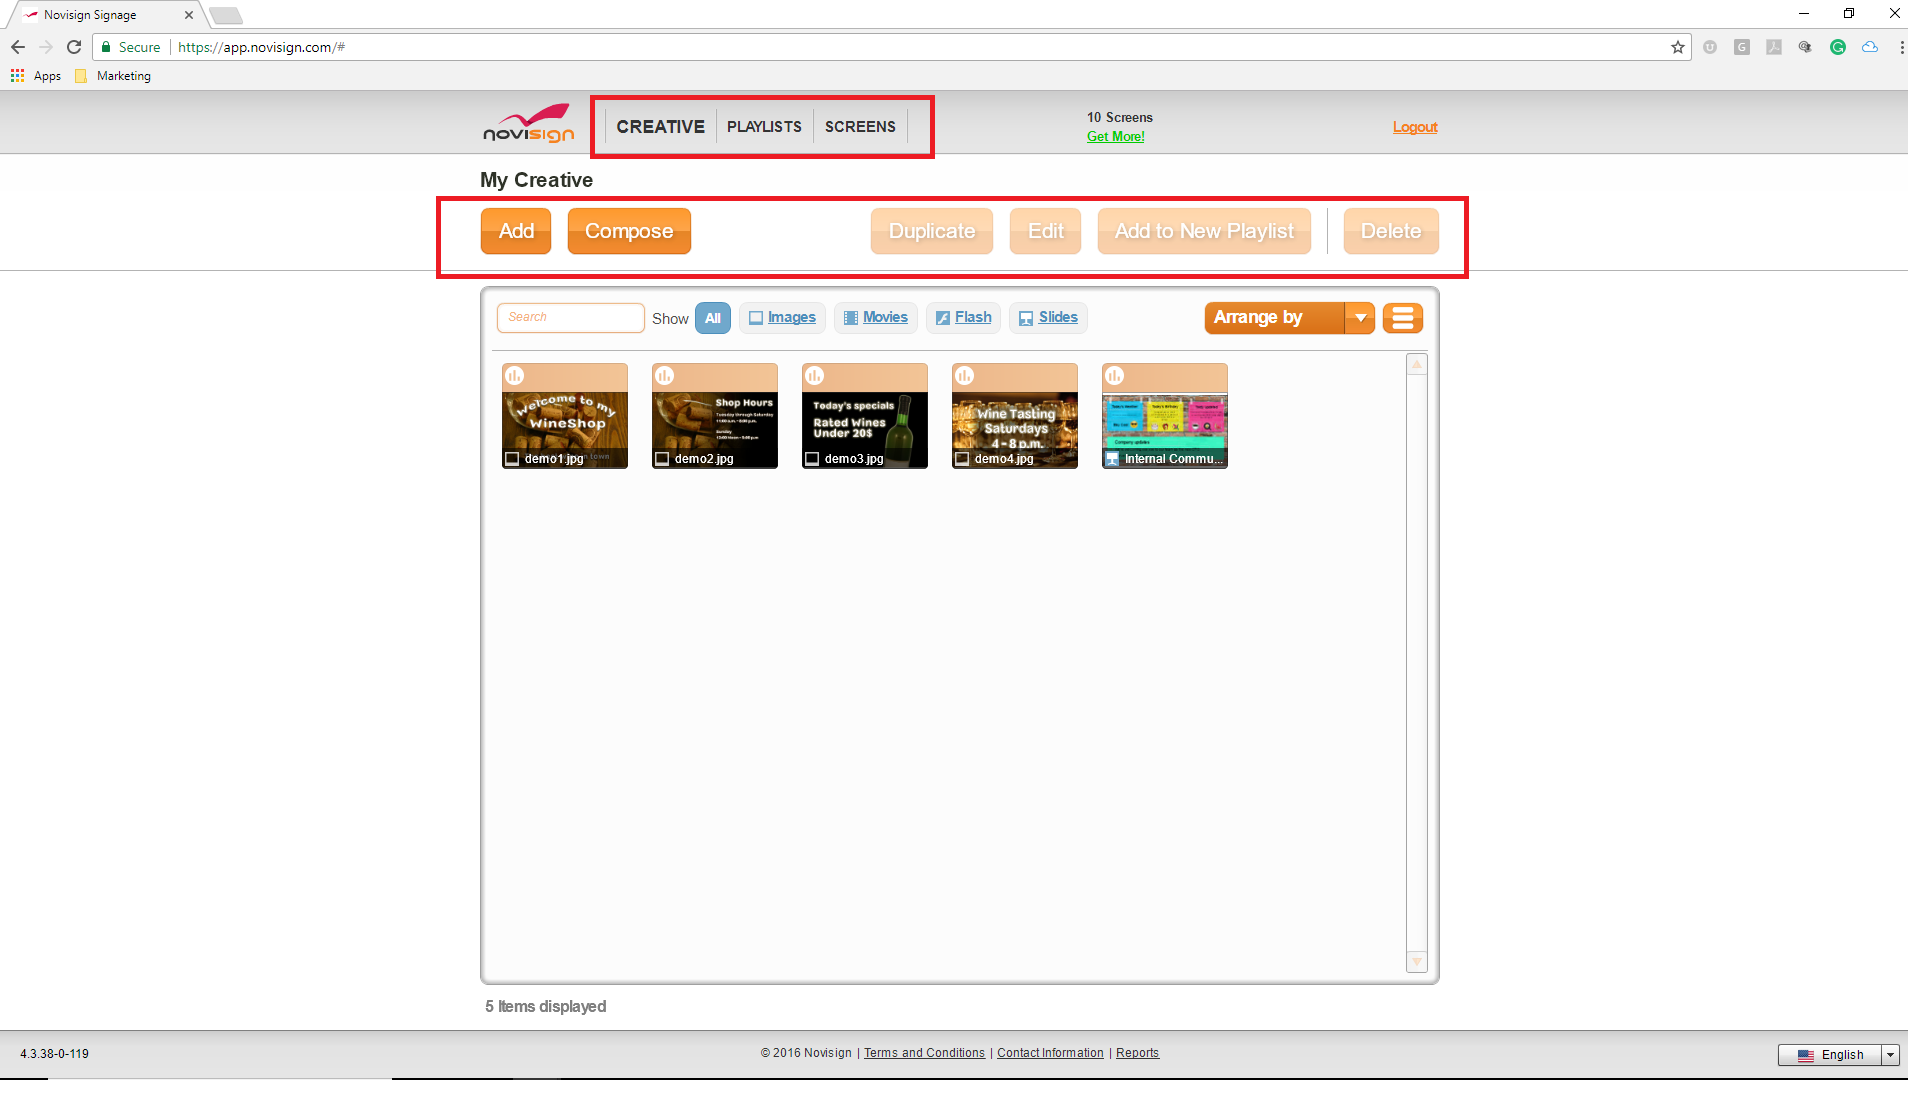
Your screen should look like “Image 2.0”. This page is called “CREATIVE.” At the top of the screen is a gray
bar with three tabs(just right of NoviSign logo) titled:
- CREATIVE: these are your creatives (the building blocks for any playlist).
- PLAYLISTS: this is the content (a playlist can be made of one or more creatives) to be assigned to
your media players. Schedule by week, day, hour and expire or by recurring times. - SCREENS: send your playlists to a single display or a group of displays
Under the grey bar are a series of orange buttons titled:
- Add: upload your media files to your Media Library (or just access it), where you have all your videos
and images stored at. - Compose: takes you to Creative Composer, to create newcomposed creatives (those with the cool widgets
within). - Duplicate: this makes a copy of an existing creative that you have made (useful for backup or for
creating similar creatives). - Edit: select a creative then click “Edit.”Thisopens the creative in edit mode so thatyou can edit
it. - Add to New Playlist: add a selected creative to a new playlist.
- Delete: this deletes a selected creative.
Related Information
- How to upload media files to media library
Read more
Required Action
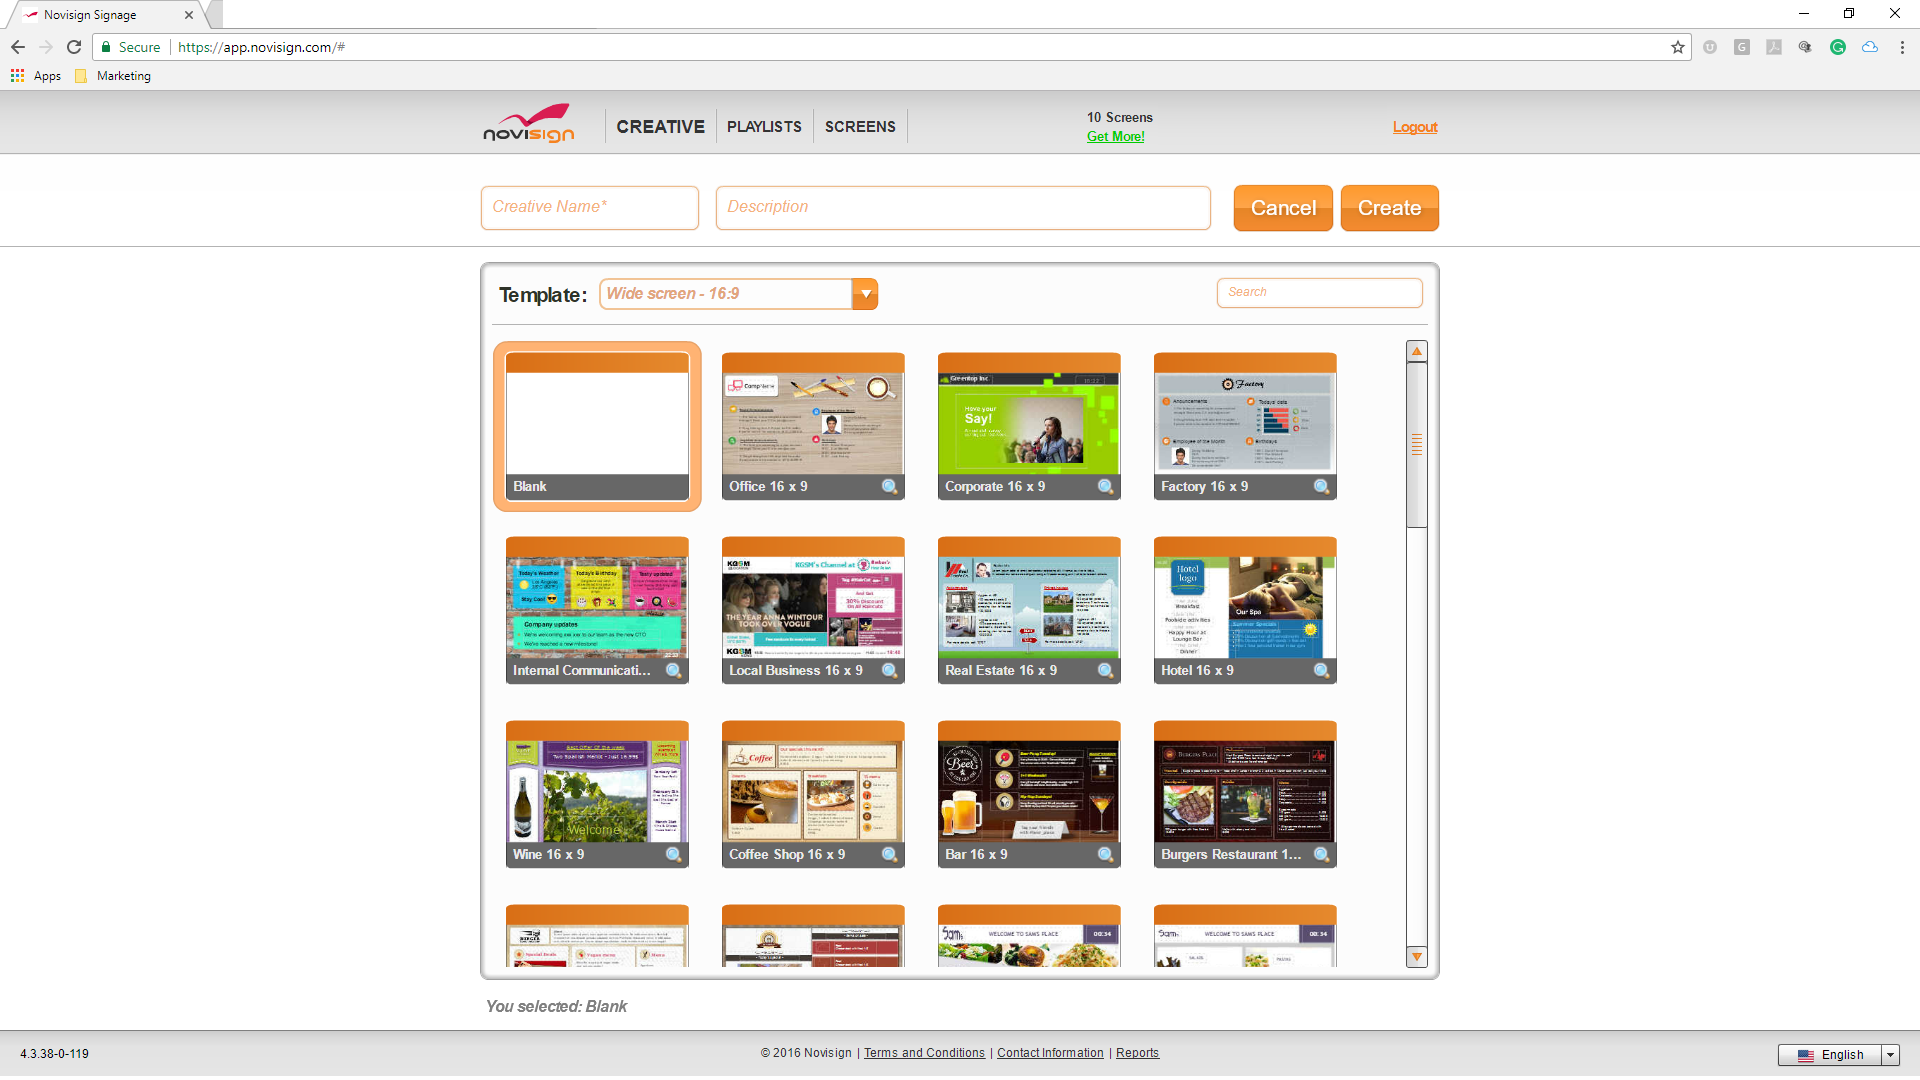
- (A) Type a name in the “Creative name” text box and add a “Description”.
- Thiswill be the name of the creative that you create.
- (B) Choose a template to customize or create a creative from scratch, using the blank template.
- (C) Once you select a template, an orange box will encompass the template.
- (D) After selecting thetemplate, click the button titled “Create” (upper right box screen).
- (E) The Creative Composer will then load.
Additional Details:
To change the orientation of the content,in step B above, select drop-down titled “Template” and change the default
option named “Wide screen – 16: 9” to another available ratio.
Related Information
Description:
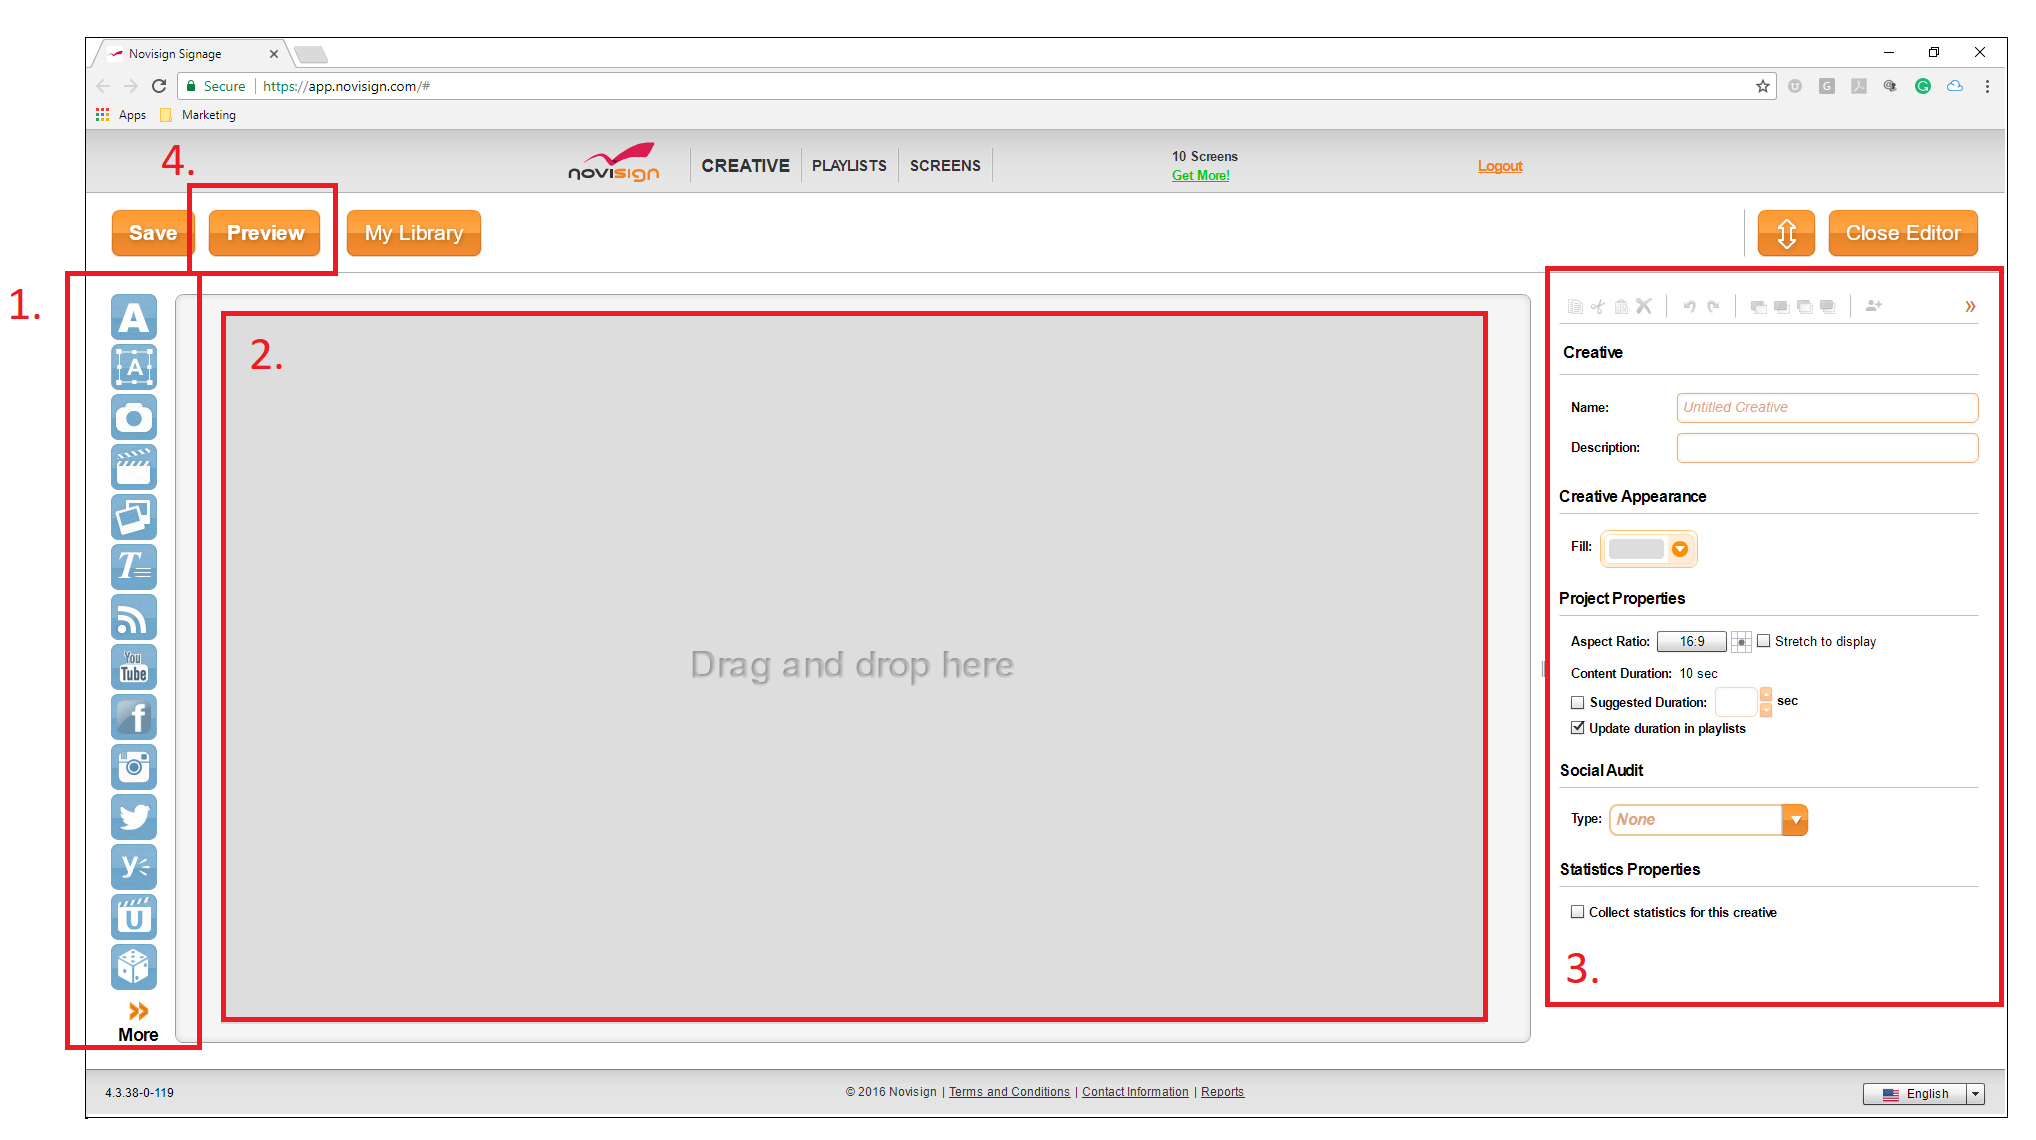
The NoviSignCreative Composer: here you will be able to create the content for your digital sign. It consists of four primary
features:
(1) Drag &drop widgets: 24 feature icons located on the left-hand page of the screen. To view all
widgets, click the button titled “More”.
(2) Canvas: this is where you add your widgets to create the content for the sign.
(3) Properties box: right panel,where you can adjust the settings for each widget.
(4) Preview: few seconds preview of the content that you made.
Required Action:
(A) Select drop-down list titled “Fill” (inside of “Properties” box), select your background color.
(B) Click and drag a widget to the canvas.
(C) Once dropped onto the screen, you can resize/adjust the widget to your requirements.
(D) Widget settings can be found in the properties box located on the right pane.
(E) To preview what you have made click the orange button titled “Preview”.
(F) Once you have your template created, click the “Save”button” and then click “Close Editor”.
Additional Widget Details:
Drag &drop widgets include:
Widget User Guides:
| How to add a Yammer feed | Learn more | How to display a Google slideshow | Learn more |
| How to set up a game widget | Learn more | How to add a Web Image widget | Learn more |
| How to display an Excel in digital signage | Learn more | How to add FTP, shuffle, and custom clock | Learn more |
| How to add a poll | Learn more | How to add a simple queue | Learn more |
| How to add a Facebook page album | Learn more | How to add touchscreen capability | Learn more |
| How to add a Twitter feed | Learn more | How to configure for a video wall | Learn more |
| How to add an Instagram feed | Learn more | How to add advanced weather forecast | Learn more |
| How to add a Barcode reader.” | Learn more | How to add an RFID reader | Learn more |
| How to add countdown widget | Learn more | How to add synchronized slideshows&Ustream | Learn more |
| How to set up social widgets | View video | How to add the smart queue widget | Learn more |
Media Best Practices:
| How to convert from one video type to another, using Any Video Converter | View video |
| How to convert from one video type to another, using Converter Lite | View video |
| How to convert a video to MP4, using AnyMP4 | View video |
| MP4 video for Android | View video |
| This is NoviSign (Selection of YouTube video featuring abilities & features) | View video |
| Best practices for using media | Learn more |
Related Information
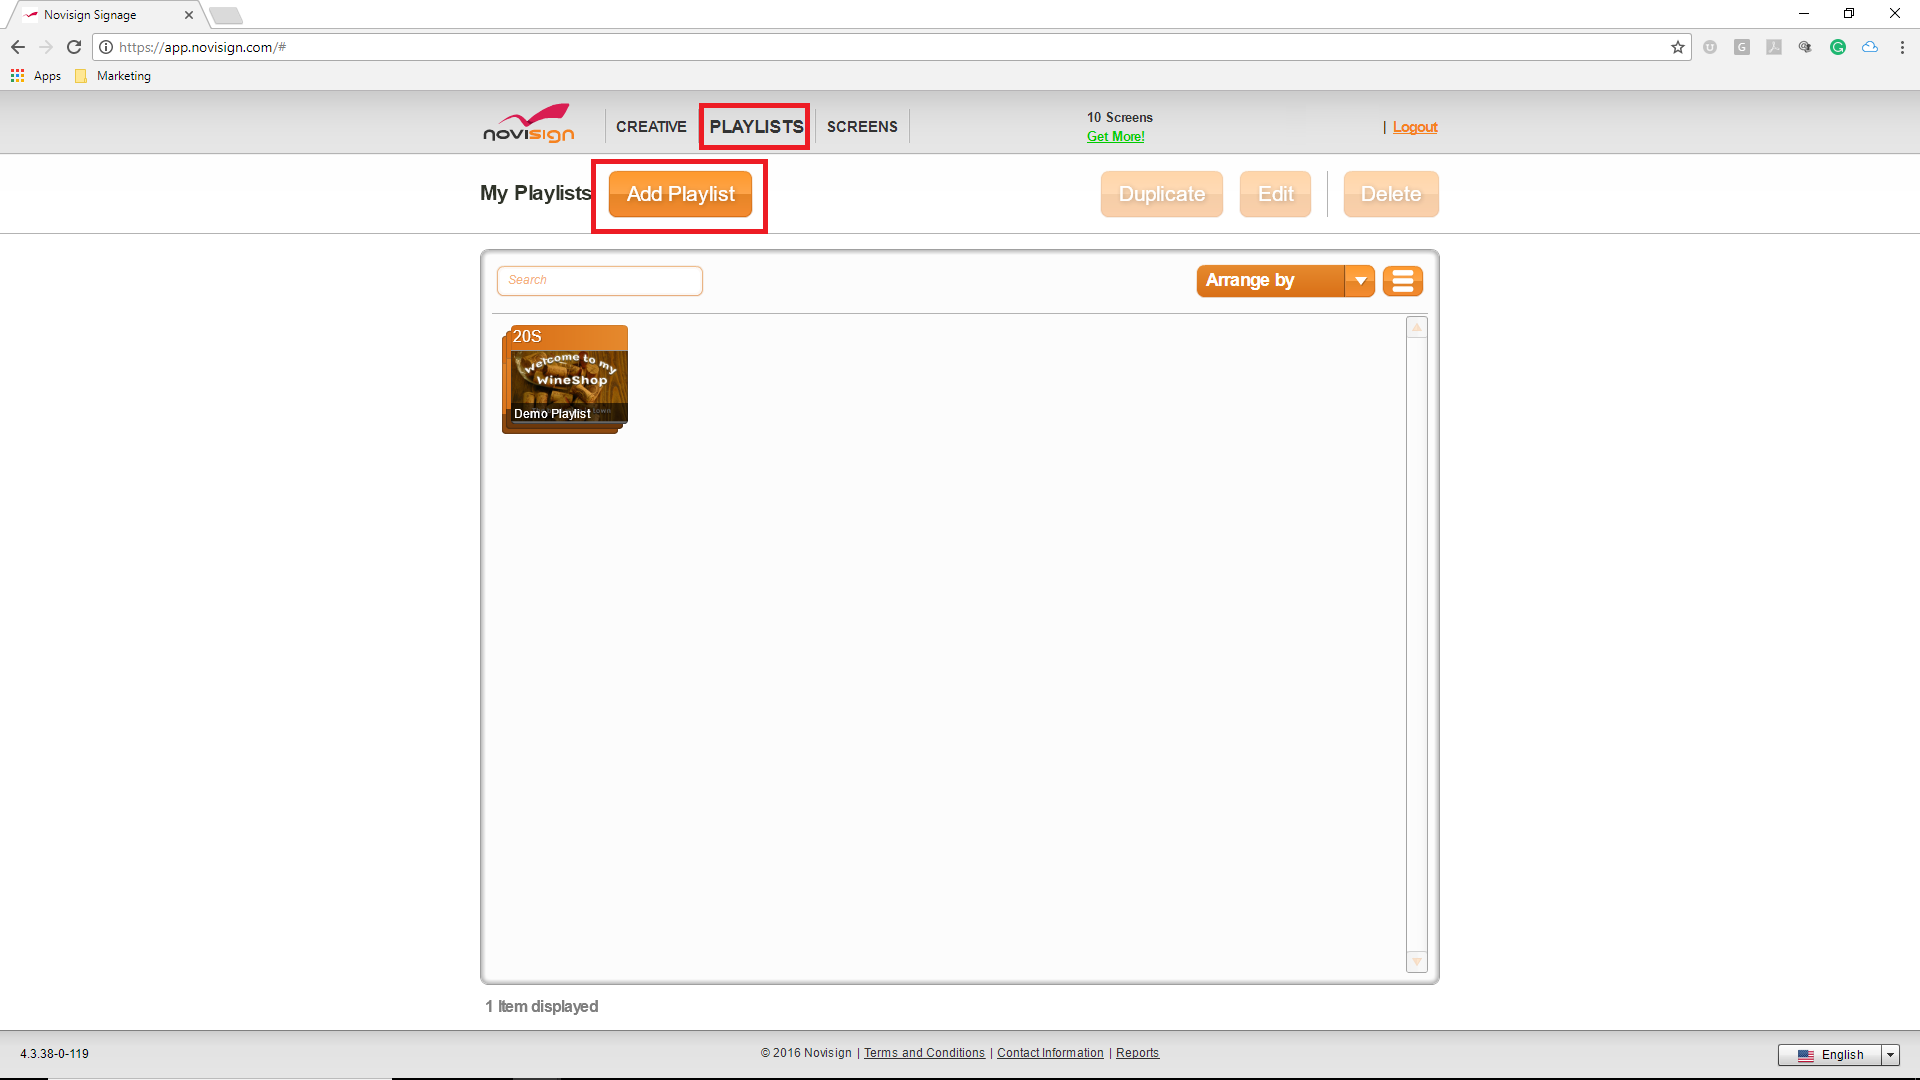
Description:
Playlist: where you can set the play order of creativesand schedule them to play on specific days, times, and
set expiration dates. The “PLAYLIST” page consists of four primary features:
- Add Playlist: Click this option for creating a new playlist.
- Duplicate: makes a copy of an existing playlist.
- Edit: select a playlist, then click “Edit.”Thisopens the playlist in edit mode.
- Delete: select and delete a playlist.
Required Action
- (1) Click the “Add Playlist” button.
- (2) Add a new playlist name and type the description of the playlist use.
- (3) Click button “Add Creative”.
- (4) Drag the creatives that you want in the playlist onto the white box:
- (a) To change the order of the creatives, click and drag any of them to rearrange.
- (b) To schedule a specific creative to play, click the calendaricon:
- Additional details on scheduling
read more
- Additional details on scheduling
- (c) To schedule how long you want each creative to play, click the 10S text. This controls
the duration (in seconds) of each creative in the playlist.
Related Information:
Related Information
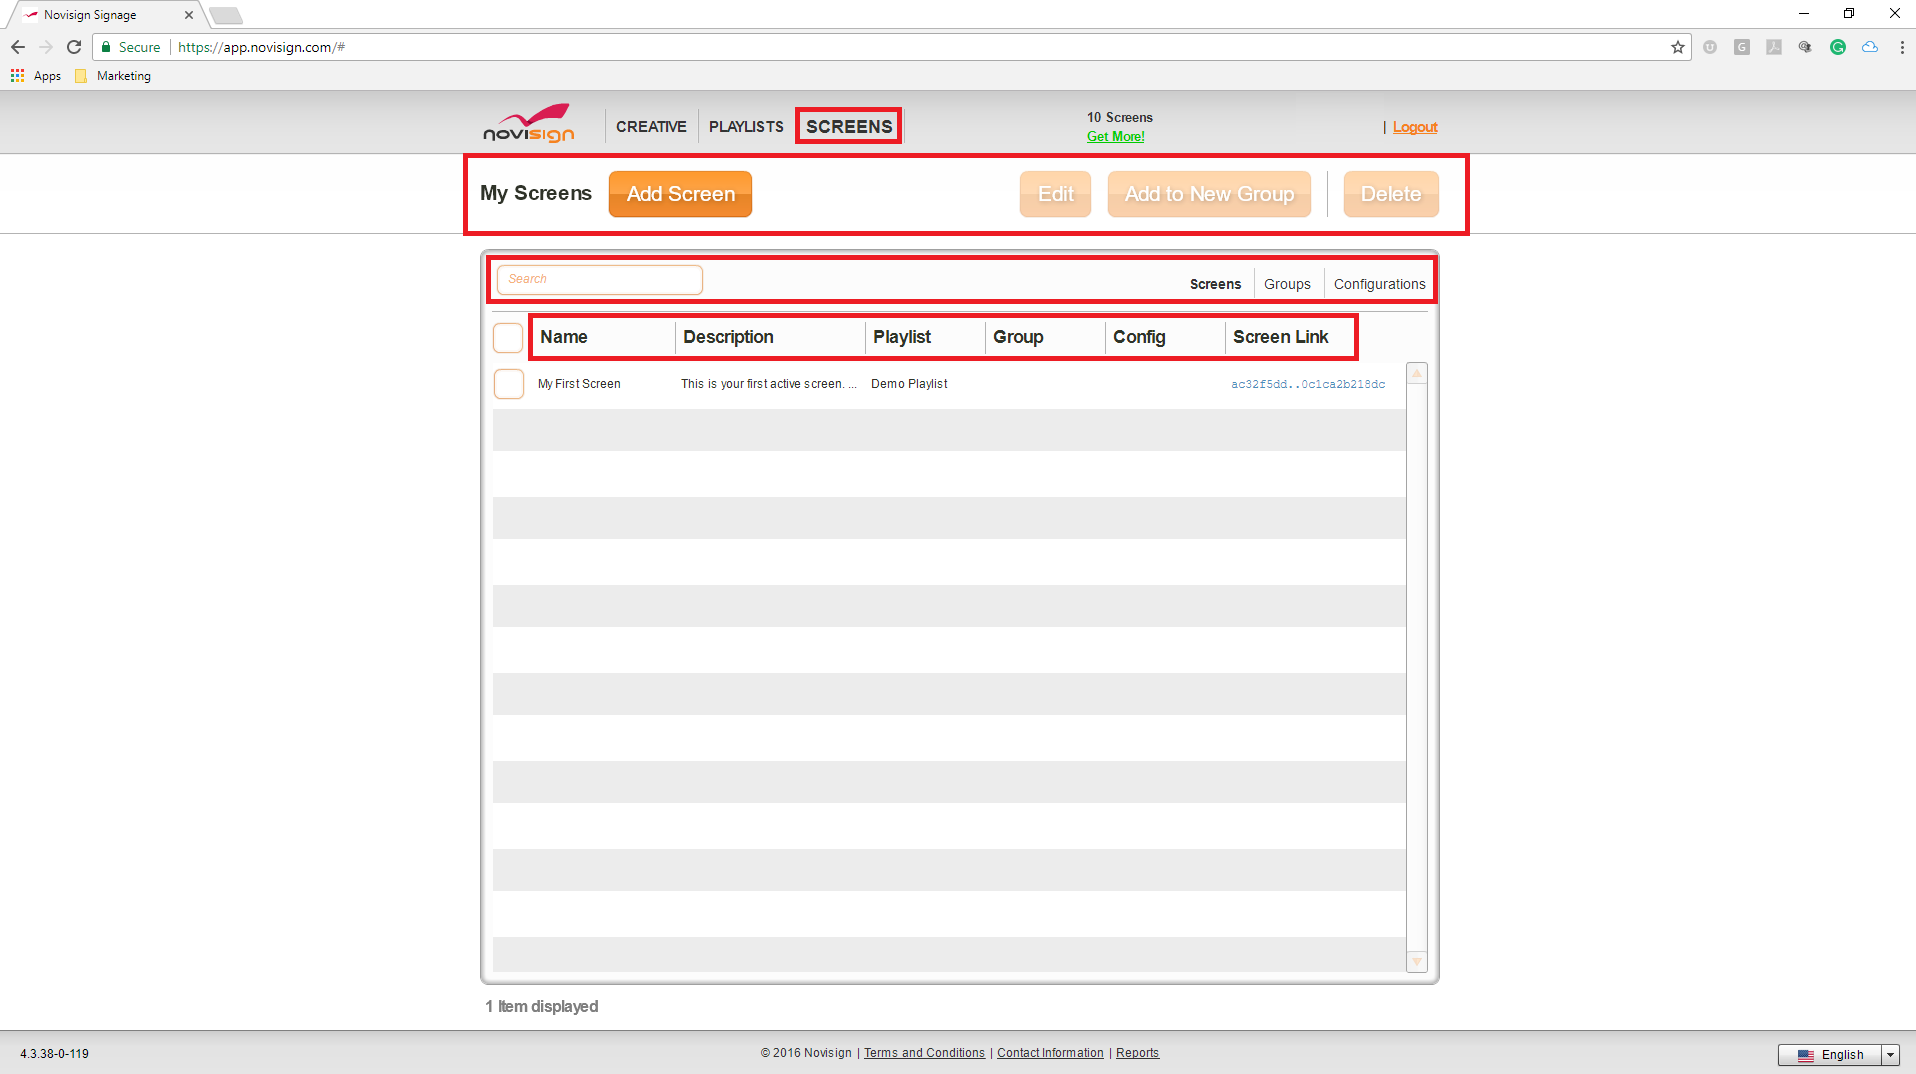
Description:
This is where you send your playlist’s of content to a media player.Screens in the “SCREENS” page are supposed
to represent screens in the real world. The page consists of four primary features (orange buttons located
under the gray top bar):
- Add Screen: add new screen that you want to send content to.
- Edit: edit an existing screen.
- Add to New Group: send same content to multiple screens.
- Delete: the screen from the system (this does not affect its chosen content).
Under the set of orange buttons is a table. In the upper right side of thetable are one textbox (for searching)
and three sub-tabs:
- “Search”: search for a screen name.
- “Screens”: manage the content of the screens.
- “Groups”: send the same content to multiple screens all at once.
- “Configurations”: send a set of configured app settings to any screen
The table is broken down into categories:
- “Name”: name of the screen.
-
“Description”: description of the screen – this could be location (better name your screens according
to their location, so you’ll be able to know who is what and where, i.e. if you have a couple of screen
in the University of Texas and one of them is in the cafeteria of the faculty of humanities, you can
name it “Texas uni. – humanities cafe front”). - “Group”: indicates if the screen belongs to a group of screens.
- “Config”: shows if there is a selected configuration which was applied on that screen.
- “Screen Link”: ability to live preview (in your browser) the content playing on the screen.
How to Send Content to One Screen:
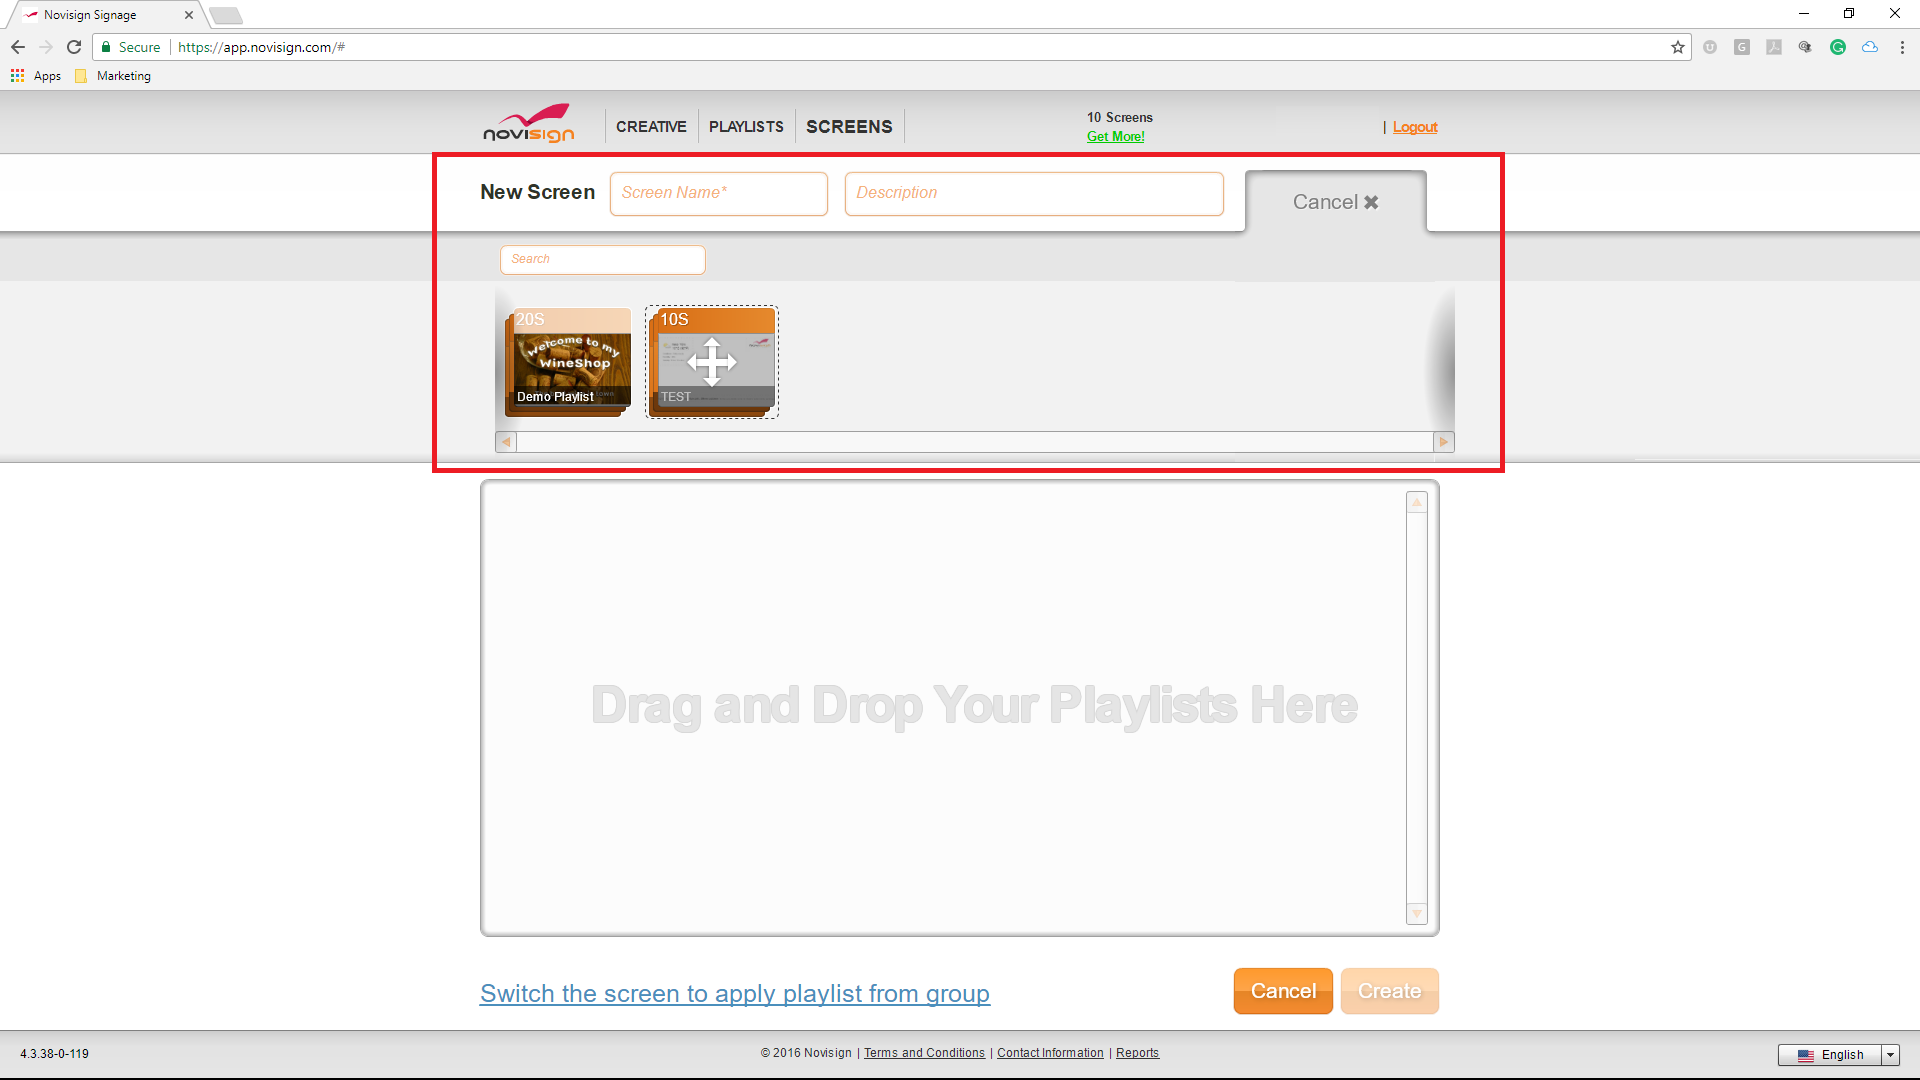
Image 3.4
Required Action
- Select the “Add Screen” orange button. Once selected, your screen should like “Image 3.4”.
- Add a new screen and fill the description of the display use.
- Drag and drop the playlist to the box below:
- To change the order of the playlists (a screen can have multiple playlists if you like),click and
drag it to rearrange. - To schedule a specific playlist to play, click the calendar icon.
- To change the order of the playlists (a screen can have multiple playlists if you like),click and
- Press the “Create” button.
- Your screen will then take you back to the primary “SCREENS” tab.
- The Studiowill update to look like “Image 3.6”.
- You can live to preview the content by clicking the screen link.
- You can email the live preview content to someone else to view the screen key: Click the “Send to Email”
button.
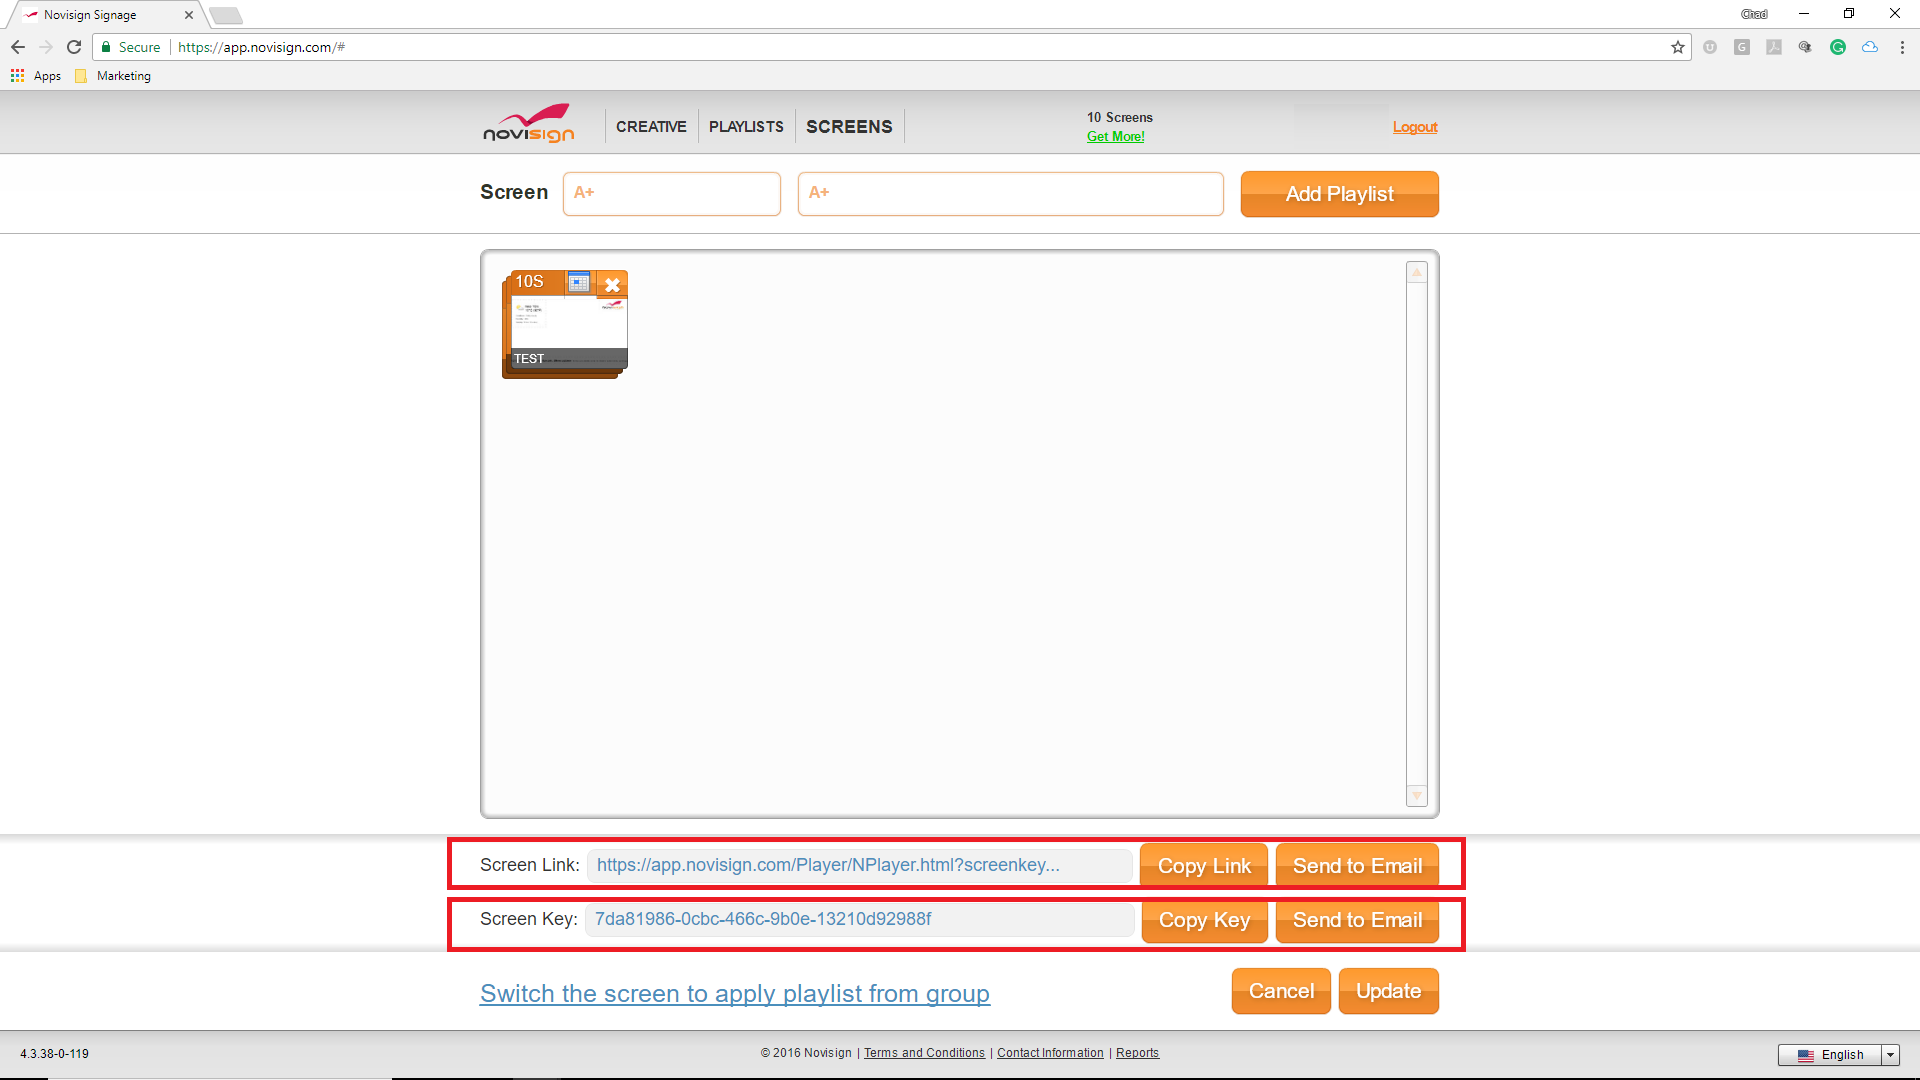
Image 3.5
How to Send the Content to Multiple Screens:
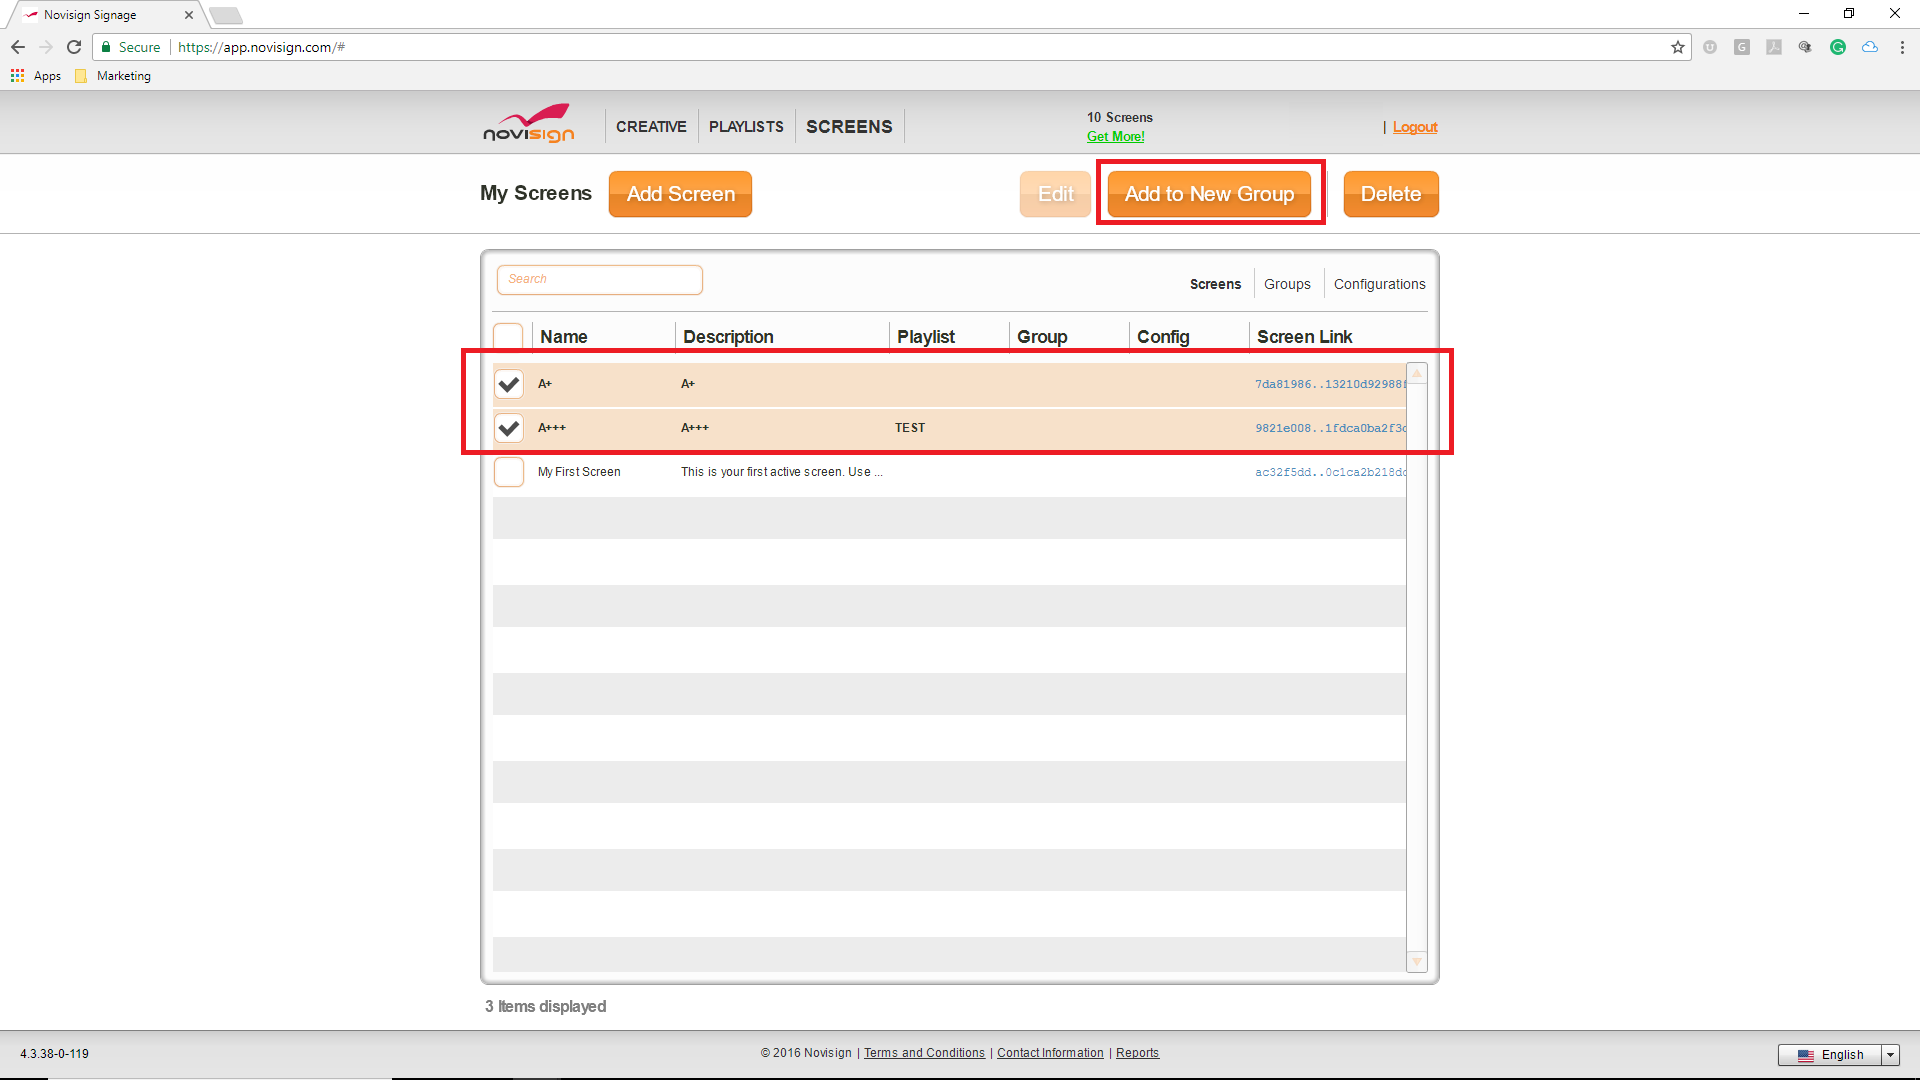
Image 3.5
Required Action
- Select the screens that you would like to send the same content to all at once.
- Select the “Add to New Group” button.
- Type in “Group Name” and add “Description”.
- Press the “Add Playlist” button.
- Drag and drop the playlists (one or more) that you want that group of screens to play.
- Press the“Create” button.
- You are done! The content will update and begin playing on the screens in your group.
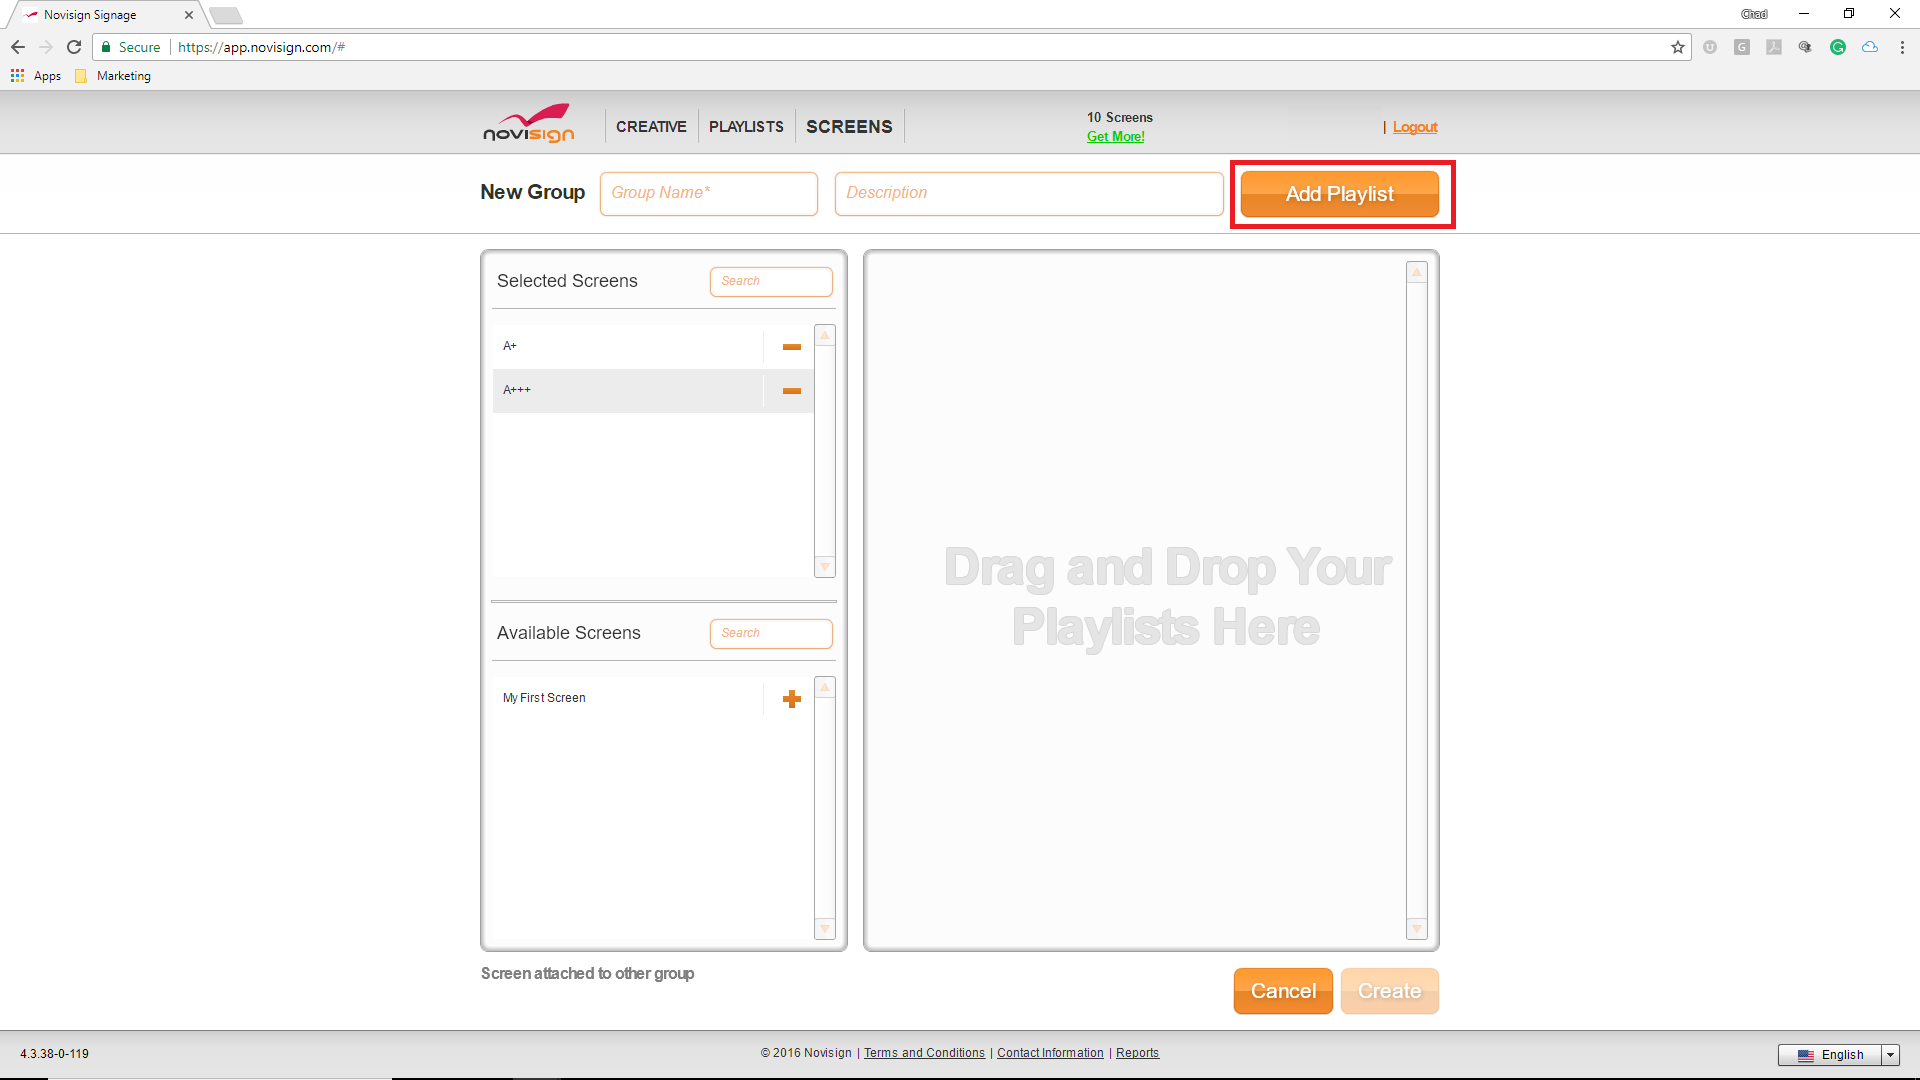
Image 3.5
Note:
Make sure that you have added the Screen Key to each NoviSign app that is installed onto the media playersor
displays. The screen key is the ID of the app – this way the app knows who it is,and the Studio knows to
send that signage device with that app, which has that unique ID, the content which you have assigned it,
in your Studio.